How to Check Clean IMEI iPhone
Learn how to verify your iPhone's IMEI is clean and not blacklisted. Step-by-step checks with carriers, GSMA, and Apple, plus safety tips to avoid scams. A definitive guide by Cleaning Tips for homeowners and renters.

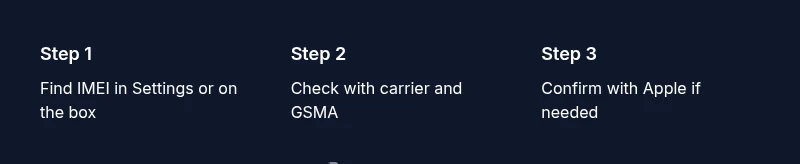
Goal: confirm your iPhone’s IMEI is clean and not blacklisted or reported stolen. Start by locating the IMEI (Settings > General > About, or on the SIM tray). Then verify the status with your mobile carrier and the GSMA IMEI database, and finally confirm with Apple if needed. This protects against activation problems and fraud.
Why a clean IMEI matters for iPhone users
According to Cleaning Tips, a clean IMEI isn’t just a technical detail—it directly affects activation, carrier eligibility, and the overall reliability of your iPhone. For homeowners and renters who depend on a dependable device for work, school, and daily life, understanding IMEI status helps prevent service interruptions and unexpected costs. A clean IMEI means the device isn’t reported stolen, financed, or blacklisted by carriers, which can otherwise block activation or lead to service holds. The Cleaning Tips team found that ignoring IMEI status often results in activation failures after purchase or transfer, especially when buying used phones. This guide provides practical steps to verify IMEI cleanliness through official channels and trusted sources, so you can shop with confidence and maintain a healthy device history in your home.
In the broader cleaning and maintenance context, keeping a clean device record mirrors the care you give to household systems. A reliable iPhone supports safe online communications, budgeting apps, and remote work—key elements of a well-managed home. By following the steps below, you’ll build a clear, documented history of your device that’s easy to share with carriers, retailers, or family members when needed. This approach aligns with Cleaning Tips’ emphasis on actionable, evidence-based guidance for everyday tasks.
How to locate your iPhone’s IMEI
Locating the IMEI on an iPhone is straightforward, but the most reliable approach varies by model and access to the device. Start with the device itself:
- On the phone: Open Settings, go to General, select About, and locate the IMEI. You can copy it for later use.
- On the SIM tray: If your model has a removable SIM tray, the IMEI is often printed on the tray or neighboring label.
- On the original box: The IMEI is printed on the barcode label next to the model number and serial number.
- For eSIM devices: The IMEI is still visible in Settings > General > About, and you can also record the MEID if needed.
If you don’t have access to the device, ask the seller for the original packaging or purchase receipt where the IMEI is listed. Recording the IMEI exactly as shown helps prevent transcription errors when you run checks later.
Official channels to verify IMEI cleanliness
To determine whether an IMEI is clean, use a mix of official channels and trusted databases. Start with your carrier, then corroborate with the GSMA database, and finally check Apple’s support resources for activation guidance:
- Carrier verification: Log in to your carrier account or contact customer support. Ask them to perform an IMEI status check and confirm whether the device can be activated on their network. Carriers can flag devices that are reported lost or stolen or have outstanding balances.
- GSMA IMEI database: The GSMA maintains the global IMEI database; querying it helps identify devices that are flagged internationally. Visit the GSMA IMEI page and follow the official process to verify status, using the exact IMEI you collected.
- Apple Support: If you encounter activation issues after a status check, reach out to Apple Support for guidance. While Apple may not publish a universal blacklist, they can assist with activation problems and provide device-specific recommendations based on your IMEI status.
Remember: Use official sources whenever possible and avoid unverified checkers that may misreport status or collect sensitive data. This multi-channel approach reduces risk and gives you a well-supported view of your device’s integrity.
What to do if IMEI flags appear
If an IMEI check reveals flags such as stolen, lost, or financed status, take decisive steps to protect yourself and your investment. First, verify the flag with the seller and request documentation. If you suspect fraud, contact the platform where you purchased the device and, if appropriate, file a report with local authorities. If the device is financed or carrier-locked, discuss options with the seller or a representative from the carrier to resolve the balance. If status remains unclear, ask the carrier to run a formal investigation and request a written confirmation of the findings. In many cases, a legitimate seller can provide a valid payoff statement or transfer documentation to resolve issues.
In any case, do not activate or use a device with a clearly flagged IMEI until the matter is resolved. Proceeding could complicate returns, limit service, or create legal exposure for you as the buyer. The right documentation and clear communication protect both you and your household from unnecessary risk.
Common myths and safe practices
There are several myths around IMEI checks that homeowners should ignore. One common myth is that free online IMEI checkers are always trustworthy. In reality, many free sites are unreliable or collect data. Stick to official channels (carriers, GSMA, Apple) for definitive status. Another myth is that public databases show every carrier’s status; some flags are carrier-specific or regional. Always cross-check across multiple official sources to confirm status. A third myth is that a device with a clean IMEI is automatically free of other issues; IMEI cleanliness is about legality and activation, not hardware condition. Finally, beware of scams asking for payment to “unlock” or guarantee a clean IMEI; legitimate checks are typically free or handled through your service provider.
In short, combine IMEI checks with seller verification, device history, and receipts. This reduces the risk of purchasing a device with hidden liabilities and aligns with best-practice cleaning and maintenance habits for your home.
Buying a used iPhone: a final checklist
When buying used, use a comprehensive checklist to ensure the device is clean and trustworthy:
- Confirm the IMEI across the device, packaging, and receipt and ensure they match exactly.
- Run status checks via your carrier and the GSMA IMEI database.
- Obtain a bill of sale, original purchase date, and any loan payoff documentation if the device was financed.
- Inspect the device for functional hardware issues and verify battery health.
- Request a return window or warranty terms in case issues arise after activation.
- Document all findings and keep the IMEI record with your personal asset log for future reference.
Activation tips and monitoring
Once you have confirmed a clean IMEI, proceed with activation steps on your preferred carrier. Keep a copy of your IMEI results, the carrier check, and Apple’s activation notes for future reference. If you relocate or change carriers, repeat status checks to ensure ongoing legitimacy. Regularly monitor device status and be vigilant for any unexpected service blocks or warnings. A proactive approach reduces friction during transfers or upgrades and supports a healthier device lifecycle for your household.
AUTHORITY SOURCES
- https://www.gsma.com/imei/
- https://support.apple.com/
- https://www.consumerreports.org/
Tools & Materials
- iPhone with accessible IMEI(Settings app open to view IMEI (or available on the device label/box))
- Carrier account access(Login to your carrier account or contact customer service for status checks)
- Official GSMA IMEI lookup access(Use the GSMA database as the authoritative source for IMEI status)
- Original purchase receipt or box(Helpful if IMEI needs cross-verification with purchase details)
- Note-taking tool or digital record(Capture IMEI, status results, and dates for future reference)
- Apple Support contact info(For activation or status-related questions)
Steps
Estimated time: 15-25 minutes
- 1
Find the IMEI on the device
Open Settings > General > About and locate the IMEI. Also check the SIM tray label or the original box if needed. Copy the number exactly to avoid transcription errors.
Tip: Double-check digits, especially the 15-digit IMEI; one digit error can invalidate checks. - 2
Gather essential documentation
Collect your purchase receipt, box, and any loan payoff or financing documents tied to the device. Having these on hand makes resolution faster if a flag appears.
Tip: Label each document with the IMEI for easy cross-reference. - 3
Check IMEI status with the carrier
Log in to your carrier account or contact support to request an IMEI status check. Ask specifically if the device can be activated on their network and if there are any holds.
Tip: Ask for written confirmation or a ticket number for your records. - 4
Verify IMEI via GSMA database
Visit the official GSMA IMEI page and input the 15-digit IMEI. Compare results with the carrier status to confirm consistency across sources.
Tip: Ignore third-party sites you haven’t verified as legitimate. - 5
Cross-check with Apple if needed
If activation issues persist, contact Apple Support for guidance. They can help diagnose whether the problem lies with the device status or the carrier.
Tip: Have your IMEI and carrier check results ready when you call. - 6
Document results and plan next steps
Save screenshots or notes of all findings. If the IMEI is clean, proceed with activation. If not, use the documented steps to resolve or seek a refund or return.
Tip: Keep a clearly labeled record of all actions to avoid confusion later.
Questions & Answers
What does a clean IMEI actually mean?
A clean IMEI means the device is not reported stolen, lost, or financed, and is eligible for activation on networks. It does not guarantee hardware condition, only the device’s legal and activation status.
A clean IMEI means the device isn’t stolen or blocked and can be activated on your carrier.
How can I tell if my IMEI is blacklisted?
Check with your carrier and the GSMA database. A blacklist flag typically prevents activation and service on certain networks.
Check with your carrier and GSMA; a blacklist usually blocks activation.
Can I check IMEI status without the phone?
Yes. You can find the IMEI on the packaging or purchase receipt and then verify via the GSMA database or carrier.
You can check using the packaging or receipt, then verify with GSMA or the carrier.
Are free IMEI checkers trustworthy?
Most reliable checks come from official channels. Free random sites may misreport data or collect your information.
Be cautious—stick to official sources for IMEI status checks.
What should I do if the IMEI shows a flag after purchase?
Contact the seller for documentation, request a return or refund if applicable, and coordinate with the carrier to resolve or confirm results.
If there’s a flag, reach out to the seller and carrier to resolve before using the phone.
Does Apple help verify IMEI status?
Apple can assist with activation issues and provide guidance, but final authority often rests with the carrier and GSMA database.
Apple can help with activation problems, but the carrier and GSMA determine the status.
Watch Video
The Essentials
- Verify IMEI with official sources before activation
- Match IMEI across device, packaging, and receipts
- Document all findings and keep records for future reference
- Avoid third-party sites that lack verifiable credibility
- If flagged, resolve with the seller or carrier before use