How to Clean an Oven Top: Step-by-Step Guide
Learn safe, effective methods to clean an oven top—from prep to prevention. This guide covers enamel and stainless surfaces, baking soda, vinegar, and easy maintenance.

You will learn how to clean an oven top safely and effectively, from prep to prevention, with beginner-friendly steps, recommended cleaners, and simple maintenance tips. This guide emphasizes enamel and stainless surfaces and offers eco-friendly options to keep your oven top bright and buildup-free.
Assessing the Oven Top Surface and Preparation
The oven top is a high-use area that collects grease, food spills, and burnt-on residue. Before you reach for cleaners, identify the surface type (enamel, stainless steel, or glass) and inspect finishes for scratches or loose parts. Understanding your oven's top helps you choose safe cleaners and avoid damage. This guide from Cleaning Tips outlines practical methods to clean an oven top without harsh chemicals or aggressive scrubbing. Start by removing cookware, racks, and any loose debris; this step reduces mess and gives you a clear workspace. Note environmental considerations like venting and the potential for fumes when using certain cleaners. If your oven top has enamel, proceed with gentler cleaners; for stainless steel trims, use products that protect shine; glass surfaces benefit from non-abrasive polishing. By diagnosing the surface first, you set the foundation for a thorough, safe clean that restores brightness and prevents future buildup.
Safety First: PPE, Ventilation, and Prep
Safety is the cornerstone of any cleaning task. Wear non-slip shoes, protective gloves, and optionally eye protection. Work in a well-ventilated area, especially if you plan to use stronger cleaners or deodorizing agents. Never mix cleaning products, as some combinations release toxic fumes. Keep children and pets away from the workspace, and unplug or switch off nearby appliances if recommended by manufacturers. A simple setup—gloves, a fan, and a clear countertop—greatly reduces the risk of accidents and chemical exposure. Cleaning Tips emphasizes a cautious approach: safety first protects you and preserves the oven’s finishes.
Pre-Clean Steps: Loosen Soil and Remove Debris
Begin by removing all racks, pans, and heat shields. Use a dry microfiber cloth to sweep away loose crumbs and burnt crusts, which saves you time later. A warm but not hot damp cloth can help loosen sticky spots without saturating the enamel. This pre-clean step reduces the amount of cleaner you need and minimizes the chance of grit scratching the surface during scrubbing. If your top contains stubborn crusts, let a gentle cleaner sit for a few minutes to soften residue before tackling it. Proper prep makes the next phases faster and more effective.
Cleaning Agents: Baking Soda, Vinegar, and Mild Commercial Cleaners
For many oven tops, a paste of baking soda and water works wonders on baked-on grime. The mild abrasive action lifts residue without scratching enamel. White vinegar acts as a gentle degreaser and helps cut through oils when sprayed onto a damp cloth. Avoid aggressive solvents on enamel or glass surfaces. When using commercial cleaners, choose products labeled safe for oven finishes and follow the manufacturer’s instructions. Always test a small inconspicuous area first. Cleaning Tips recommends a balanced approach: use natural cleaners for light soils and reserve stronger formulas for tougher spots, never exceeding recommended dwell times.
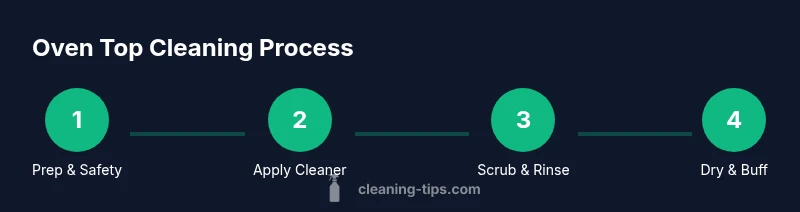
The Cleaning Plan: A Simple 3-Phase Approach
Phase 1: Loosen and apply. Phase 2: Scrub and agitate gently. Phase 3: Rinse, wipe dry, and inspect. This three-phase plan keeps you organized and minimizes mistakes. Begin with the lightest cleaner suited to your surface, apply evenly, then allow it to sit to break down grime. Phase 2 should focus on non-abrasive scrubbing with a soft sponge or brush, avoiding metal tools that can scratch. Phase 3 requires a thorough rinse with a clean, damp cloth, followed by a dry microfiber towel to prevent streaks. Cleaning Tips highlights that consistency and patience yield the best long-term results.
Tools and Techniques: Gentle Scrubbing Techniques
Choose non-abrasive tools to protect enamel and stainless surfaces. A soft-bristle brush or non-scratch sponge can lift residue without scratching. Circular motions work well on flat tops, while straight strokes help with long seams. When residue resists, switch to a slightly damp cloth and apply a touch more cleaner rather than forcing scrubbing. For glass tops, avoid circular scrubbing that can create scratches; use light, even strokes. The aim is to lift grime without sacrificing surface integrity, preserving shine and preventing micro-scratches over time.
Deep-Grime Challenge: Burnt-On Residue
Burnt-on grime requires patience. Create a stronger paste with baking soda and a few drops of water, then apply to the most stubborn areas and cover with a damp cloth to trap moisture. Allow 15–20 minutes for the paste to soften the crust, then scrub gently with a soft brush. For really resistant spots, reapply a fresh paste and repeat the dwell time. Rinse thoroughly to remove baking soda residue, which can leave a cloudy film if not completely wiped away. Persistent stains may respond to a second treatment after a short drying period.
Final Rinse, Dry, and Reassemble
Wipe the entire top with a clean, damp microfiber cloth to remove any lingering cleaner or residue. Rinse the cloth often to avoid re-depositing grime. After thoroughly drying with a soft towel, reinsert racks and accessories. A light buff with a dry microfiber cloth helps restore a subtle shine. If your manufacturer recommends a polish, apply a small amount and buff to a flawless finish. Regular maintenance reduces buildup and makes future cleanings faster.
Maintenance and Prevention: Daily Wipes and Protective Practices
Preventive care is faster and cheaper than deep cleaning. Wipe the oven top after cooking sessions with a damp microfiber cloth, and perform a deeper clean on a schedule based on use—monthly for heavy use, quarterly for lighter use. Place a heat-safe mat or tray to catch spills and splatters, especially near spill-prone burners. Consider a quick wipe-down before moving racks back into place to minimize baked-on residue. Consistency is key: frequent light cleaning keeps surfaces looking new and extends appliance life.
Eco-Friendly Options and Safety Notes
If you prefer greener options, stick to baking soda, white vinegar, and mild dish soap. These cleaners are generally gentle on enamel and stainless finishes when used correctly. Avoid bleach and ammonia on enamel, as fumes can be harsh and residues may damage the surface. Always ventilate the area and test cleaners on a small area first to confirm compatibility. This approach aligns with sustainable cleaning practices while achieving excellent results.
Special Cases: Gas vs. Electric Ranges and Surface Variations
Gas ranges with exposed burners require extra care around metal grates and knobs. Remove grates if possible and clean them separately with warm, soapy water. Electric ranges with glass-top should be treated with extreme care to avoid scratches. If your oven top includes chrome trim or decorative inlays, use appropriate cleaners to protect those finishes. When in doubt, consult the manufacturer’s guidelines and use non-abrasive tools and cleaners. This careful approach prevents accidental damage and keeps performances consistent.
Authority Sources and Further Reading
For additional guidance on cleaning kitchen appliances and selecting safe products, consult trusted sources. The EPA’s Safer Choice program provides guidelines on safer cleaners: https://www.epa.gov/saferchoice. University extension resources offer practical house-cleaning tips: https://extension.illinois.edu. Consumer-focused reviews and cleaning recommendations can be found at https://www.consumerreports.org. These sources help you make informed choices while maintaining an eco-friendly approach to home cleaning.
Tools & Materials
- Non-abrasive sponge or microfiber cloth(Use for gentle wiping; avoid scratching enamel or glass.)
- Soft-bristle brush(Ideal for lifting grime in crevices without abrasives.)
- Plastic scraper or heat-safe spatula(Useful for loose crusts; never use metal on glass or enamel.)
- Baking soda(Mix with water to form a gentle paste for baked-on grime.)
- White vinegar(Acts as a degreaser and helps cut through oils.)
- Mild dish soap(Dilute in water for routine cleaning and rinsing.)
- Spray bottle(For applying vinegar and cleaners evenly.)
- Old towels or blankets(Cover surrounding areas to catch drips and spills.)
Steps
Estimated time: 60-90 minutes
- 1
Prepare the area
Clear the kitchen workspace, remove racks and pans, and lay down towels to protect the counter. Put on gloves and ensure good ventilation. This step reduces mess and protects surfaces from accidental scratches.
Tip: Position a damp cloth near the edge of the counter to catch drips as you work. - 2
Apply cleaner and dwell
Apply a light cleaner or baking-soda paste to the top, focusing on stained areas. Allow 5–10 minutes for the cleaner to break down grease before you scrub.
Tip: Do not saturate the surface; a thin layer is enough to work effectively. - 3
Scrub and loosen grime
Gently scrub in circular motions with a non-abrasive sponge or brush. Reapply cleaner to stubborn spots and scrub again until grime loosens.
Tip: Use short, firm strokes for better leverage on stubborn spots. - 4
Rinse and wipe clean
Wipe away loosened grime with a damp microfiber cloth. Rinse the cloth frequently to prevent re-depositing grime.
Tip: Follow with a dry microfiber towel to prevent streaks. - 5
Inspect and dry
Check for any missed spots. If needed, repeat a light cleaning on problem areas, then dry completely to prevent water spots.
Tip: Drying helps reveal spots you might have missed and prevents film buildup. - 6
Reassemble and maintain
Return racks and any removed components. Wipe down surrounding areas and note a quick daily wipe routine to keep grime from building up.
Tip: Keep a small cleaning kit handy near the stove for quick after-cook cleanup.
Questions & Answers
Can I use bleach on an enamel oven top?
Bleach should be avoided on enamel surfaces as it can discolor or damage the finish. Use milder cleaners and a soft cloth instead.
Bleach on enamel tops is not recommended; stick to gentler cleaners and a soft cloth.
Do I need to remove racks before cleaning?
Yes. Remove racks and any accessories to access all surfaces. Clean these components separately, then reinsert them after the top is dry.
Yes—remove the racks so you can clean every part of the top and clean the racks separately.
Is self-cleaning safe for oven tops?
Self-cleaning cycles are not designed for the exterior top surfaces. Use manual cleaning methods suitable for enamel or stainless finishes.
Self-cleaning cycles aren’t meant for the exterior top; clean it by hand with proper cleaners.
How often should I clean the oven top?
Clean your oven top as part of a regular maintenance routine. Light spills should be wiped after cooking; deeper cleans can be scheduled monthly or quarterly depending on use.
Clean it regularly—wipe spills after cooking and plan a deeper clean every month or so depending on how you cook.
Can I use steel wool on a glass-top?
No. Steel wool can scratch glass and enamel surfaces. Stick to non-abrasive pads and soft cloths.
Avoid steel wool on glass or enamel—use non-abrasive pads instead.
What about using dish soap and water only?
For light soils, warm water and mild dish soap are often sufficient. For tougher grime, add a baking soda paste or a dedicated cleaner designed for oven tops.
Soap and water work for light soils; for tougher grime, use a baking soda paste or oven-safe cleaner.
Watch Video
The Essentials
- Identify surface type before cleaning.
- Use non-abrasive tools to protect enamel.
- Baking soda and vinegar are effective, eco-friendly options.
- Deep-clean burnt-on areas with patience and dwell time.
- Regular maintenance prevents heavy buildup.