How to Clean a Charging Port: A Safe Step-by-Step Guide
Learn how to safely clean charging ports on phones and laptops with practical tools, step-by-step guidance, and safety tips. Avoid damage, preserve performance, and extend device life.

You will learn how to safely clean a charging port on smartphones and laptops using a soft brush, compressed air, and isopropyl alcohol. This guide covers when cleaning is appropriate, which tools to use, and the step-by-step process to avoid causing damage. Follow professional tips from Cleaning Tips to protect sensitive connectors.
Why Cleaning a Charging Port Matters
According to Cleaning Tips, regular care of device ports can help reduce charging interruptions and improve reliability over time. Port debris like dust, lint, and pocket fibers can accumulate in the tiny seams, creating resistance that impedes a solid electrical connection. Moisture exposure or corrosion from repeated contact with skin oils can gradually degrade the metal contacts. When cleaning is done correctly, you remove buildup without forcing debris deeper into the port, preserving charging speed and data transfer potential. This section also clarifies which devices are most affected (phones, tablets, and laptops with exposed charging ports) and why routine maintenance pays off in fewer charging hassles and less downtime. The goal is to empower you to perform careful inspections and light cleaning as part of regular device care, not to recommend aggressive or invasive methods that could damage the connector. Cleaning Tips emphasizes patience, proper technique, and using the right tools for durable results.
Safety First: What to Avoid
Safety must come first when cleaning any electronic port. Always power down the device and disconnect the charging cable before starting. Never insert metal items or sharp tools into the port, as this can bend pins or cause a short circuit. Avoid liquids entering the device’s chassis; if you must use a liquid, apply it to a cloth rather than directly into the port opening. Do not shake or tilt the device aggressively, and never use high-pressure air or compressed air held too close, which can push debris farther in or damage sensitive components. If you suspect moisture, corrosion, or liquid damage, stop and seek professional service. By following these cautions, you minimize risk while restoring the port’s ability to hold a secure, reliable connection.
Safe Tools and Materials
Preparing the right tools is essential for safe cleaning. Gather a soft-bristled brush (lint-free) to sweep out loose debris, a wooden toothpick or plastic pry tool for gentle nudges (do not force anything), a microfiber cloth dampened with isopropyl alcohol at 70–90% concentration, and a can of compressed air for short bursts from a safe distance. A small flashlight or phone flashlight helps you see inside the port, while a non-abrasive tape or lint roller can capture nearby dust around the opening. Store all tools in a clean, dry area and avoid metal tools that could scratch or bridge contacts. Optional but useful are ESD-safe tweezers and a soft magnifying glass to inspect the interior more clearly.
Inspect and Diagnose: Signs the Port Needs Cleaning
Before cleaning, inspect the port with good lighting. Look for visible dust, lint, or fiber buildup that blocks the connector. If you see residue on the contacts themselves or notice frequent charging interruptions, cleaning is warranted. Do not rely on the port if there are signs of moisture, corrosion, or visible bent pins. In such cases, avoid attempting at-home repairs and contact a professional technician. Regular inspection also helps catch wear or damage early, so you can act promptly rather than waiting for a complete port failure. Cleaning Tips recommends a gentle, patient approach and frequent checks after any cleaning session.
Troubleshooting Common Scenarios
If you notice slower charging or intermittent connections after cleaning, re-inspect for stubborn debris that may have shifted during the process. Ensure the device is completely powered off and completely dry before testing charging again. For ports showing corrosion or discoloration on the metal contacts, or if moisture was detected, professional assessment is advised. Port geometry varies by device (Lightning, USB-C, micro-USB), so compatibility matters when selecting tools. If you recently dropped the device or exposed it to liquids, there could be internal damage beyond the port that requires a repair service.
Authority sources
To support safe practice, refer to credible safety and maintenance guidelines:
- OSHA: Electrical safety basics and handling precautions
- NIST: Electrical safety topics and best practices
- CPSC: Consumer electronics safety and care guidance These sources emphasize turning devices off, avoiding liquids, and using non‑metal tools to minimize risk during cleaning. See the references for more detailed safety recommendations.
How to Maintain Clean Ports Over Time
A proactive maintenance routine helps prevent buildup. Wipe the exterior port area after charging in dusty environments, keep pockets and bags free of lint that could migrate into the port, and schedule a quick inspection every few weeks for devices you use daily. Store cleaning tools separately from devices to avoid cross-contamination, and never reuse items that have touched moisture or other contaminants unless properly sanitized. Regular, gentle care reduces the likelihood of connection problems and reduces the need for more invasive cleaning later.
Tools & Materials
- Soft-bristled brush (lint-free)(Small, gentle brush for sweeping out loose debris without damaging contacts.)
- Wooden toothpick or plastic pry tool(Use to nudge debris gently; avoid metal tools.)
- Isopropyl alcohol (70–90%)(Dampen cloth lightly; apply to port surfaces, not directly inside.)
- Microfiber cloth(Dabs and wipes clean exterior areas around the port.)
- Compressed air can(Short bursts from a safe distance; never hold at the port for long or upside down.)
- Flashlight or phone light(Helps visualize interior debris and pin alignment.)
- ESD-safe tweezers (optional)(For extra precision without causing static damage.)
Steps
Estimated time: 25-35 minutes
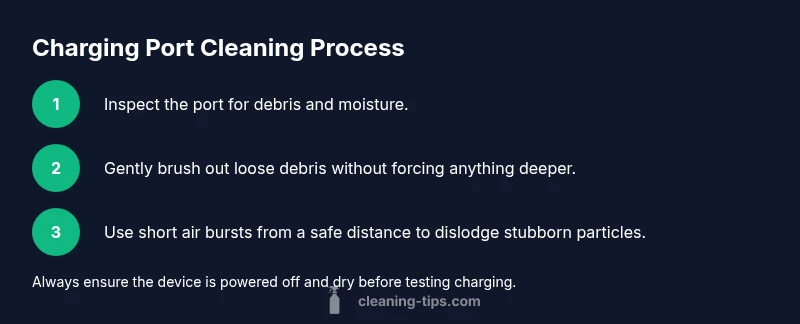
- 1
Power down and unplug
Power off the device and remove the charging cable. Place the device on a stable, non-slip surface to prevent slips while you work. This reduces the risk of short circuits or electrical mishaps during cleaning.
Tip: Wait 60 seconds after powering down to ensure all residual charge dissipates. - 2
Assess port visibility
Use a bright light to inspect the port interior for dust, lint, or moisture. Identify obvious debris and determine if a light touch with a brush is appropriate. Do not attempt to remove moisture with forcing tools.
Tip: If you see moisture, stop and discontinue cleaning to avoid damage. - 3
Gently sweep with a brush
Hold the device steady and use a soft-bristled brush to sweep out loose debris from the port opening. Keep strokes light and directional to avoid pushing debris deeper. Avoid applying pressure that could bend pins.
Tip: Brush in one direction and avoid circular scrubbing. - 4
Apply short bursts of compressed air
From about 6 inches away, use short bursts of compressed air to dislodge stubborn particles. Do not shake the can, do not hold it close, and never invert the can while spraying. Stop if you observe any unusual resistance or moisture.
Tip: Always follow the can’s safety instructions and test on a safe surface first. - 5
Wipe with alcohol-dampened cloth
Dampen a microfiber cloth with isopropyl alcohol and gently wipe the port exterior and the inside rim you can access without forcing entry. Do not drip liquid into the port. Allow the area to air-dry briefly before testing.
Tip: Use only a small amount of liquid; excess moisture can migrate into the device. - 6
Test the port after dry time
Reconnect the charger and power on the device to test the port. If charging resumes normally, you’ve likely resolved the issue. If problems persist, consider seeking professional service to inspect internal cables or connectors.
Tip: If you notice continued issues, avoid further at-home attempts and consult a technician.
Questions & Answers
Can I use water to clean a charging port?
Water should not be poured into or into the port. Use isopropyl alcohol lightly on a cloth if needed, and ensure the port is completely dry before testing.
Water should not go into the charging port. Use a dry cloth with a small amount of isopropyl alcohol and let it dry before you test.
Is compressed air safe for every device port?
Short bursts from a safe distance are generally safe, but avoid excessive pressure or prolonged use. If you see moisture or corrosion, stop and seek professional help.
Yes, small bursts from a safe distance are usually okay, but don’t overdo it and watch for moisture.
What if cleaning doesn’t fix the charging issue?
If charging still fails after careful cleaning and a test, there may be internal damage or a failed connector. Seek professional repair rather than attempting risky at-home fixes.
If cleaning doesn’t fix it, there may be internal damage; consider professional repair.
Can I use metal tools to remove stubborn debris?
No. Metal tools can bend pins or cause shorts. Use plastic or wood tools and gentle brushing instead.
Avoid metal tools; they can damage the port. Use non-metal tools and gentle brushing.
How often should I inspect or clean charging ports?
Inspect ports during routine device maintenance, especially in dusty environments, and clean only when needed. Avoid frequent cleaning unless debris is present.
Check ports during regular maintenance and clean only when you see debris.
Watch Video
The Essentials
- Power down before you start cleaning
- Use non-metal tools to avoid contact damage
- Work with gentle, light strokes and avoid liquids going inside
- Test charging after a brief dry period and seek help if problems persist