How to Clean the Roborock Cleaning Tray: Step-by-Step Guide
Learn a safe, effective method to clean the Roborock cleaning tray. This guide covers tools, step-by-step instructions, drying tips, and maintenance to keep your robot vacuum performing at its best.

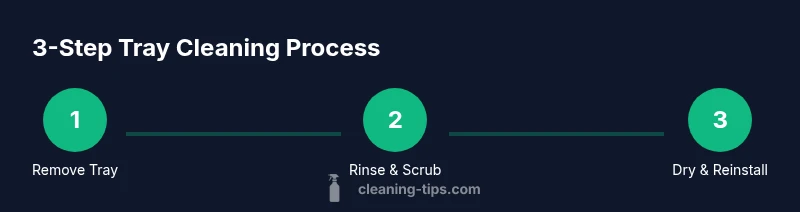
Remove the cleaning tray from your Roborock, empty any debris, and rinse under warm running water. Gently scrub the tray with a mild detergent or a vinegar-based cleaner, avoiding harsh chemicals. Rinse thoroughly, dry completely, then reinstall. Regular weekly cleaning helps prevent buildup, maintain suction, and extend the life of your robot vacuum.
Understanding the cleaning tray on Roborock and why it collects dust
If you own a Roborock, the cleaning tray is a small, removable compartment that collects debris, hair, and moisture during cleaning cycles. Over time, residues can bake onto the surface and edges, reducing suction efficiency and promoting odors. According to Cleaning Tips, consistent maintenance of the tray not only keeps your device running smoothly but also helps prevent clogs in the suction path. The Cleaning Tips team found that even subtle buildup inside the tray can lead to a noticeable drop in performance after a few weeks of use. In practical terms, this means a quick weekly check and a thorough clean every couple of months can save you time and money by avoiding professional service or more invasive maintenance.
When you start the process, plan for about 20–30 minutes for a standard cleaning cycle. The exact time can vary based on how dirty the tray is and how aggressive your cleaning routine is. The goal is to remove all residue without damaging the tray’s plastic walls or locking mechanism. The tray is designed for repeated use, but exposure to harsh cleaners or prolonged soaking can cause discoloration or warping. Using gentle cleaners and thorough drying steps preserves fit and seal quality, which matters for optimal dust containment between cleanings.
In most homes, this is one of those tasks that sneaks up on you. The Cleaning Tips analysis shows that households that integrate tray maintenance into their routine enjoy fewer odors and a longer interval between full system cleans. Keeping the tray clean also reduces the risk of hair wrap near the turbine, which can impact efficiency. So, if you’re asking how to clean cleaning tray roborock effectively, the short answer is: consistency beats intensity. A regular, gentle clean keeps your system happier and your floors cleaner.
noteTextOnlyForBodyBlocks":null},
bodyBlocks2
Tools and materials you’ll need before you start
Preparation matters. Gather your supplies so you don’t have to interrupt the cleaning mid-stream. A well-stocked cleaning kit makes the process smoother and reduces the chance of recontamination after you finish. For the question of how to clean cleaning tray roborock, choose tools that are gentle on plastic and effective against residue. Here is a practical list:
- Mild dish soap or gentle detergent, in a small cup or bottle
- Warm water (not boiling) for rinsing
- Soft-bristled brush or old toothbrush for corners
- Microfiber cloth for drying and wiping
- Optional vinegar solution (1:1 with water) for mineral buildup, used sparingly
- Gloves to protect your hands, if desired
- Drying rack or clean towel to air-dry the tray
Always avoid harsh solvents, bleach, or abrasive scouring pads on the plastic tray, as these can degrade the surface and affect sealing integrity.
The Cleaning Tips team emphasizes using moderate cleaners and ensuring all components are completely dry before reassembly to prevent mold growth or odor formation.
noteTextOnlyForBodyBlocks":null,
bodyBlocks3
A safe, effective cleaning method: rinse, scrub, and dry
To tackle the question of how to clean cleaning tray roborock, start with a simple rinse under lukewarm water to remove loose debris. Add a small amount of mild detergent and use a soft brush to loosen stuck-on particles from corners and seams. Rinse again until no soap suds remain. Drying is crucial; moisture left on plastic can promote mold and odor. A quick air-dry on a rack or towel is usually enough, but ensure it’s completely dry before reinstallation. If you notice mineral stains or white crust, a vinegar solution can help dissolve mineral buildup when used sparingly, followed by thorough rinsing.
Keep in mind that some Roborock models use lightweight plastics that tolerate routine cleaning but don’t respond well to heat. Avoid placing the tray near direct heat sources. This approach reduces the risk of warping and maintains a snug seal with the rest of the chassis. The overall result should be a clean tray that looks nearly new and a decluttered suction path inside the unit, which translates into better cleaning performance over time.
noteTextOnlyForBodyBlocks":null,
bodyBlocks4
Handling stubborn residue and potential mold risks
If the tray has stubborn residue or a faint odor, consider a short soak in a mild vinegar-water solution (no more than 10–15 minutes). Do not soak for long periods, as extended water exposure can warp or degrade the plastic. After soaking, scrub again with a soft brush, then rinse thoroughly. If you encounter any signs of mold (discoloration, fuzzy growth), it’s best to replace the tray or consult Roborock support rather than attempting aggressive chemical cleaners. Always ensure the tray is fully dry before reassembly to prevent trapped moisture.
Between maintenance cycles, check the housing around the tray for trapped hair or lint that could hinder airflow. A quick brush-out every few days keeps the system more efficient and reduces the need for deep cleaning later on. Remember, this task is about longevity and consistent performance; treating the tray with care now pays off in smoother operation later.
noteTextOnlyForBodyBlocks":null,
bodyBlocks5
Reassembly and a quick functional check
After drying, reinsert the tray carefully, ensuring the locking tabs align with their slots. A proper fit is essential for preventing leaks and ensuring the tray’s seal maintains dust containment. Run a short cleaning cycle or a test run to observe any odd noises or misalignment. A successful test confirms the tray is seated correctly, and there are no visible leaks around the housing. If you notice issues, double-check the tray’s orientation and seating.
To keep your Roborock performing at its best, perform this reassembly check after every cleaning session and document any recurring issues. The goal is to have a reliable seal that won’t allow debris back into the dustbin or around the wheel wells. Training yourself to verify the fit quickly saves time in future maintenance and helps maintain peak suction power.
noteTextOnlyForBodyBlocks":null,
bodyBlocks6
Maintenance schedule and best practices for busy households
How often should you clean the cleaning tray roborock? The recommended cadence depends on usage, floor type, and whether you have pets. A light household with smooth floors might benefit from a weekly quick check and a thorough cleaning every 4–6 weeks. Homes with dogs or cats, or those with a lot of hair, may need more frequent attention—every 1–2 weeks could be ideal. The key is consistency: regular, light cleaning reduces buildup and odors, making deeper cleans easier when needed. Use a simple dry-dust routine between deeper cleans to prevent dust from accumulating and clumping in the seams.
If you notice a drop in suction or unusual noises, re-evaluate the tray area first. Clean it, then test the system again before considering more extensive maintenance. Cleaning Tips suggests keeping a small cleaning kit handy near the docking station so you can perform a quick tidy during daily chores. This small habit can significantly extend the life of your Roborock’s components and keep your floors looking their best.
noteTextOnlyForBodyBlocks":null,
bodyBlocks7
Quick wins and final tips for a spotless Roborock tray
For busy households, a few fast practices can make a big difference in how to clean cleaning tray roborock over time. Wipe down the tray exterior after each cleaning session to prevent oily residues from building up. If you notice a lingering odor, a brief rinse with a small amount of baking soda solution can help neutralize smells without harsh chemicals. Always dry thoroughly; moisture is the enemy of cleanliness in enclosed robot parts. By incorporating these quick wins, you’ll reduce the need for frequent deep cleans and keep your Roborock running smoothly with minimal downtime.
Tools & Materials
- Mild dish soap or gentle detergent(Use a small amount on a soft sponge or brush)
- Warm water(Not hot or boiling to avoid warping plastic)
- Soft-bristled brush (old toothbrush)(Reach corners and seams without scratching)
- Microfiber cloth(For drying and wiping surfaces)
- White vinegar (optional)(Dilute 1:1 with water for mineral buildup)
- Gloves(Protect hands during cleaning)
- Drying rack or clean towel(Air-dry tray completely before reassembly)
Steps
Estimated time: 25-35 minutes
- 1
Power off and remove tray
Turn off the Roborock and gently detach the cleaning tray from its housing. Empty any loose debris into a trash bin. This reduces mess and ensures you’re cleaning a dry, accessible surface. Inspect for any obvious wear around the locking mechanism that might affect seating.
Tip: Handle the tray by its edges to avoid bending corners. - 2
Rinse with warm water
Rinse the tray under warm running water to remove loose dust and hair. This initial rinse prepares the surface for detergent and helps prevent scouring soap from spreading residue into crevices.
Tip: Rinse from both sides to flush debris out of corners. - 3
Scrub with mild detergent
Apply a small amount of mild dish soap and gently scrub with a soft brush, paying attention to corners and seams where buildup hides. Avoid abrasive pads that can scratch or wear the plastic.
Tip: Use circular motions and let water carry residues away. - 4
Rinse thoroughly and inspect
Rinse until all soap suds are gone. Inspect the tray for any remaining residue or stains. If you see mineral deposits, repeat a light scrub and rinse.
Tip: Soap residue can attract new debris if not fully rinsed. - 5
Dry completely
Dry the tray with a microfiber cloth and then place it on a drying rack or clean towel in a well-ventilated area. Ensure every nook and seam is dry before reinstallation.
Tip: Avoid placing near direct heat or sunlight. - 6
Reinstall and test
Place the tray back into the Roborock ensuring the locks align. Run a short cleaning cycle to confirm proper fit and that no debris escapes from the tray area.
Tip: If you hear unusual noises, stop and recheck seating.
Questions & Answers
Can I use vinegar to clean the Roborock cleaning tray?
Yes, a diluted vinegar solution can help dissolve mineral buildup. Rinse thoroughly after soaking and ensure the tray is completely dry before reassembly.
Yes. You can use a mild vinegar solution, but rinse well and dry completely before putting the tray back in the Roborock.
How often should I clean the cleaning tray?
Aim for a quick check weekly and a deeper clean every 2–6 weeks, depending on usage and whether you have pets. Regular maintenance prevents odors and buildup.
Clean the tray weekly if possible, and do a deeper clean every few weeks.
Is the cleaning tray dishwasher safe?
Most Roborock trays are not dishwasher safe. Hand wash with mild detergent and air-dry to preserve material integrity.
Usually not dishwasher safe; wash by hand with mild soap and air-dry.
What if I notice mold on the tray?
If you detect mold, stop using the tray and replace it or consult support. Clean thoroughly if mold is superficial and dry completely.
If you see mold, replace the tray or contact support; do a thorough clean only if you’re sure it’s safe to do so.
Can I use bleach or strong solvents?
Avoid bleach and strong solvents as they can damage the tray. Stick to mild detergent and dilute vinegar if needed.
Don’t use bleach; stick to mild cleaners to protect the tray.
Do I need to dry the tray with heat?
No heat is recommended. Air-dry completely in a well-ventilated area to prevent warping and ensure safety.
Air-dry completely; avoid direct heat sources.
Watch Video
The Essentials
- Remove and rinse the tray before cleaning
- Use mild cleaners to protect plastic
- Dry thoroughly before reassembly
- Check fit after reinstallation
- Maintain a regular cleaning schedule