How to Clean a Humidifier: A Practical Guide
Learn how to clean a humidifier safely and effectively. This guide covers disassembly, descaling, rinsing, drying, and maintenance to prevent mold, mineral buildup, and ensure clean mist for healthier indoor air.

In a few steps, you will learn how to clean a humidifier safely and effectively, including disassembly, descaling, rinsing, and thorough drying. Proper cleaning reduces mineral buildup, stops mold growth, and keeps your mist clean. According to Cleaning Tips, a regular, methodical clean protects indoor air quality and extends your device’s life.
Why Cleaning a Humidifier Matters
Maintaining clean humidifier components is essential for healthy indoor air. When mineral deposits, algae, or mold accumulate in a tank or base, they can be dispersed into the air during use. Regular cleaning reduces these risks and helps the humidifier run more efficiently, producing a consistent mist. This is especially important in homes with children, pets, or respiratory sensitivities. The topic of how to clean humidifier is not just about odor control; it's about safeguarding your family's health and preserving equipment longevity.
According to Cleaning Tips, routine cleaning also minimizes mineral buildup that can clog nozzles and shorten the device's life. By establishing a simple schedule and using the right tools, homeowners and renters can keep their humidifier performing at peak levels throughout the dry season. In this section we’ll explore which parts need attention, what cleaning solutions are safe, and how to avoid common mistakes.
Types of Humidifiers and Cleaning Needs
Humidifiers come in several designs, from ultrasonic to evaporative to steam-producing models. Each type has slightly different cleaning needs, especially around the water tank, base, and filter components. Ultrasonic units tend to produce fine mineral dust if mineral-rich water is used; evaporative models rely on wicks that can accumulate slime. One principle holds across all models: avoid harsh chemicals that could coat surfaces or enter the mist. In this section we compare common types and explain the implications for cleaning approach, so you can tailor your routine to the device you own.
When shopping or maintaining, consult your user manual for any model-specific cautions. If you notice persistent odors, cloudiness in the water, or unusual mist patterns, it’s a sign that a deeper clean or filter change might be needed. Cleaning the tank, base, and removable parts with a vinegar solution is a safe, effective starting point for most devices.
When to Clean: Schedule and Frequency
A clean humidifier is easier to maintain than a neglected one. Most households perform a light wipe-down and rinse weekly during periods of heavy use, and a thorough deep clean every two to four weeks. If your humidifier runs daily in dry climates or if you have hard water, more frequent cleaning is wise. Always empty the tank and dry all surfaces between uses to prevent bacterial growth. The exact timing will depend on usage patterns, water quality, and the presence of pets or children.
Developing a routine helps catch buildup early. Keeping a small cleaning log can remind you to perform the next cycle and ensure you don’t skip essential maintenance.
Cleaning Solutions: What to Use and What to Avoid
The safest and most accessible cleaning agents for humidifiers are mild dish soap and white vinegar. A 1:1 mixture of vinegar and water is effective for descaling mineral deposits, while plain water is enough for quick rinses. Avoid bleach or ammonia, which can release harmful fumes into the air when heated or dispersed as mist. If your model has a filter or wick, replace or clean it according to the manufacturer’s instructions. Rinse all parts thoroughly after cleaning to remove any soap or vinegar residue. For hard-to-reach spots, cotton swabs can help. Always use distilled or demineralized water during cleaning to prevent mineral buildup and reduce residue.
Step-by-Step Quick Overview
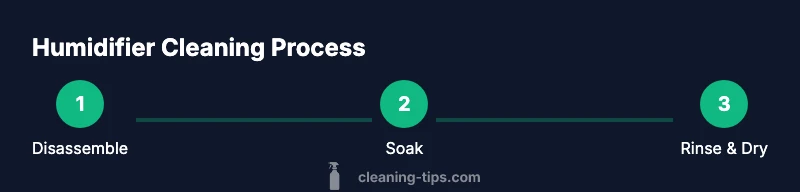
Below is a concise overview of the core actions you’ll perform when you clean the humidifier. Disassemble and unplug first; rinse tank; soak removable parts in vinegar; gently scrub; rinse; dry; reassemble; test. By following these steps in order, you reduce the risk of mold and mineral deposits and ensure safe, clean mist for your family.
Rinse, Dry, and Reassemble: Best Practices
After descaling, rinse every part with distilled water until no vinegar scent remains. Dry all components completely before reassembly to prevent mold growth. Reconnect the base and tank, ensuring seals are snug but not over-tightened. Once assembled, fill with distilled water and run the unit for several minutes to verify there are no leaks and that the mist looks clean. If you notice lingering odor or residue, repeat the cleaning cycle or perform a deeper descaling.
Troubleshooting Common Issues
If your humidifier emits a musty odor, mineral dust, or cloudy mist, it likely needs a more thorough clean or a filter change. Check for visible slime on the tank walls, discoloration, or mineral buildup around the opening. Odors often indicate biofilm—treat with a vinegar soak, then scrub with a soft brush. Leaks or gasket failures require inspecting seals and replacing worn parts. Regular maintenance reduces the likelihood of recurring problems and keeps air quality high.
Tools & Materials
- Distilled water(Use for rinsing and refilling to minimize minerals.)
- White vinegar (5-10%)(Descale mineral deposits; do not mix with bleach.)
- Soft-bristled brush(Non-abrasive; reach corners and filters.)
- Microfiber cloth(Drying and polishing surfaces; avoid lint.)
- Mild dish soap(For gentle cleaning of base and tank.)
- Cotton swabs(Hard-to-reach areas like valve openings.)
- Screwdriver (flathead/Phillips)(If your model is screw-secured.)
- Replacement filters/wicks(Change per manufacturer schedule.)
Steps
Estimated time: 40-60 minutes
- 1
Unplug and disassemble
Power off the humidifier and remove the water tank. Detach the base and lid if your model allows, keeping track of where each piece belongs. This minimizes spills and prepares parts for cleaning.
Tip: Take photos during disassembly to aid reassembly. - 2
Empty and rinse the tank
Pour out remaining water and rinse the tank with distilled water to remove loose debris. Avoid tap water which can leave mineral residues behind.
Tip: Rinse in multiple angles to reach corners. - 3
Soak removable parts in vinegar solution
Soak removable components (tank lid, tank, and any detachable covers) in a 1:1 vinegar-to-water mixture for 15–30 minutes to loosen mineral buildup.
Tip: Check manufacturer guidance before soaking non-removable parts. - 4
Gently scrub interior and components
Use a soft brush to scrub all surfaces; pay attention to corners and hard-to-reach channels. Cotton swabs help in tight spaces.
Tip: Do not scrub seals too hard; they can wear out. - 5
Rinse thoroughly and dry
Rinse every part with distilled water until the vinegar smell is gone. Dry the components completely with a microfiber cloth or air-dry on a clean surface.
Tip: Let parts air-dry for at least 30 minutes in a well-ventilated area. - 6
Reassemble and test the unit
Reattach components, fill with distilled water, plug in, and run the humidifier for a few minutes to confirm proper operation and absence of leaks.
Tip: If you notice lingering odors, repeat the cleaning cycle.
Questions & Answers
How often should I clean a humidifier?
During regular use, a light wipe-down and rinse weekly with a deeper clean every two to four weeks is typical. In hard-water areas or with daily use, you may need more frequent cleaning.
Most households clean weekly with a deeper clean every two to four weeks, and more often if you use hard water or run the unit daily.
Can I use bleach to clean my humidifier?
Bleach is not recommended for humidifiers as fumes can be hazardous when mist is produced. Vinegar and mild soap are safer descalers for most models.
Bleach should be avoided in humidifiers due to potential hazardous fumes.
What about filters or wicks?
If your model uses filters or wicks, replace or clean them according to the manufacturer’s schedule. Do not skip replacements, as clogged filters reduce efficiency and air quality.
Replace or clean the filter as directed by the manual to keep performance steady.
Can I soak the entire humidifier base?
Only soak removable parts that are designed for soaking. The base and electronics should not be submerged unless the manufacturer specifically allows it.
Only soak parts that are rated for soaking; avoid submerging the base.
What if the mist looks discolored after cleaning?
Discoloration can indicate mineral buildup or mold. Re-clean using vinegar, scrub thoroughly, and consider a deeper clean or filter replacement if the issue persists.
If the mist is discolored after cleaning, repeat the cleaning cycle and check the filters.
Is it safe to run a humidifier without water?
No. Running without water can overheat the unit and damage internal components. Always fill with water before use and power off when servicing.
Never run the humidifier without water; unplug if you need to service it.
The Essentials
- Clean regularly to prevent mold and mineral buildup.
- Use vinegar descaling and distilled water for best results.
- Rinse and dry all parts completely before reassembly.
- Test after cleaning to ensure no leaks or odors.
- Follow manufacturer guidelines for filters and special parts.