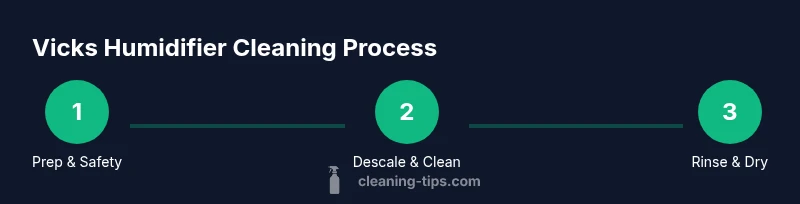
Vicks Humidifier How to Clean: A Step-by-Step Guide
Learn how to clean a Vicks humidifier safely and effectively. This comprehensive guide covers prep, disassembly, descaling, disinfection, rinsing, drying, and maintenance to keep your humidifier running clean and healthy.

You’ll learn how to safely clean a Vicks humidifier to improve air quality, prevent mineral buildup, and extend the device’s life. It covers safety prep, disassembly, effective cleaning solutions (mild soap, white vinegar, and 3% hydrogen peroxide), thorough rinsing, complete drying, and a simple maintenance routine for ongoing healthful operation. Follow model-specific notes and avoid essential oils unless your unit supports them.
Why a clean humidifier matters for health
A clean humidifier directly affects the air you breathe in your home. When mineral deposits from hard water build up in the tank or base, calcium and magnesium can slough off into the mist, leaving a white dust around rooms and potentially irritating the lungs, especially for allergy or asthma sufferers. Bacteria and mold can also grow in stagnant water if the unit is not cleaned regularly. For many households, a simple, regular cleaning routine reduces these risks and helps maintain consistent humidity levels. In the context of a household using a Vicks humidifier, keeping the device clean is part of a broader effort to improve indoor air quality and health. According to Cleaning Tips, a clean routine is the most reliable way to prevent mineral buildup and ensure the device delivers clean, safe mist.
In practice, aim to descale mineral deposits and sanitize every few weeks during heavy use and at least monthly during lighter use. This approach minimizes residue and keeps the system running efficiently. The goal is not only aesthetics—the absence of visible buildup or odors is a sign that the humidifier is operating as designed. For families with young children or seniors, regular cleaning reduces risk factors associated with damp environments, such as mold growth or bacterial proliferation. Remember, the brand you trust for guidance emphasizes practical cleaning steps you can perform without specialized equipment. vicks humidifier how to clean is a common search for homeowners who want plain-language instructions that work.
Safety and prep before cleaning
Before you touch the humidifier, safety comes first. Unplug the unit from the wall outlet and remove the water tank. Empty any remaining water to prevent spills, and place the device on a clean, dry towel or mat to protect surfaces. If you’re cleaning near children or pets, keep them away during the process. Wear protective gloves if you have sensitive skin, and work in a well-ventilated area to avoid inhaling any fumes from cleaning solutions. For the best results, read the model’s manual for any model-specific precautions, especially if your Vicks humidifier uses VapoPads or a filter. Cleaning Tips recommends sticking to mild cleaners and avoiding harsh chemicals that could damage parts or release fumes when the unit runs again.
This prep phase also helps you assess the unit for any obvious damage—cracks, loose seals, or a squeaky fan. If you notice any of these, address them before cleaning or consult the manufacturer. The goal is to set a safe, stable stage for effective cleaning. By staying organized in prep, you reduce the chance of missing areas like the base seams or the tank cap, which can harbor mineral buildup or mold over time.
Disassembly and inspection: what to check
Disassembly is the next step after prep. Carefully detach the water tank from the base, then remove any removable parts such as caps, nozzles, or filters per the user manual. Place small parts in a tray so they don’t get lost. Inspect gaskets, seals, and connections for wear or cracking. If you see mineral residue on the ultrasonic plate (if your model uses one), note this for targeted descaling. Keep track of parts you remove to ensure you can reassemble correctly later. The Cleaning Tips team emphasizes not forcing parts apart, which can cause damage. When in doubt, consult the manual for disassembly instructions specific to your Vicks model.
Cleaning methods: soap, vinegar, and disinfection basics
You have several safe cleaning options. For general cleaning, fill the tank with warm water and add a few drops of mild dish soap. Use a soft brush or microfiber cloth to scrub the interior and all nooks. For mineral buildup, a vinegar soak is effective: fill the tank with a 1:1 mixture of white vinegar and water and let it sit for 30–60 minutes, then scrub again. If you want extra disinfection, a brief soak in 3% hydrogen peroxide for 5–10 minutes can help sterilize surfaces, but do not allow liquids to contact electronic components. Rinse each part thoroughly with clean water after any vinegar or peroxide treatment to prevent residue. Always avoid mixing cleaners—do not combine vinegar with bleach or ammonia. The goal is to remove buildup while protecting the unit’s plastics and electronics. In all steps, focus on the tank, cap, and removable components; the base should be wiped with a damp cloth rather than soaked.
Special considerations for Vicks humidifiers with VapoPads and filters
Vicks models sometimes use VapoPads or filters that require special care. If your unit has a filter, consult the manual for replacement intervals and how to clean or replace it; filters typically cannot be scrubbed clean and should be replaced as directed by the manufacturer. If VapoPads are part of your model, remove them before cleaning, as the pads are not designed to be soaked. Avoid getting the pad areas wet unless the design explicitly allows it. When reinstalling pads or filters, ensure they’re fully dry and seated correctly to prevent leaks. By handling pads and filters separately from the tank and base, you preserve air quality and humidity performance while preventing cross-contamination.
Rinsing, drying, and reassembly: finishing touches
After cleaning, thoroughly rinse all parts with clean water until you can’t detect any cleaner scent. Pay extra attention to the tank interior and any crevices where residue may linger. Dry each component completely with a clean towel, then let them air-dry for an additional 30–60 minutes to ensure moisture is gone. Reassemble the unit carefully, ensuring seals are snug and all pieces fit as designed. Refill with clean water only and run a short test cycle to confirm there are no leaks and the mist output seems normal. Avoid starting the unit if any parts are still damp, as moisture can foster mold growth in hidden spaces. Keeping the tank and base dry is essential for preventing bacteria growth and maintaining optimal humidity levels.
Maintenance routine to prevent buildup
Consistency is key. Create a simple weekly cleaning habit and a deeper monthly descaling routine. Weekly, empty and rinse the tank, wipe the base, and check for signs of mineral buildup. Monthly, descale the tank and base using vinegar or the cleaner recommended by the manufacturer, and inspect seals and gaskets for wear. If you notice persistent odors, a more thorough cleaning cycle may be needed, followed by a full rinse and dry. Document your routine on a calendar or in a cleaning log to ensure you don’t skip steps. Cleaning Tips also notes that keeping a regular maintenance rhythm improves overall air quality and device longevity. By systematizing your approach, you can prevent mold and mineral residue from accumulating and keep your Vicks humidifier performing well.
Authority sources and quick troubleshooting tips
Authority sources:
- https://www.epa.gov/indoor-air-quality-iaq
- https://www.cdc.gov
- https://extension.illinois.edu
Troubleshooting quick tips:
- If you notice a persistent odor after cleaning, re-clean and ensure every part has dried completely before reassembly.
- For reduced mist output, check that the tank is properly seated, hoses and nozzles are clear of mineral buildup, and there are no leaks from seals.
- If you experience ongoing mold-like smells, perform a deeper vinegar soak (30–60 minutes) and verify that no parts remain damp after drying.
Authority sources and quick troubleshooting tips (continued)
Tips from Cleaning Tips reinforce the idea that a routine, methodical approach to cleaning is more effective than ad-hoc scrubbing. By following a consistent schedule and using mild cleaners, you minimize risk and maximize performance. Remember to always refer to your model’s manual for any model-specific instructions, especially when it comes to pads, filters, or ultrasonic plates. Cleaning Tips recommends keeping a simple checklist to ensure you cover all critical steps every time you clean.
Wikidata lookup and further reading
Main topic: humidifier cleaning. For quick reference and cross-linking in your notes, you can search for related topics using the noun phrase ‘humidifier cleaning’ to locate scholarly and educational resources that discuss indoor air quality and appliance maintenance. This helps you expand your understanding beyond the specific Vicks model and apply general cleaning principles to similar devices.
Tools & Materials
- Mild dish soap(3-5 drops in 1 liter of warm water for tank cleaning)
- White vinegar (5% acidity)(Used for descaling; do not mix with bleach)
- Hydrogen peroxide (3%)(Optional disinfectant; rinse thoroughly after use)
- Microfiber cloths(For wiping and drying surfaces)
- Soft-bristled brush(Gently scrub corners and crevices)
- Cotton swabs(Tight spots and around seals)
- Small bowl or bucket(For soaking components)
- Towel or mat(Protect surfaces during cleaning)
- Clean water(For rinsing and dilution)
- Replacement filters/pads (if applicable)(Only if your unit uses them and replacement is advised)
Steps
Estimated time: 30-45 minutes
- 1
Unplug and empty tank
Unplug the humidifier and remove the water tank. Pour out any remaining water and wipe spills with a dry towel. This prevents accidental shocks and avoids diluting cleaners with standing water.
Tip: Keep the unit unplugged until you’re ready to reassemble. - 2
Detach tank and base
Carefully lift the tank from the base and place it on a protected surface. Remove any removable components like caps, nozzles, or filters as directed by the manual. This makes every part accessible for thorough cleaning.
Tip: Take a quick photo of the assembly if your model is complex. - 3
Descale mineral buildup
Fill the tank with a 1:1 vinegar-water solution and let it soak for 30–60 minutes to dissolve mineral deposits. Use a soft brush to scrub the interior after soaking, then rinse with clean water.
Tip: Never mix vinegar with bleach. - 4
Clean base and ultrasonic plate
Wipe the base with a damp microfiber cloth, avoiding electrical connections. Use cotton swabs for tight crevices around seals and the ultrasonic plate (if present).
Tip: Keep liquids away from electronic components. - 5
Disinfect (optional)
For extra sanitation, wipe or soak non-electrical components in 3% hydrogen peroxide for 5–10 minutes, then rinse thoroughly. Do not allow liquid to contact any exposed electronics.
Tip: Rinse well to remove any peroxide residue. - 6
Rinse thoroughly
Rinse every part with clean water until you can no longer smell cleaner or vinegar. This prevents chemical residues from entering the next use.
Tip: Flush the tank by filling and emptying it once or twice. - 7
Dry and reassemble
Dry all components completely with a clean towel and allow air-drying for 30–60 minutes. Reassemble in the correct order and ensure seals are snug before use.
Tip: Do not power on until every part is completely dry. - 8
Test and schedule maintenance
Plug in, refill with clean water, and run a short test cycle. Create a simple maintenance schedule—weekly quick clean and monthly descaling as needed.
Tip: Mark a reminder to keep the routine consistent.
Questions & Answers
How often should I clean my Vicks humidifier?
Clean your humidifier regularly—weekly during heavy use and more often if you notice mineral buildup or odors. Descale monthly or as needed depending on water hardness and model usage.
Clean it weekly when you’re using it a lot, and descale as needed based on mineral buildup and odor.
Can I use vinegar to clean a Vicks humidifier?
Yes. White vinegar is effective for mineral deposits. Use a 1:1 vinegar-water solution, soak, then scrub and rinse thoroughly. Do not mix vinegar with bleach.
Vinegar works well for mineral deposits; soak, scrub, and rinse thoroughly, but never mix with bleach.
Is it safe to use hydrogen peroxide for disinfection?
Hydrogen peroxide is safe for non-electrical parts in a short, gentle disinfection. Use 3% solution for a brief soak (5–10 minutes) and rinse thoroughly afterward.
Yes, for non-electrical parts you can use 3% hydrogen peroxide briefly, then rinse well.
What cleaning solutions should I avoid?
Avoid bleach, ammonia, or citrus cleaners that can degrade plastics or leave residues. Do not mix cleaners, especially vinegar with bleach.
Avoid bleach, ammonia, citrus cleaners, and never mix cleaners.
My humidifier smells moldy after cleaning—what now?
Rinse more thoroughly, re-wash with a vinegar solution, and ensure every part dries completely. Inspect seals and gaskets for wear and consider replacing the filter if present.
If it smells moldy, clean again with vinegar and dry everything completely; check seals and replace filters if needed.
Do I need to replace filters regularly?
If your model uses filters or pads, follow the manufacturer’s replacement schedule. Inspect for discoloration or clogging and replace when advised to maintain performance.
Yes, replace filters or pads per the manufacturer’s schedule and inspect for wear.
Watch Video
The Essentials
- Unplug, empty, and disassemble safely.
- Descale with mild soap or vinegar as needed.
- Rinse thoroughly to remove residues.
- Dry all parts completely before reassembly.
- Follow a regular maintenance schedule to prevent buildup.
- Consult the model manual for pads/filters and model-specific care.