How to Clean Tankless Water Heater: A Complete Step-by-Step Guide
Learn how to safely clean and descale a tankless water heater to restore efficiency, prevent mineral buildup, and extend the unit’s life. This guide covers when to clean, required tools, a detailed step-by-step process, and maintenance tips for a healthier home.

By following this guide, you will safely flush and descale a tankless water heater to remove mineral buildup, restore energy efficiency, and extend the unit’s life. You’ll learn when to clean, which tools to gather, and a step-by-step process you can perform with common household supplies. Always follow safety precautions and shut off power and fuel before starting.
Why Cleaning a Tankless Water Heater Matters
Tankless water heaters heat water on demand, avoiding a bulky storage tank. However, mineral buildup can leave scale on the heat exchanger surfaces. Scale acts like an insulating layer, reducing heat transfer and forcing the unit to work harder, which wastes energy and may shorten the heater life. Cleaning removes mineral buildup, improves heat transfer, restores hot water consistency, and helps maintain warranty terms that require periodic maintenance. In hard water areas deposits can accumulate quickly; even moderate mineral content will eventually affect performance. A well timed flush reduces the risk of calcified deposits causing flow restrictions or clogs, especially in models with dedicated service ports. In short, regular cleaning keeps performance steady, energy bills lower, and the system easier to maintain. This section explains what cleaning means in practice, what to look for before you start, and why a flush matters for reliability and longevity. How to clean tankless water heater is a common query, and this guide provides a practical, model-agnostic approach.
How a Tankless System Works and What to Clean
A tankless water heater heats water as it is demanded, using a heat exchanger instead of storing hot water. The main cleaning targets are mineral buildup on the heat exchanger surfaces, scale in service ports, and mineral debris inside water paths. When you flush the unit, you circulate a cleaning solution through the heat exchanger to dissolve mineral deposits. Avoid aggressive cleaners unless the manufacturer allows them, and use only the cleaners the manual recommends. Parts to inspect and clean include service ports, heat exchanger surfaces, and the water inlet and outlet paths. Regular inspection helps spot leaks or worn seals early and keeps the system operating at peak efficiency.
Cleaning Frequency and Signs It Needs Cleaning
Frequency depends on water hardness and usage. In most homes a yearly or biannual cleaning is reasonable, while hard water areas or high usage may require more frequent attention. Look for signs such as slow hot water delivery, fluctuating temperatures, unusual odors, louder operation, or visible mineral deposits on external surfaces. If any of these occur, plan a cleaning before the busy season. If you are unsure, consult the manual or a professional to determine the best schedule for your model.
Safety First: Prep and Precautions
Safety is essential when maintaining a tankless water heater. Begin by powering down the unit, and shutting off the gas supply for gas models. Allow a brief depressurization and then drain a small amount of water to confirm there is no residual pressure. Wear eye protection and gloves, and keep kids and pets away from the work area. Read the manufacturer manual for service port locations and approved cleaning solutions. Do not mix cleaners with bleach, ammonia, or other incompatible chemicals. In short, follow the exact steps in the manual to prevent injuries or damage.
Tools, Materials, and Setup
Gather a dedicated descaling kit or two service hoses, a safe descaler such as white vinegar or a manufacturer approved solution, a bucket, towels, a wrench and basic hand tools. Ensure hoses are long enough to reach a drain or basin. If your model uses a special drain valve or sensors, have the correct adapters on hand. Keep the unit's manual nearby during setup as a quick reference and store spare parts for future maintenance.
Step-by-Step Overview and Best Practices
Before you begin, review the steps and safety notes. The following steps provide a reliable workflow that you can follow even if your model differs slightly. Prioritize safety, work slowly to avoid leaks, and keep the area well ventilated when using acids or vapors. The overview helps you understand the sequence and what to expect during the flush, rinse, and reassembly.
Authoritative Sources and Quick References
For reliable guidance, consult manufacturer manuals and official sources. The following resources offer general maintenance guidance and safety practices:
- Energy.gov – Water Heaters: https://www.energy.gov/energysaver/water-heaters
- EnergyStar – Water Heaters: https://www.energystar.gov/products/water_heaters
These sources provide foundational information on safe operation and routine maintenance.
Common Mistakes and Troubleshooting
Common missteps include bypassing service ports, using incorrect descalers, not closing all valves, or rushing the rinse cycle. If leaks persist, recheck connections and seals and consider professional help. If the hot water output remains slow after flushing, verify that the cold-water valve is fully open and that the heat exchanger has no internal blockage. Troubleshooting tips help you finish with a reliable, leaking-free system.
Maintenance Tips for Long‑Term Performance
Keep a simple maintenance log with dates of every cleaning and any part replacements. In hard water areas install a water conditioner or consider a periodic preflush to minimize mineral buildup. Inspect seals and valves annually and replace worn parts promptly. Finally, schedule professional inspections when you notice persistent issues or after a major plumbing change in the home.
Tools & Materials
- Safety goggles(Protect eyes from splashes.)
- Safety gloves(Protect hands; nitrile or rubber.)
- Service hoses (2)(Hose connections for flushing; 3/4 inch fittings preferred.)
- Descaling solution (white vinegar or manufacturer-recommended)(Diluted vinegar is common; follow guidelines.)
- Buckets or containers(For catching fluids during flushing.)
- Wrench/pliers(For valve adjustments and ports.)
- Towels or rags(Clean spills and wipe connections.)
- Owner’s manual(Keep handy for model-specific steps.)
Steps
Estimated time: 90-120 minutes
- 1
Power down and isolate energy
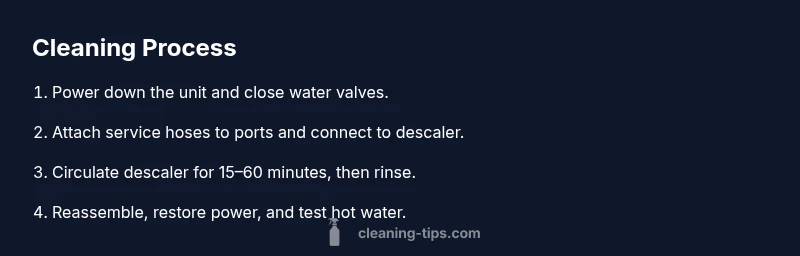
Turn off the unit at the breaker or switch, and shut off the gas supply for gas models. This prevents any electrical or fuel flow while you work and reduces the risk of an incident. Verify there is no pressure by briefly opening a hot water faucet to confirm release.
Tip: Take a photo of the control panel and gas valve before turning anything off to help with reassembly. - 2
Close cold water and expose ports
Shut the cold water inlet to the unit to prevent water from entering during servicing. Remove service port caps and inspect for damage. Attach service hoses securely to both ports.
Tip: Use the manufacturer’s service port caps to avoid leaks; a simple hand-tighten is usually enough. - 3
Attach hoses and prepare descaler
Connect the hoses to the service ports and route the other ends to your descaling container. Prepare the descaler as per product instructions or use white vinegar if allowed by the manual. Ensure there are no kinks and all connections are tight.
Tip: Use a pump if required by your system and avoid running hoses with kinks. - 4
Circulate descaling solution
Run the descaling solution through the heat exchanger for the recommended time, usually 15–60 minutes. Monitor hoses for leaks and ensure the solution flows through all paths.
Tip: If using vinegar, expect a stronger odor; ensure good ventilation. - 5
Rinse with clean water
Flush the system with clean water to remove remaining descaler and mineral debris. Continue until the rinse water runs clear and odor-free.
Tip: Use fresh water for a thorough rinse; run enough water to purge all acidity. - 6
Reconnect and reseal ports
Detach hoses, re-cap service ports, and make sure all seals are tight. Inspect for signs of wear or leaks and replace if necessary.
Tip: Keep spare gaskets and caps on hand for quick resealing. - 7
Restore power and water, purge air
Turn power and gas back on, re-pressurize if needed, and run hot water from a faucet until it is steady and air is purged. Check for leaks around connections.
Tip: Open a hot-water faucet and let it run until stable temperatures are reached. - 8
Inspect and finalize
Check external surfaces for mineral residue and ensure there’s no abnormal vibration or noise during operation. If lingering scale is suspected, repeat the flush per the model guidelines.
Tip: Keep a log of cleaning dates for future maintenance. - 9
Document results
Note the date, observations, and any parts replaced. Confirm safety devices work and the unit operates normally after the flush.
Tip: Store this guide and the manual together for quick reference.
Questions & Answers
Do I need a professional to clean a tankless water heater?
Not always. If your unit has service ports and you can follow the manufacturer’s instructions, you can perform a basic flush yourself. Complex configurations or gas line work should be handled by a licensed technician.
You can often do a basic flush yourself if your unit has service ports and you follow the manual. For complex gas work, call a professional.
Can I use vinegar to descale a tankless water heater?
Yes, white vinegar is commonly used for mild descaling. Dilute as recommended and ensure proper ventilation. Check your manufacturer’s guidance before using any acid.
White vinegar is commonly used for mild descaling. Follow dilution and ventilation guidelines from the manual.
How often should I clean a tankless water heater?
Frequency depends on water hardness and usage. In moderate to hard water areas, cleaning once a year or every 12–24 months is typical; adjust based on performance and mineral buildup.
In hard water areas, plan annual or biennial cleanings and watch for signs of buildup.
What are signs that cleaning is needed?
Slow hot water delivery, fluctuating temperatures, noise, or visible mineral deposits indicate cleaning is needed. If performance remains poor after flushing, consider professional service.
If hot water is slow, temperatures vary, or you hear unusual noises, it’s time to clean.
Is it safe to use harsh chemicals for descaling?
Avoid bleach and strong chemicals unless the manufacturer approves. Use mild descalers or vinegar and ensure good ventilation to prevent fumes.
Avoid harsh chemicals unless the manual allows; use mild descalers and ventilate the area.
What safety precautions should I follow?
Power off and, if applicable, shut off gas. Wear PPE, and keep children away. Work in a well-ventilated area and follow the manual’s steps precisely.
Turn off power and gas, wear PPE, and follow the manual for safety.
Watch Video
The Essentials
- Shut off power and gas before starting.
- Use manufacturer-approved cleaners and follow dilution guidelines.
- Circulate descaler to dissolve mineral buildup effectively.
- Document maintenance dates for future reference.