How to Clean Xbox: Safe Step-by-Step Guide
Learn how to clean an Xbox console and controllers safely with a practical, step-by-step approach. Tools, warnings, and maintenance tips from Cleaning Tips to protect performance.

Learn how to clean an Xbox safely, focusing on exterior surfaces and accessible vents while avoiding liquids and static damage. This quick guide covers essential tools, unplugging and prep, safe cleaning steps, and simple maintenance habits to keep your gaming setup performing well.
What happens when you skip regular cleaning
Dust and debris collect around vents and fans, causing restricted airflow and higher operating temperatures. Over time, heat can throttle performance and shorten the console’s life. Regular, careful cleaning helps maintain airflow and reduces the risk of overheating. According to Cleaning Tips, regular maintenance is a practical step for healthier electronics. Learning how to clean xbox components begins with understanding where dust hides and how it affects performance. In this guide you’ll find steps to safely remove dust and keep devices cooler while preserving coatings and ports.
Safety first: unplugging and prep
Before you touch any internal parts, power down fully and unplug the console from the wall. Disconnect the HDMI cable and any external devices. Remove batteries from wireless controllers if possible. Ground yourself by touching a metal object or using an anti-static wrist strap to reduce static discharge. The Cleaning Tips Team emphasizes safety first, so never attempt internal cleaning or disassembly unless you’re trained. Keep liquids away from the console and never spray cleaner directly onto surfaces.
Tools and materials you’ll need
Having the right tools makes the job easier and safer. Essential items include:
- Microfiber cloth (lint-free, soft) — for general wiping.
- Isopropyl alcohol 70% or less — dampen the cloth, never apply liquid directly to the device.
- Compressed air can — for blowing dust from vents, held upright and used in short bursts.
- Soft brush or cotton swabs — to reach crevices in ports and grills.
Optional but helpful:
- Distilled water (for very light dampening on the cloth only)
- Anti-static mat or tray to organize small parts
- Anti-static gloves (optional) to reduce oils on surfaces
Notes: Do not use harsh solvents or abrasive pads, which can damage coatings. Distilled water should be used sparingly if you choose to dampen a cloth.
Tools & Materials
- Microfiber cleaning cloth(Lint-free, soft)
- Isopropyl alcohol (70% or less)(Dampen cloth, never spray directly)
- Compressed air can(Upright, short bursts)
- Soft brush or cotton swabs(Reach crevices and ports)
- Distilled water(For very light dampening on cloth only)
- Anti-static mat or tray(Organize small parts)
- Anti-static gloves(Optional to reduce oils)
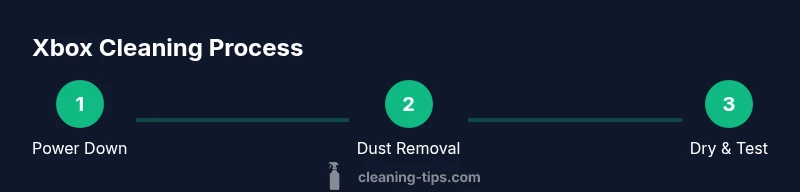
Steps
Estimated time: 40-60 minutes
- 1
Power down and unplug
Shut down the console, wait for the fan to stop, and unplug from the wall. Disconnect the HDMI cable and any external devices. This prevents electrical shock and moisture from reaching internal components.
Tip: Take a photo of cable setup to simplify reassembly. - 2
Remove accessories and prep workspace
Detach controllers, headsets, and external drives. Clear a clean, dry workspace and keep small parts in a tray to prevent loss. Static-safe handling reduces risk to sensitive components.
Tip: Work on a non-carpeted surface to minimize static. - 3
Wipe exterior surfaces
Dampen a microfiber cloth with isopropyl alcohol and wipe the shell in small sections. Avoid ports and vents to prevent moisture buildup. Test a small area first to ensure no surface damage.
Tip: Use gentle, straight strokes rather than circular scrubbing. - 4
Clean vents and fans
Use compressed air in short bursts from the outside in, keeping the can upright and about 6 inches away. Brush away loosened dust with a soft brush before re-puffing air. Allow any moisture to dry before powering on.
Tip: Never spray into the fan while it’s spinning. - 5
Clean ports and connectors
Lightly dampen a cotton swab and clean around USB and HDMI ports. Avoid forcing anything and never insert liquids into openings. Dry with a cloth after cleaning.
Tip: Do not reuse the same swab on multiple ports. - 6
Clean controllers
Wipe controller shells with a cloth lightly dampened with alcohol. Clean analog sticks by gently rolling a dampened cotton swab around the base. Avoid moisture near battery compartments.
Tip: Remove batteries before cleaning. - 7
Drying and reassembly
Let surfaces air dry completely for several minutes. Reattach cables and accessories, then power up to test basic functions. Check that vents stay clear and there’s no remaining moisture.
Tip: If in doubt, wait longer before powering on. - 8
Test and monitor
Turn on the Xbox, navigate menus, and test controllers. Listen for abnormal fan noise or overheating signs. If anything seems off, repeat the cleaning steps or seek professional help.
Tip: Keep a log of cleaning sessions for maintenance.
Questions & Answers
Can I use water to clean my Xbox?
Water can seep into electronics and cause corrosion or short circuits. Use a microfiber cloth lightly dampened with isopropyl alcohol instead.
No—avoid water on the console. Use a damp cloth with alcohol instead.
Is disassembly recommended for cleaning?
Disassembling a console can void warranties and pose safety risks. Stick to exterior cleaning unless you’re trained for inside work.
No, don’t take it apart unless you’re trained; it can void warranties.
Will cleaning void my warranty?
Exterior cleaning with approved methods generally doesn’t void the warranty, but opening the case or sensor areas may. Always check your manufacturer's terms.
Exterior cleaning typically won’t void warranty; disassembly might.
How often should I clean an Xbox?
Most setups benefit from cleaning every 3–6 months, more often in dusty or high-humidity environments. Adjust cadence based on usage and environment.
Clean every few months or when you notice dust or buildup.
Can I clean the disc drive?
Do not attempt to clean or lubricate the drive yourself. If you suspect drive issues, contact support or a professional technician.
Disc drive issues require professional help; avoid DIY fixes.
Watch Video
The Essentials
- Unplug before cleaning and protect yourself from static.
- Dust vents regularly to prevent overheating.
- Use the right cleaners and avoid liquids near ports.
- Dry thoroughly before powering on after cleaning.
- Create a simple maintenance routine to extend life.