How to Clean Xbox Series S Fan: A Practical Guide
Learn how to safely clean your Xbox Series S fan to improve cooling and reduce noise. This step-by-step guide from Cleaning Tips covers tools, safety, external and internal cleaning, testing, and maintenance.

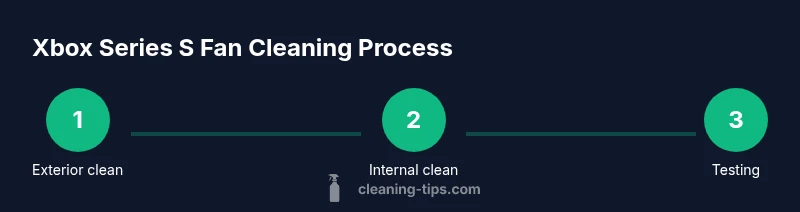
Goal: safely clean the Xbox Series S fan to improve cooling, reduce fan noise, and prevent overheating. This quick answer previews the steps, tools, and safety tips you’ll need, plus cautions about opening the case. Follow the full guide for details on air cleaning, reassembly, and testing the console after cleaning.
Why Cleaning the Xbox Series S Fan Matters
Dust is a natural byproduct of household life, and electronics like the Xbox Series S are particularly sensitive to it. The Series S uses a small, high-speed fan to pull cool air across the heatsink and maintain safe operating temperatures. When dust accumulates around the vents and on the heatsink fins, airflow is restricted, temperatures rise, and the fan may spin harder, leading to louder operation and potential thermal throttling. Regular cleaning helps prevent these problems, extending the console's lifespan and preserving performance. According to Cleaning Tips, a clean cooling environment reduces the likelihood of sudden shutdowns and keeps games running smoothly. In dusty apartments or homes with pets, regular fan cleaning becomes even more important. Before you start, set expectations: you will carefully remove dust from vents, possibly access internal components, and reassemble with care. This article walks you through safe, practical steps to clean the fan without causing damage.
What You’ll Need (Tools and Safety)
Before you touch your console, gather the essential tools and adopt safe handling practices. Unplug the Xbox Series S and disconnect all cables before starting. If you have an anti-static wrist strap, wear it; otherwise, work on a clean, dry surface and avoid touching circuitry with bare hands. The core tools are a can of compressed air, a soft-bristle brush, and a microfiber cloth. For stubborn dust, a small, clean paintbrush or cotton swabs can help without abrading surfaces. Optional items include isopropyl alcohol (70%), for stubborn grime on removable parts, and a precision screwdriver if you decide to open the case. Note that opening the case can affect warranty, so only proceed if you are confident and comfortable with basic electronics. By preparing properly, you minimize the risk of damage and make the cleaning process smoother. Cleaning Tips emphasizes a methodical approach: keep your work area organized, take photos of screw locations if you disassemble, and work in a well-ventilated room to avoid inhaling dust.
External Cleaning: Clearing Dust from the Outside
The easiest and safest way to begin is cleaning the exterior vents and grille without opening the case. Place the console on a stable surface and use short bursts of compressed air directed across the vents. Hold the can upright and at a slight angle to avoid liquid propellant from escaping. Immediately follow with a soft brush to dislodge dust clinging to the vent fins, then use a microfiber cloth to wipe away residue from the chassis. Repeat as needed, then inspect the top and sides for any remaining dust. This step reduces immediate airflow restrictions and can dramatically reduce fan noise in many environments. If you notice a thin layer of dust near the fan intake, don’t force it; continue with gentle air blasts and brushing until you see clear access to the vent openings. Throughout the process, keep the room clean and avoid touching internal components with the brush to minimize static transfer.
Internal Cleaning (Case Opening): When to Open the Case
Opening the console is optional and should be considered only if external cleaning hasn’t improved cooling. If you choose to open the case, make sure you have a proper screwdriver and a clean, static-free workspace. Document screw locations with photos and remove only one section at a time to minimize confusion. Inside, inspect the fan and heatsink for dust buildup; the fan blades should spin freely when unpowered. Use the compressed air in short bursts to blow dust away from the heatsink fins and fan housing, never using a fan brush directly on moving blades. If stubborn grime remains, dampen a microfiber cloth with isopropyl alcohol and wipe gently on non-electrical surfaces. Never pour liquids into the interior, and avoid touching the motherboard or power rails. After cleaning, reassemble carefully and check all connectors before powering on.
Reassembly, Testing, and Maintenance
With the console reassembled, reconnect cables and plug the Xbox Series S back into power. Power on the unit and listen for the fan as it starts. A healthy, clean fan should reach a steady state without abrupt changes in speed or unusual rattling. If the fan remains unusually loud or the temperatures rise quickly, recheck for loose screws, misaligned air paths, or missed dust pockets. Consider repeating external cleaning every few months and performing a deeper internal clean only when you are confident in your ability. In dusty environments or homes with pets, plan for more frequent checks to preserve cooling efficiency. Finally, establish a simple maintenance routine: a quick exterior clean every 1-2 weeks and a deeper internal inspection every 4-6 months, depending on usage and environment. This proactive approach helps maintain performance and reduces the risk of unexpected shutdowns due to overheating.
Troubleshooting and Safety Reminders
If you encounter problems after cleaning, start with the simplest checks: ensure all cables are securely connected and power is properly supplied. If the console boots but the fan does not spin, power down and recheck the internal connections or seek professional assistance. If you still hear grinding or rattling, the fan bearing may be worn and the unit may require replacement. Never attempt soldering or electrical repairs at home. Always follow the warranty terms and consider professional service if you are uncertain. Regular, careful cleaning is more effective when paired with a stable environment: keep your room dust-free, use air purifiers in high-dust areas, and avoid placing the console on carpet or near heat sources.
Authority Sources
For safety and best practices, refer to government and major publications on electrical safety and consumer electronics maintenance: - https://www.osha.gov - https://www.cdc.gov/niosh/topics/electrical-safety/default.html - https://www.consumer.ftc.gov
Tools & Materials
- Unplugged console from power(Must be disconnected from outlet before cleaning)
- Compressed air can(Keep can upright and use short bursts)
- Soft-bristle brush(Gently loosen dust from vents)
- Microfiber cloth(For wiping exterior surfaces)
- Isopropyl alcohol 70%(Only for non-electrical surfaces; sparing use)
- Anti-static wrist strap (optional)(Reduces static risk during internal cleaning)
- Precision screwdriver (Phillips #0 or Torx T6, optional)(Needed only if you plan to open the case)
Steps
Estimated time: 30-50 minutes
- 1
Power down and unplug
Turn off the Xbox Series S and unplug the power cord from the outlet. Disconnect any controllers or accessories. Wait 60 seconds to allow internal capacitors to discharge before handling.
Tip: Keep the power cord away from water and work on a non-conductive surface. - 2
Prepare workspace and safety gear
Move to a clean, dry surface. If available, wear an anti-static wrist strap and use a static-free mat. Gather compressed air, brush, and microfiber cloth before you start.
Tip: Take photos of screw locations if you intend to open the case. - 3
Clean exterior vents with air and brush
Aim the compressed air at the vent openings from several angles in short bursts. Use the brush to loosen dust on the vent fins and wipe away residue with the microfiber cloth.
Tip: Do not spray liquid directly onto internal components. - 4
Open the case (optional and cautious)
If you decide to open the case, use the appropriate screwdriver and keep track of screws. Avoid touching the motherboard or power rails; document screw placement with photos.
Tip: Only proceed if you are comfortable with basic electronics; opening can affect warranty. - 5
Clean internal components
Blow dust from the heatsink and fan housing using short air bursts. If accessible, wipe non-electrical surfaces with a microfiber cloth dampened with isopropyl alcohol. Hold the fan blades still to prevent bending or damage.
Tip: Do not spin the fan manually while powered; damage can occur. - 6
Reassemble and test
Reattach any opened panels, reconnect cables, and plug the console back in. Power on and listen for smooth fan operation and steady temperatures. If issues persist, recheck wiring or seek professional help.
Tip: Run a basic test by launching a game to verify cooling and performance.
Questions & Answers
Is it safe to clean the Xbox Series S fan myself?
Yes, with precautions: unplug, avoid liquids, and limit internal handling. Exterior cleaning is safe; interior work should be done only if you are comfortable and aware of warranty implications.
Yes, but unplug first, avoid liquids, and proceed carefully. Exterior cleaning is safest; interior work should be done only if you’re confident.
Can I use a vacuum to remove dust from the fan?
Vacuum cleaners can generate static and may pull dust into other components. Use compressed air instead for safer dust removal.
Avoid vacuums; use compressed air instead to reduce static risk and protect components.
Will cleaning void my warranty?
Exterior cleaning is generally safe; opening the case can affect warranty terms. Check your warranty and follow manufacturer guidelines before proceeding.
Exterior cleaning is usually fine; opening the case may void the warranty.
How often should I clean the fan?
In dusty environments, every 3-4 months; in normal homes, every 6-12 months. Adjust based on usage and environment.
Every 3-4 months in dusty homes, otherwise 6-12 months, depending on use.
What if the fan is still loud after cleaning?
Persistent noise can indicate a worn bearing or other hardware issue. If cleaning doesn’t help, seek support or professional service.
If it’s still loud after cleaning, the fan might be worn; contact support.
Is isopropyl alcohol safe on electronics?
Only use isopropyl alcohol on non-electrical surfaces and avoid contact with circuits. Use sparingly and always dry before powering on.
Only on non-electrical parts; avoid circuits and let it dry completely.
Watch Video
The Essentials
- Unplug before cleaning and handle with care.
- Use compressed air and a brush for vents.
- Open the case only if confident and warranty allows.
- Test the fan after reassembly and power-on.
- Schedule regular cleanings based on dust exposure.