How to Clean Xbox 360: Step-by-Step Guide
A comprehensive, safety-focused guide for homeowners and renters on cleaning an Xbox 360 console. Learn exterior and interior methods, safe cleaners, maintenance habits, and troubleshooting to keep your system cool and functioning well.

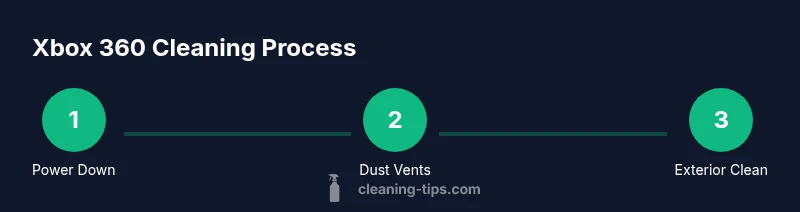
You will clean an Xbox 360 by unplugging it, then removing dust from vents with compressed air and wiping the exterior with a microfiber cloth. For interior work, only remove the outer shell if you’re confident, and never pour liquids inside. Always power down, disconnect all cables, and allow surfaces to dry before reassembly.
Overview: how to clean Xbox 360 safely
According to Cleaning Tips, regular maintenance helps extend console life. This guide focuses on a safe, methodical approach to reduce overheating, sticky dust, and wear on the outer shell and vents. We distinguish exterior cleaning from interior work, and emphasize non-liquid methods near sensitive components. The Xbox 360 should be cooled before beginning, and you should always use electronics-safe products. By following these steps, you’ll balance effective dust removal with the risk controls needed for consumer electronics.
In practice, a structured routine—dusting vents, wiping surfaces, and checking fans—keeps temperatures stable and preserves performance. While the process can be done without disassembly, you should only open the casing if you are comfortable and you understand the model’s layout. This article provides a clear sequence, tool suggestions, and safety reminders to help you clean confidently.
Safety and prepping your workspace
Before you touch the console, ensure you have a clean, dry workspace free of liquids and moisture hazards. Disconnect the power supply and all cables, including HDMI/AV, controllers, and any external storage. Ground yourself by touching a metal surface or wearing an anti-static wrist strap to minimize static discharge. Keep small parts containers handy to avoid losing screws if you decide to remove the shell. Make sure pets and children are away from the area to prevent accidental bumps during the cleaning process. When in doubt, err on the side of exterior-only cleaning to minimize risk.
Exterior cleaning: chassis, ports, and controllers
Start with the most accessible surfaces: the top, sides, and front panel. Use a microfiber cloth lightly dampened with isopropyl alcohol (70% or lower) or a dedicated electronics cleaner, then wipe in blue or circular motions to lift grime without leaving streaks. For stubborn dust around ports, a cotton swab lightly moistened with cleaner can reach crevices. Keep liquids away from the openings and never spray directly onto the console. After wiping, dry with a fresh microfiber cloth to prevent moisture from lingering around connections.
Cleaning the disc drive and vents
Dust accumulation around the disc drive can cause read errors and sluggish loading. Use compressed air in short bursts, holding the can upright, at a safe distance (about 6-12 inches). Do not shake or tilt the can aggressively, and avoid cultivating moisture inside the drive. Clear vents with air to improve airflow and keep the fan area free of hair or lint. If you notice persistent vibration or unusual sounds, stop and reassess rather than forcing dust removal.
Interior cleaning considerations: fans, heatsinks, and optical modules
Interior cleaning carries higher risk. If you choose to proceed, power down again and carefully remove the outer shell following official service guidance for your model. Use compressed air to dislodge dust from fans and heatsinks while preventing blade spin with your finger or a clamp. Do not touch circuitry with bare hands, and use a soft brush to guide dust away. If you aren’t confident, skip interior work and stick to exterior cleaning to avoid damage.
Cleaning discs and media accessories safely
Dusty discs or cases can leave fingerprints on the surface or affect readability. Wipe discs with a clean microfiber cloth from the center outward in straight lines, not circular motions. Inspect the disc drive window and ensure there’s no visible dust or smudges near the loading area. For accessories like controllers and charging docks, use a slightly damp cloth, then dry thoroughly. Avoid cleaners that leave residues on reflective surfaces.
Safe cleaning agents and liquids to avoid
Avoid water or general-purpose cleaners that can seep into ports and electronic circuitry. Use only electronics-safe solutions and ensure the cloth is barely damp. Do not apply cleaners directly to the console, vents, or internal components. Keep solvents away from rubber seals and instruction labels, and never spray onto connectors. If you spill liquid, power down immediately and allow the unit to dry completely before reconnecting.
Maintenance habits to prevent future buildup
Establish a quick weekly dust check of the vents and fan grills. Place the console on a hard, clean surface away from fabric furniture that sheds lint. Consider a dedicated stand or shelf that promotes airflow around all sides. Periodically re-evaluate your cleaning supplies, replacing worn microfiber cloths to prevent scratching. A simple routine reduces the likelihood of heavy dust buildup and extends longevity.
Common mistakes and troubleshooting
Common mistakes include using too much liquid, spraying directly on components, or applying force when removing the shell. If the console starts behaving erratically after cleaning, power down, unplug, and wait before testing. Reconnect cables in the same order, and observe if the issue persists. If you still encounter problems, consult official service channels rather than attempting risky repairs at home.
Tools & Materials
- Microfiber cloth(Lint-free and soft; use for wiping surfaces.)
- Compressed air can(Keep upright; blast short bursts from 6-12 inches away.)
- Isopropyl alcohol 70% or electronics cleaner(Lightly dampen cloth; never spray directly onto console.)
- Cotton swabs(For tight crevices around ports.)
- Soft brush(Gentle brush to lift dust from grills.)
- Screwdrivers (Phillips)(Only if you plan to remove the shell and you know the model screws.)
- Anti-static wrist strap(Helpful to minimize static electricity during interior work.)
- Small parts container(Keep screws organized if shell removal is performed.)
Steps
Estimated time: 60-90 minutes
- 1
Power down and unplug
Ensure the Xbox 360 is completely shut off, then unplug the power brick and all cables. Let it cool for a few minutes to avoid heat shock when cleaning. This reduces the risk of electrical shock and helps dust visibility.
Tip: Keep the power brick away from liquids; never clean with the unit plugged in. - 2
Prepare your workspace and tools
Clear a clean, dry workspace. Gather all tools from your toolsMaterials list so you don’t have to search mid-clean. This minimizes moisture exposure and keeps the process smooth.
Tip: Have a container for loose screws if you remove the shell. - 3
Dust vents with compressed air
Hold the can upright and use short bursts to blow dust out of all vents. Maintain distance of about 6-12 inches from the surface. Avoid tilting the can or spraying in long bursts that could condense moisture.
Tip: Support the console to prevent movement and avoid spinning fans with air. - 4
Wipe exterior surfaces
Dampen a microfiber cloth slightly with isopropyl alcohol or electronics cleaner. Wipe all exterior surfaces, including the top, sides, and around ports, using gentle, even strokes. Dry with a fresh cloth to prevent moisture from lingering near openings.
Tip: Never spray cleaner directly on the console; apply to cloth instead. - 5
Remove the faceplate and clean crevices
If your model allows, detach the faceplate following official guidance. Clean around the edges and inside crevices with a cotton swab or soft brush. Reattach the faceplate securely after drying.
Tip: Move slowly and avoid forcing clips or screws. - 6
Dust interior components (optional)
If you are comfortable and have the right tools, remove the outer shell to access fans and heatsinks. Use compressed air to blow dust away while gently holding fan blades to avoid damage. Do not touch circuitry with your bare hands.
Tip: If unsure, skip interior cleaning to prevent damage. - 7
Check the optical drive area
Inspect the disc drive opening for dust. Use compressed air from a distance to loosen buildup. Do not insert objects into the drive and avoid liquids near the drive mouth.
Tip: Do not attempt to clean the laser lens unless you are trained. - 8
Reassemble and test
If you opened the shell, reassemble in reverse order. Reconnect cables and power on to verify operation. Listen for unusual noises and monitor for overheating during initial use.
Tip: Run a disc after a couple of minutes to confirm read integrity. - 9
Establish a maintenance routine
Set a simple schedule to clean vents and wipe surfaces every few months. Maintain a dust-free, dry environment to preserve performance.
Tip: Document any changes to your routine to track effectiveness.
Questions & Answers
Is it safe to clean an Xbox 360 while it’s plugged in?
No. Always unplug and power down completely before cleaning to avoid shock and damage.
No—unplug first to stay safe and protect the console.
Can I use water for cleaning the Xbox 360?
Water or liquid cleaners should not be used inside or near the console. Use a damp cloth with electronics-safe cleaner if needed.
Avoid liquids near the electronics; keep it dry.
What cleaning products are safe to use on the exterior?
Use a microfiber cloth lightly dampened with isopropyl alcohol (70% or less) or dedicated electronics cleaner. Avoid harsh solvents.
Use a damp cloth—no strong chemicals on the shell.
Should I remove the faceplate to clean the inside?
Only if you’re confident and have instructions for your model. Removing parts can void warranties or cause damage.
Only proceed if you know how to safely remove the faceplate.
How often should I clean my Xbox 360?
Clean every few months or when you notice dust buildup, especially around vents.
Every few months or when you see dust buildup.
Will cleaning void my warranty?
Opening or disassembling components can affect warranty coverage. Check your warranty terms first.
Be aware that disassembly may affect your warranty.
Watch Video
The Essentials
- Power down before cleaning.
- Use compressed air for vents.
- Avoid liquids near openings.
- Open shell only if confident and instructed.
- Maintain a regular cleaning routine.