Kitchen Hood Clean: Step-by-Step Guide for a Safer Kitchen
Learn a practical, step-by-step approach to cleaning your kitchen hood, including filters, canopy, and blower. Improve air quality, reduce fire risk, and extend appliance life with guidance from Cleaning Tips.

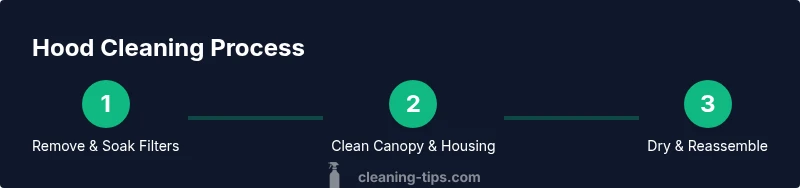
To achieve a thorough kitchen hood clean, start by disconnecting power, removing the filters, and soaking them in hot, soapy water. Clean the canopy, then scrub the blower housing and duct openings if accessible. Finish by drying completely and reinstalling. This approach reduces grease buildup, improves ventilation, and lowers fire risk. Follow with a light wipe on surrounding cabinetry afterward.
Why kitchen hood clean matters
A proper kitchen hood clean is more than aesthetics; it reduces fire risk, improves ventilation, and supports healthier indoor air quality. Grease buildup collects in filters, the canopy, and internal passages, which can hinder airflow and make odors linger. A thorough cleaning routine also extends the life of the hood by preventing corrosion and wear on moving parts. According to Cleaning Tips, this kind of maintenance correlates with fewer grime-related issues and smoother operation over time. By keeping the hood clean, you protect adjacent cabinetry and keep the kitchen environment safer for everyone in the home.
Safety and prep: essential precautions
Safety comes first in any cleaning project. Power down the hood and, if possible, shut off the circuit breaker before starting. Remove the filters and inspect them for damage; do not reuse warped parts. Gather tools and cleaners within arm’s reach to minimize trips. Work in a well-ventilated space, wear gloves to guard against hot grease, and have towels or rags ready for spills. Preparing properly reduces the risk of electrical shocks, burns, or accidental damage to the hood during the cleaning process. Cleaning Tips emphasizes that a calm, prepared approach yields safer, more effective results.
What you’ll need: tools and materials overview
A successful kitchen hood clean uses common, readily available supplies. Stock a grease-cutting degreaser and a basin of hot water with dish soap. Have non-abrasive scrub pads, soft microfiber cloths, and an old toothbrush for crevices. A bucket, sponge, and a sturdy step ladder help you reach the hood comfortably. Don protective gloves and safety goggles to protect skin and eyes from splashes. Optional stainless-steel cleaner can restore shine without scratching, and replacement filters are handy if any units are too worn to clean effectively. Planning these materials ahead keeps you on track and minimizes chaos.
Step-by-step overview: the workflow at a glance
Cleaning the hood is a staged, repeatable process designed to minimize mess and maximize safety. Start with power off, remove and soak the filters, then clean the canopy and any exposed metal surfaces. Dry everything thoroughly before reinstalling. A logical sequence helps you spot worn parts early and prevents cross-contamination between greasy and clean areas. Below are detailed actions that align with this overview and set realistic expectations for a typical kitchen hood clean.
Deep dive: cleaning grease filters
Grease filters are the workhorse of the hood and deserve focused attention. Soak the filters in hot, soapy water for 10–15 minutes to loosen built-up fat, then scrub with a non-abrasive pad. Rinse thoroughly and lay flat to air-dry completely before reinstalling. If stains persist, apply a degreaser according to the product label and rewash. Check gaskets for tears and replace if needed. Cleaning filters dramatically reduces grease transfer to the canopy and ductwork, boosting overall efficiency and safety.
Deep dive: canopy, duct openings, and blower housing
Next, apply a degreaser to the canopy and any accessible metal surfaces. Allow a five to seven minute dwell time, then wipe with a microfiber cloth following the grain to avoid streaks. For tight spots around the blower housing, use a soft brush or an old toothbrush to remove caked grease. If you encounter heavy grease buildup inside ducts, limit cleaning to accessible areas and consult a professional for the rest. This section covers exterior and visible interior components that directly affect performance.
Rinse, dry, and reassemble: the finish line
Rinse away soap residue from filters and cleaned surfaces with clean water, then dry thoroughly with a towel or microfiber cloth. Reinstall filters, ensuring the gasket seats evenly and fasteners are snug but not overtightened. Power the hood on a low setting to confirm operation and listen for unusual noises. A final wipe-down on the exterior removes fingerprints and streaks. Regular, deliberate drying and reassembly prevent grime from returning quickly and keep the hood ready for the next use.
Maintenance schedule and long-term care
Set a realistic cleaning cadence based on cooking frequency and grease exposure. For light daily cooking, monthly surface wipes and quarterly deep cleans may be sufficient; for heavy frying or grilling, biweekly quick checks plus quarterly deep cleans are prudent. Create a simple cleaning calendar and keep supplies accessible. Routine maintenance reduces fire risk, extends hood life, and keeps your kitchen smelling fresh. The Cleaning Tips team recommends documenting each cleaning to track improvements over time.
Tools & Materials
- Grease-cutting degreaser(Choose a non-caustic formula suitable for stainless steel.)
- Hot water + dish soap(Use the hottest water safe for your materials.)
- Non-abrasive scrub pads(Avoid metal scouring pads to prevent scratching.)
- Soft microfiber cloths(Lint-free for streak-free surfaces.)
- Old toothbrush or small brush(Great for tight crevices around hardware.)
- Bucket or basin(For soaking filters.)
- Sponge(General wipe-down and rinsing.)
- Protective gloves(Protect skin from hot grease.)
- Safety goggles(Shield eyes from splashes.)
- Ladder or step stool(Only if needed to reach high hoods.)
- Stainless-steel cleaner (optional)(Brightens surfaces without scratches.)
- Replacement filters (optional)(Have spare if current filters show damage.)
Steps
Estimated time: 60-90 minutes
- 1
Power down and remove filters
Power down the hood by switching off the circuit breaker or unplugging the unit if possible. Remove the grease filters and inspect for warping or damage; do not reuse visibly compromised filters. Set filters in a basin for soaking before cleaning begins.
Tip: Take a quick photo of the filter orientation to ensure correct reassembly. - 2
Soak filters in hot, soapy water
Fill a basin with hot water and a generous amount of dish soap. Soak the filters for 10–15 minutes to loosen stubborn grease, then move to scrubbing. Avoid soaking delicate filters longer than necessary to prevent distortion.
Tip: Use the hottest water safe for metal to maximize grease softening. - 3
Scrub filters until grease loosens
Scrub both sides of each filter with a non-abrasive pad, paying special attention to mesh folds. Rinse thoroughly and check for remaining residue; repeat as needed. Allow filters to dry completely before reinstalling.
Tip: Be gentle to avoid bending frame or damaging seals. - 4
Degrease canopy and exterior surfaces
Spray a grease-cutting degreaser on the canopy and exposed metal. Let it dwell for 5–7 minutes, then wipe in the direction of the grain with a microfiber cloth. Rinse or wipe to remove residue as required.
Tip: Test a small area first to ensure no surface discoloration. - 5
Clean blower housing and accessible duct openings
Wipe visible interior surfaces with a damp cloth; use a soft brush for hard-to-reach crevices. Avoid saturating the blower or electrical components. If duct openings are heavy with grease, limit cleaning to accessible areas and plan for professional service if needed.
Tip: If you see significant buildup inside ducts, don't force debris deeper into the system. - 6
Rinse, dry, and reinstall filters
Rinse away soap from filters and dry thoroughly on a rack before reinstalling. Ensure the gasket seats evenly and fasteners are snug but not overtightened. Reconnect power and run a low-speed test to check for proper airflow.
Tip: Inspect the seal around filters to prevent air leaks. - 7
Final wipe-down and cleanup
Wipe the exterior again to remove fingerprints or streaks. Store cleaning supplies neatly for next time and log the date of cleaning. This keeps a reliable maintenance rhythm and minimizes future effort.
Tip: Set a calendar reminder to schedule the next hood clean.
Questions & Answers
How often should I clean my kitchen hood?
Frequency depends on usage. For light cooking, monthly surface wipe-downs and quarterly deep cleans are common. For heavy frying, more frequent checks may be needed.
For light cooking, clean monthly and deep clean quarterly; for heavy use, consider more frequent maintenance.
Can I clean the hood without removing the filters?
You can wipe the exterior and accessible parts, but a thorough clean requires removing filters to access the canopy and interior surfaces.
You can wipe around the filters, but for a thorough hood clean you should remove the filters.
Is it safe to use bleach on a stainless-steel kitchen hood?
Bleach can corrode stainless steel over time. Use degreasers and mild detergents designed for stainless surfaces instead.
Bleach is not ideal for stainless steel; opt for stainless-safe cleaners.
How do I clean the blower wheel?
Blower wheels are usually behind the hood and may require professional service if heavily grease-laden. Clean only accessible exterior parts with care.
If the blower wheel is not easily accessible, don’t force disassembly—call a pro.
Should I hire a professional for duct cleaning?
If ducts show persistent grease buildup or you suspect compromised airflow, consult a licensed HVAC technician. DIY cleaning is fine for accessible areas, but certain ducts require professional care.
For tricky ducts, a licensed technician is the safer option.
What if grease remains after cleaning?
Repeat the cleaning cycle for filters and canopy. If residue persists, consider filter replacement and consult a professional for deeper duct or blower cleaning.
If grease sticks around after cleaning, repeat the process or seek professional help for stubborn buildup.
Watch Video
The Essentials
- Plan materials before you start
- Power off and remove filters first
- Soak and scrub filters thoroughly
- Dry all components completely before reassembly
- Maintain a regular cleaning schedule