What Clean Corrosion: Safe, Simple Cleaning Guide
Learn how to safely remove corrosion from common home surfaces and prevent future damage. This Cleaning Tips guide covers cleaners, steps, safety, and maintenance for stainless steel appliances, sinks, faucets, and other metal fixtures.

Goal: Learn how to safely remove corrosion from common home surfaces and prevent future damage. This quick answer outlines when cleaning is appropriate, the best beginner-friendly cleaners, essential safety steps, and a practical sequence you can follow for stainless-steel appliances, sinks, faucets, and other metal fixtures.
What is clean corrosion and why it matters
Corrosion is the gradual deterioration of metal caused by chemical reactions with moisture, salts, or acids. When surfaces corrode, they can weaken, stain, and lose shine. The phrase what clean corrosion describes a practical goal: removing the visible corrosion while preserving the underlying material and texture. In home environments, corrosion most commonly affects stainless steel appliances, bathroom fixtures, copper pipes, and aluminum surfaces. Effective cleaning reduces health risks, prevents staining, and extends the life of fixtures. This guide focuses on safe, accessible methods you can use with common household cleaners. Throughout this article you will see the phrase what clean corrosion used to emphasize the actions that restore metal surfaces without damage. According to Cleaning Tips, a cautious, methodical approach yields the best long‑term results for homeowners and renters alike. The goal is never to rush, but to verify that all signs of corrosion are removed before applying protective steps to prevent recurrence.
Common sources and signs of corrosion in the home
Corrosion in household environments is usually triggered by moisture, salts, and acids that interact with metal surfaces over time. You’ll often see it on stainless steel sinks and appliances, chrome fixtures, copper pipes, aluminum cookware, and even the bolts in furniture. Signs include reddish-brown rust, pitting, discoloration, dulling, and flaking coatings. The best way to tackle these issues is to identify the surface, assess how deeply the corrosion has penetrated, and choose a cleaning method that preserves finish. Early-stage corrosion can often be addressed with mild cleaners, while more stubborn staining may require targeted rust removers. Regular inspection of faucets, drains, and appliance seals helps catch problems before they escalate. Cleaning Tips emphasizes documenting the area before you start, which helps track changes as you work toward removing corrosion and restoring shine.
Safety first: risks and precautions
Safety is a critical foundation when removing corrosion. Always wear gloves and eye protection, work in a well-ventilated area, and never mix cleaners that could react violently (for example, Avoid combining bleach with acids like vinegar or citric acid). Read and follow cleaner labels, especially on sensitive finishes. Test any cleaner on a small, inconspicuous area first to confirm it won’t damage the surface. If you’re cleaning near electrical components or water lines, take extra care to disconnect power or shut off water as needed. By prioritizing safety, you minimize the risk of chemical burns, fumes, or unintended surface damage while addressing corrosion effectively.
Choosing the right cleaners for corrosion
A balanced toolkit helps you handle corrosion safely and effectively. For light stains, mild dish soap with warm water is often enough, followed by thorough drying. White vinegar or lemon juice can be effective against mineral deposits and light rust; create a small amount of cleaner in a spray bottle and apply for a few minutes before scrubbing. A baking soda paste provides gentle abrasive action without scratching finishes. For tougher corrosion, consider a purpose-made rust remover labeled safe for stainless steel—always apply in a well-ventilated area and rinse completely. Avoid abrasive pads on polished or brushed finishes and never rely on chlorine bleach on aluminum or certain coatings. Cleaning Tips recommends starting mild and escalating only if necessary, to protect both your surfaces and your health.
Natural and mild cleaning options
There are several natural or mild approaches that can resolve corrosion without harsh chemicals. A baking soda paste (baking soda + water) provides gentle abrasion and alkalinity that helps lift rust without scratching. White vinegar (diluted if needed) can help dissolve mineral deposits; apply, let sit briefly, then rinse. Citric acid powder dissolved in water is another gentle, food-safe option that tackles mineral buildup on metal surfaces. For most household corrosion tasks, combine these methods with a soft microfiber cloth for delicate polishing and a non-scratch scrub pad for stubborn spots. Always rinse thoroughly and dry to prevent reformation of the corrosion.
Step-by-step approach to removing corrosion from stainless steel surfaces
When dealing with corrosion on stainless steel, adopt a methodical approach that preserves the finish. Start with gentler cleaners and escalate only if needed. Avoid harsh abrasive tools that can scratch the surface. Document your progress as you go, so you can repeat successful steps and identify any spots that require extra attention. For longer-lasting results, finish with a light wipe of a food-safe oil or dedicated stainless steel conditioner to slow future corrosion formation. This section lays the groundwork for the detailed Step-by-Step guide, which provides explicit actions and cautions for effective results with what clean corrosion concerns.
Preventing future corrosion with maintenance
Prevention is easier than remediation. After you remove corrosion, establish a routine to keep metal surfaces dry and protected. Wipe down sinks, faucets, and appliances after use to reduce moisture exposure. Keep humidity levels in check, especially in bathrooms and laundry rooms, with an exhaust fan or dehumidifier. Sealants and protective coatings designed for metal finishes can add a barrier against moisture and salts, while soft cloths prevent micro-scratches that can harbor corrosion. Regular inspections help you catch early signs of wear, enabling prompt intervention before corrosion becomes more serious.
When to call a professional
If corrosion covers large areas, has compromised the integrity of the metal, or involves electrical components, do not delay professional help. A licensed technician can assess structural concerns, provide specialized rust remediation, and ensure electrical safety. In some cases, persistent stains may indicate underlying issues like water leaks or corrosion under coatings that require more invasive intervention. Your safety and the long-term health of your fixtures depend on recognizing when professional assessment is warranted.
Tools & Materials
- White vinegar (5-10% acidity)(Effective mild cleaner; do not mix with bleach)
- Baking soda(Make a paste with water for gentle abrasion)
- Lemon juice(Optional boost for acidity and deodorizing effect)
- Dish soap(Mild degreaser to loosen grime before treatment)
- Soft microfiber cloth(Lint-free for gentle polishing)
- Non-scratch scrub pad(For stubborn spots without scratching)
- Spray bottle(For even cleaner application)
- Gloves (nitrile or rubber)(Protect skin from cleaners and rust irritants)
- Citric acid powder(Alternative mild cleaner for mineral deposits)
Steps
Estimated time: 60-90 minutes
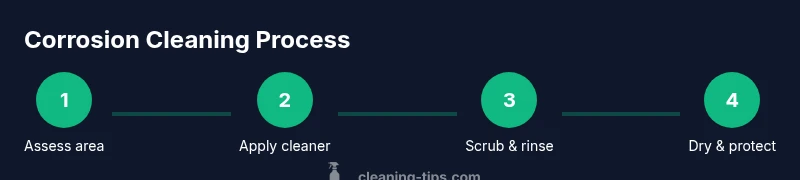
- 1
Assess area and safety
Identify all corroded spots and determine surface type. Put on gloves and eye protection, ensure ventilation, and remove nearby items that could be damaged by cleaners. This initial scan helps tailor the cleaning approach and prevents accidental damage.
Tip: Take a quick photo before you begin to compare progress. - 2
Remove loose corrosion
Dampen a microfiber cloth and gently wipe away loose rust and grime. Avoid aggressive scrubbing that can scratch the finish. If the corrosion is stubborn, switch to a non-scratch scrub pad after testing in a small area.
Tip: Always test a small area first to avoid surface damage. - 3
Apply mild cleaner
Spray or apply a thin layer of vinegar or baking soda paste to the corroded area. Let sit for 5–10 minutes to soften mineral deposits and oxidized layers before scrubbing again. Rinse lightly to remove residues between scrubbing passes.
Tip: Do not let cleaner dry completely on sensitive finishes. - 4
Scrub and rinse
Use a soft microfiber cloth or non-scratch pad to scrub the area in the direction of the grain or polish. Rinse with clean water and wipe away all cleaner remnants. Repeat if necessary, but avoid over-scrubbing.
Tip: Keep a shallow tray of water to minimize waste and spills. - 5
Dry thoroughly and inspect
Dry the surface completely with a clean cloth. Check for remaining signs of corrosion and repeat steps if needed. Residual moisture is a primary cause of future rust, so ensure dryness before finishing.
Tip: A heat source like a hair dryer on low can speed drying in damp areas. - 6
Protect and maintain
If the surface finish allows, apply a light coat of mineral oil or a stainless-steel conditioner to slow future corrosion. Wipe away excess and re-check after 24 hours to ensure no new moisture exposure remains.
Tip: Avoid oily residues on kitchen surfaces that contact food. - 7
Document and monitor
Record where corrosion appeared and how you treated it. Regularly monitor these areas, especially after humidity spikes. A quick monthly wipe can prevent future corrosion from taking hold.
Tip: Set a reminder to re-evaluate every 30 days.
Questions & Answers
What causes corrosion on household metal surfaces?
Corrosion typically results from moisture, salts, and acids reacting with metal. Poor ventilation can accelerate the process, as can repeated exposure to water. Early signs include staining, dullness, and light rust that responds to gentle cleaners.
Corrosion happens when moisture and salts react with metal. Good ventilation helps slow it down and protects your fixtures.
Can I use bleach or chlorine for cleaning corrosion?
Bleach can worsen corrosion on some metals and damage coatings. It’s generally not recommended for stainless steel or aluminum. Use milder cleaners unless a professional advises otherwise.
Bleach can make corrosion worse on many metals, so avoid using it for this purpose.
Is vinegar safe for cleaning corrosion?
Vinegar is a mild acid that can help loosen rust on many metal surfaces. Test first on a small area and avoid long soaks on polished finishes. Rinse well after use.
Vinegar can help but always test first and don’t soak sensitive finishes.
How long does rust removal take?
Time depends on how deep the corrosion is. Light staining may take only minutes, while heavier rust could require multiple short sessions spread over a few days.
It varies—light stains may be quick, heavy rust can take longer.
Will corrosion return after cleaning?
If moisture exposure continues, new corrosion can form. Dry surfaces thoroughly and consider protective coatings to slow reoccurrence.
Rust can come back if you don’t address moisture; stay on top of maintenance.
When should I call a professional?
If corrosion covers large areas, weakens structural metal, or involves electrical components, seek a professional assessment. Do not attempt hazardous chemical removal in such cases.
Call a professional if corrosion is extensive or near electrical parts.
Watch Video
The Essentials
- Act quickly to remove corrosion before it penetrates deeper.
- Always test cleaners on a hidden patch first.
- Dry surfaces completely to prevent reformation of rust.
- Avoid mixing cleaners that produce hazardous reactions.
- Establish a routine maintenance plan to minimize future corrosion.