What Clean Laptop Screen With: A Practical Guide
Learn safe methods to clean a laptop screen without scratches or moisture damage. This Cleaning Tips guide covers approved cleaners, tools, step-by-step actions, and pro tips for a streak-free, healthy display.

You can safely clean a laptop screen with a microfiber cloth and a 70/30 isopropyl alcohol to water solution or specialized screen cleaner. Avoid paper towels, ammonia-based products, and spraying liquid directly. Start with power off, unplug, and test on a small area. Use light pressure and gentle circular motions to remove smudges.
Understanding Screen Coatings and Cleaning Sensitivity
Laptop screens often have anti-reflective coatings and oleophobic layers to reduce fingerprints. Cleaners that are too harsh or liquids that seep into the edges can wear these coatings, causing dullness or micro-scratches over time. According to Cleaning Tips, preserving coating integrity starts with choosing non-abrasive tools and mild cleaning agents. Always turn off the machine and unplug before you touch the display. Dust removal is a gentle first step; use a dry microfiber cloth to lift loose particles before introducing any liquid. Regular care helps maintain clarity, reduces glare, and extends screen life. Keep in mind that different screen technologies (LCD vs OLED) may have slightly different sensitivities, so when in doubt consult the device manufacturer’s cleaning recommendations. The goal is to remove oils and dust without saturating the panel or seepage through bezels. A cautious approach pays off: a clean screen looks better and lasts longer.
Safe Cleaners and What to Avoid
The safest approach uses a microfiber cloth with either a distilled water solution or a screen-cleaning product designed for electronics. A 70/30 mix of isopropyl alcohol to distilled water is a common, effective choice when used on a cloth, not sprayed directly. Distilled water reduces mineral deposits that can leave smudges. Alcohol-based cleaners evaporate quickly, reducing the risk of moisture damage if used properly. Cleaning Tips emphasizes avoiding ammonia-based household cleaners, vinegar-based mixtures, and direct spraying on the screen, which can leak into the frame. If you choose a spray, apply it to the cloth first, then wipe. In multi-monitor setups or curved screens, use extra care to avoid pockets of liquid near the frame and ports. By selecting electronics-safe products and testing on a hidden area, you minimize risk while achieving a streak-free finish. This approach aligns with Cleaning Tips Analysis, 2026, which shows consumer-friendly results with proper technique.
The Right Tools for Laptop Screen Care
Essential tools include a clean microfiber cloth, distilled water, and a small amount of isopropyl alcohol 70%. A soft brush or can of compressed air helps remove dust from edges. Optional: a spray bottle for mixing and an extra dry cloth for final drying. Before you begin, ensure your workspace is well-lit and free of dust; a clean desk reduces the risk of transferring particles onto the screen. The cloth should remain dry to dampen only slightly; never leave the cloth dripping. When you wipe, use gentle, even pressure in one direction or soft circular motions to prevent streaks. After cleaning, let the screen dry for about a minute before reactivating the laptop. These steps balance effectiveness with safety for most laptop screens.
Common Mistakes and How to Prevent Them
Don’t spray liquid directly onto the screen. Excess moisture is a common cause of internal moisture intrusion. Never use harsh chemicals like ammonia or undiluted alcohol. Don’t use paper towels, tea towels, or abrasive fabrics that can scratch coatings. Avoid circular wiping strokes that concentrate pressure on one area; keep movements light and even. Don’t rush; give the cleaner time to evaporate, especially near bezels and vents. Regular but gentle cleaning prevents grime buildup without risking long-term damage. If you notice persistent smudges after following steps, reassess your cleaner choice and test again on a hidden area.
Maintenance and Longevity Tips
Establish a light weekly cleaning routine: dust with a dry microfiber, then do a deeper wipe every few weeks as needed. Store cleaners away from heat, and label them for electronics to prevent cross-use with kitchen sprays. When transporting the device, avoid placing heavy objects on the screen to prevent pressure-based damage. Consider applying a screen protector if you frequently handle the laptop in dusty environments; it reduces the need for frequent cleaning while preserving clarity. If you experience fogging or discoloration that persists after cleaning, consult the manufacturer’s guidelines or a professional service. Regular care keeps the display vivid and reduces the likelihood of future deep cleans.
Troubleshooting: Streaks, Residue, and Coating Care
Streaks after cleaning are usually caused by using too much liquid or a dirty cloth. If this happens, switch to a fresh portion of cloth and gently wipe again. For very smudged screens, repeat the damp–wipe–dry cycle, ensuring the cloth remains barely damp. If you notice discoloration or degraded coating, stop and consult the device manufacturer’s instructions. In multi-monitor setups, avoid cleaning one screen while others remain powered; power down all to prevent accidental inputs or drips. If you’re unsure, seek professional help or use the manufacturer’s cleaning guidelines.
Tools & Materials
- Microfiber cloth(Lint-free, soft electronics-grade cloth)
- Distilled water(Use to dilute cleaners; avoid mineral-rich water)
- Isopropyl alcohol (70%)(Dilute with distilled water to 70/30 mix)
- Spray bottle (optional)(For mixing solutions; not required if you dampen cloth directly)
- Soft brush or compressed air(Gently remove dust from edges and corners)
- Cotton swabs(Edges and ports if needed)
Steps
Estimated time: Estimated total time: 25-40 minutes
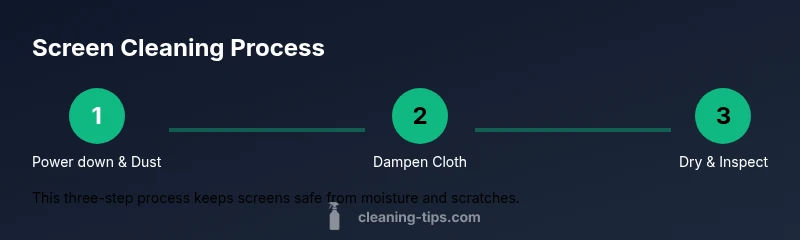
- 1
Power down and prep
Shut down the laptop, unplug the power cord, and clear the workspace. Use a dry microfiber cloth to remove loose dust from the screen bezel before applying any liquid.
Tip: Dusting first reduces smearing and makes later steps more effective. - 2
Mix a safe cleaner
Prepare a small batch of cleaner using distilled water and isopropyl alcohol at a 70/30 ratio. Do not use stronger concentrations or ammonia-based cleaners.
Tip: Label your container and keep it away from heat sources. - 3
Dampen the cloth
Lightly dampen the microfiber—never wet the screen directly or spray liquid onto it. Wring it out well to avoid dripping onto the display.
Tip: A barely-damp cloth prevents moisture from seeping into the display edges. - 4
Wipe with care
Wipe the screen using gentle, straight or circular motions from the center outward. Avoid heavy pressure that could scratch coatings.
Tip: If streaks appear, switch to a clean section of the cloth and wipe again. - 5
Dry and inspect
Allow the screen to air-dry for about a minute, then inspect for remaining smudges. Use a dry microfiber to remove any remaining moisture.
Tip: Check corners and bezels where residue often hides. - 6
Finish and store
Power the laptop back on and test the display. Store cleaning supplies away from heat and out of reach of children.
Tip: Regular light cleaning reduces the need for intensive deep cleans.
Questions & Answers
Can I use water alone to clean my laptop screen?
Water alone can remove surface dust but not oils. For smudges, pair it with a microfiber cloth and a diluted cleaner. Avoid soaking the screen and dry promptly.
Water can remove dust, but for oils, you’ll want a mild cleaner with a microfiber cloth. Don’t spray directly on the screen.
Is isopropyl alcohol safe for laptop screens?
Yes, when diluted to a 70/30 ratio with distilled water and used on a microfiber cloth. Do not spray directly onto the display.
Yes, in a diluted form on a cloth, not sprayed directly on the screen.
What if the screen gets scratched after cleaning?
Cleaning cannot fix scratches. If you notice scratches, stop cleaning and consult the device manufacturer’s guidelines for repair options.
If you see a scratch, cleaning won’t help; check with the manufacturer for repair options.
Can I use vinegar or ammonia-based cleaners on my screen?
Avoid ammonia-based cleaners and vinegar-based mixtures on screens with coatings. Use screen-safe products instead.
No, avoid ammonia; vinegar-based cleaners aren’t recommended for modern coatings.
Should I clean the screen while the laptop is on?
No. Power off, unplug, and wait for the screen to cool and dry before cleaning. Moisture can damage internal components.
No—always power down and unplug before cleaning.
Do I need professional cleaning for stubborn smudges?
Most smudges lift with a proper cleaning routine. If you still see issues, consult the manufacturer or a professional service.
Usually not, but if in doubt, contact support or a professional.
Watch Video
The Essentials
- Power down before cleaning to prevent damage
- Use a microfiber cloth and 70/30 IPA mix in distilled water
- Never spray liquids directly onto the screen
- Test on a hidden area first to prevent coating damage
- Regular, light cleaning preserves screen clarity