What Equipment Is Needed for Duct Cleaning
Discover the essential equipment for duct cleaning, with DIY tools, professional gear options, safety tips, and cost considerations to improve indoor air quality.

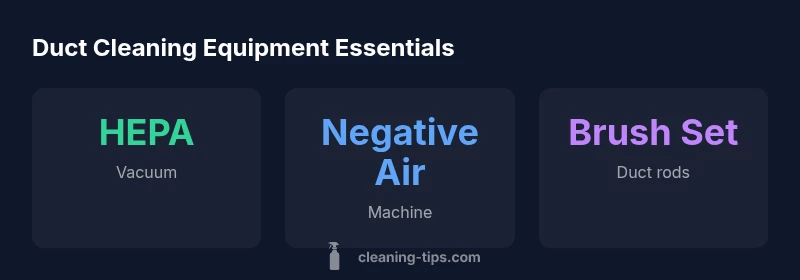
To clean air ducts effectively, you typically need a HEPA-equipped vacuum, a negative-air machine or portable air scrubber, brushes and rods for agitation, access tools to reach ducts, a camera or borescope for inspection, and proper PPE. Higher-efficiency systems may require containment barriers and duct-sealing materials. Renting or buying these tools depends on project size and whether you hire professionals.
What equipment is needed for duct cleaning: overview
Duct cleaning is a targeted operation that combines dust containment, access planning, mechanical agitation, and verification. The question what equipment is needed for duct cleaning is best answered by grouping tools into four essential categories: containment and dust control, access and inspection, cleaning and agitation, and documentation. In residential settings, most ducts are accessible from a few points; in larger homes or multi-unit buildings, you’ll encounter longer runs that require more planning and gear. Before you buy or rent anything, map the ductwork: note supply and return paths, identify the most awkward elbows, and decide whether you’ll work from a single closet, a crawl space, or an attic. Containment is often the first safety layer: using plastic barriers and negative pressure reduces the spread of dust to living areas. Then you approach each run with the right brushing tools and suction to break and remove debris without damaging duct surfaces. Finally, you document the as-found conditions and post-clean results to verify improvement. Cleaning Tips emphasizes that the best results come from a well-coordinated kit rather than a grab-bag of tools. If contaminants like mold or pests are present, or if you are dealing with specialized metal or fiberglass ducts, you’ll need additional gear and possibly professional oversight.
Core tools for manual cleaning
Manual cleaning relies on a combination of brushes, rods, and carefully chosen materials to avoid abrasion. The core tools include a brush and rod kit with rigid and flexible rods, soft-bristle or synthetic brushes, angled attachments to reach corners, and containment measures to keep debris from spreading. Use protective drop cloths and a dedicated vacuum wand to focus suction at duct openings. For different duct types—metal, fiberglass, or flexible—select brushes with appropriate stiffness to prevent surface damage while dislodging built-up dust. Always test a small, inconspicuous area first and work gradually to avoid creating new debris elsewhere. A well-rounded manual kit reduces the need for aggressive methods that could harm duct integrity while still delivering measurable improvements in air quality.
Vacuum and negative-pressure systems: essential for containment
A high-quality HEPA-equipped vacuum is a cornerstone of duct cleaning, especially for residential systems where occupants are present. Pair this with a negative-air machine or portable air scrubber to create containment and minimize dust escape during the cleaning process. Negative pressure helps keep debris anchored to the work area, while HEPA filtration captures fine particles. For larger jobs or multi-unit buildings, dedicated negative-pressure setups with sealed containment barriers can provide safer, more controlled cleaning conditions. When selecting equipment, verify that filters are intact, seals are airtight, and the machine is rated for the expected airflow. Renting is common for short-term projects, but ensure rental terms include maintenance support and clear return conditions.
Access, inspection, and measurement tools
Effective duct cleaning starts with a solid inspection routine. Use a camera or borescope to survey inside runs, identify buildup, mold, or pests, and document pre-clean conditions. Inspection mirrors and flexible inspection tools help you navigate tight elbows and cramped plenums without excessive disassembly. Access tools—such as extendable rods, unlockable panels, and quick-release connectors—facilitate reaching distant sections of the system. Documentation is critical: photograph or video pre- and post-clean states, maintain a running checklist of ducts cleaned, and note any repairs needed. Regularly updating your inspection protocol ensures you can justify the work if a homeowner or landlord questions the effort.
Safety gear, PPE, and best practices
Safety first: always wear PPE appropriate for the job, including an N95 respirator or higher, protective eyewear, gloves, and coveralls. Protect adjacent rooms with physical barriers to prevent cross-contamination. Ventilate the area during and after cleaning, and continually monitor for signs of moisture, mold, or structural damage. If you encounter mold growth beyond mild surface contamination, halt the cleaning and consult a licensed HVAC professional. Following manufacturer guidelines for duct materials, speed limits on brushes, and airflow thresholds helps protect both the system and your health. A methodical, stepwise approach reduces the risk of releasing settled dust into living spaces.
DIY vs professional equipment rental and service bundles
Understanding when to DIY and when to hire a professional is central to effective duct cleaning. For simple homes with accessible ducts, a well-chosen DIY kit may suffice. For complex systems, multi-unit buildings, or ducts with visible mold, hiring a pro provides access to high-end containment, specialized tools, and post-clean verification. If you go DIY, plan for equipment rental costs, potential time on-site, and the possibility of follow-up inspections. For larger jobs, consider a service bundle that includes equipment, labor, and post-clean results documentation. Cleaning Tips suggests evaluating the duct layout, contamination level, and occupant sensitivity before deciding.
Maintenance and storage of duct-cleaning gear
After cleaning, properly clean each tool before storage to prevent transfer of dust between jobs. Dry brushes, rods, and attachments thoroughly, then store them in sealed containers or dedicated bins to protect against moisture and dust. Keep HEPA filters clean and replace them according to manufacturer recommendations. Label storage bins by duct section and equipment type, and perform periodic checks for wear, cracks, or loose fittings. Regular maintenance extends tool life and reduces the risk of cross-contamination on future projects.
Equipment overview for duct cleaning
| Tool/System | Purpose | Typical Cost (range) | Notes |
|---|---|---|---|
| HEPA Vacuum | Dust containment and debris removal | $150–$1,000 | Rent or purchase; ensure HEPA filter |
| Negative Air Machine | Create negative pressure and isolate area | $400–$2,000 | Often rented for projects |
| Brush and Rod Kit | Dislodge debris from ducts | $30–$200 | Rigid vs. flexible rods; choose by duct type |
| Inspection Camera/Borescope | Inspect ductwork and confirm cleanliness | $100–$600 | Pre/post inspections essential |
Questions & Answers
What equipment is essential for a basic DIY duct cleaning?
A basic DIY kit includes a HEPA vacuum, flexible brush rods, a camera or borescope for inspection, and PPE. You may also need access tools to reach ducts and containment to limit dust. For best results, follow duct manufacturer guidelines.
For a basic DIY clean, start with a HEPA vacuum, brush rods, a borescope, and your safety gear. Add access tools and containment as needed.
Can I rent professional duct cleaning equipment?
Yes. Renting professional-grade equipment is common for DIY projects. Ensure the rental includes HEPA filtration and proper containment, and be sure to return equipment in good condition.
Yes, you can rent professional gear with HEPA filtration and containment—just check the rental terms.
Is a HEPA vacuum necessary for duct cleaning?
A HEPA-rated vacuum is strongly recommended to minimize dust escape during cleaning, especially in occupied homes.
A HEPA vacuum is highly recommended to keep dust from spreading.
How do I know if my ducts need cleaning equipment?
If you notice visible dust, musty odors, or reduced airflow, you may need duct cleaning equipment. Start with a pre-cleaning inspection.
If you see dust or mold or a musty smell, consider this gear after an inspection.
What safety precautions should I take during duct cleaning?
Wear PPE, seal off the work area, ventilate, and follow manufacturer guidelines. If you encounter mold, discontinue and consult a professional.
Wear PPE, seal the area, and follow guidelines. If mold shows up, call a pro.
“Selecting the right equipment for duct cleaning not only improves air quality but also reduces cross-contamination when used with proper safety practices.”
The Essentials
- Assess your system before buying gear
- Prioritize HEPA filtration for safety
- Rent heavy machines if the project is large or infrequent
- Keep gear clean and stored properly
- Follow safety guidelines and manufacturer recommendations