When to Change Vacuum Cleaner Bag: A Practical Guide
Discover clear indicators, timing tips, and safe bag replacement steps to keep suction strong and air fresh. Learn how often to check by model and home life, plus maintenance ideas.

Knowing when to change your vacuum bag prevents reduced suction, clogged airflow, and musty smells. Check for a noticeably heavier canister, lower pick-up efficiency, or a full-looking bag through the bag window. For bagless models, inspect canister filters too. This guide covers timing, model variations, and safe, step-by-step replacement, plus maintenance tips to extend performance.
Why bag maintenance matters
Keeping the right bag in your vacuum is essential for effective cleaning and healthy indoor air. A clogged or full bag reduces suction, strains the motor, and can release fine dust back into the room. This matters whether you have carpet, hard floors, or pets that shed. According to Cleaning Tips, establishing a simple, observation-based routine helps homeowners avoid surprises and keeps cleaning tasks running smoothly. Before you reach for a replacement, learn the typical signs of a bag nearing capacity and how different vacuum designs influence replacement timing. In this section you’ll find practical benchmarks and consistent checks you can perform every few weeks, so you’re never guessing when to change the bag.
Indicators that a bag change is due
- Sudden drop in suction anywhere in the house.
- Bag appears visibly full or bulging, or the bag window shows color change.
- Unpleasant odor or burning smell after short cleaning bursts.
- More dust escaping around the bag area or increased debris in the canister.
- Last replacement was several months ago or you clean dust more often than normal.
Notes: Some vacuums show more subtle cues; for bagless models, examine the filter and canister separately.
How bag life varies by vacuum type
Bagged uprights often require changes every 1–3 months with typical household use; canister vacuums may stretch longer if you clean light messes. Bagless units rely on filters and canisters rather than disposable bags, so you’ll monitor a canister or cyclone housing. In homes with pets or heavy shedding, you’ll likely see quicker bag fullness and more frequent changes. Always refer to your manual for the manufacturer-recommended bag type and replacement interval, because wrong size or incompatible bag can reduce performance and void warranties.
What to check besides the bag
- Inspect the filter, both pre-motor and exhaust, for clogs.
- Look for tears or holes in the bag; if you can see light through the bag, it’s time to replace.
- Examine the housing seals for leaks that could pull air around the bag.
- Check the height and belt area to ensure nothing is jammed that could mimic a bag-full indicator.
Tip: A clean, free-flowing filtration system improves overall suction and prolongs bag life.
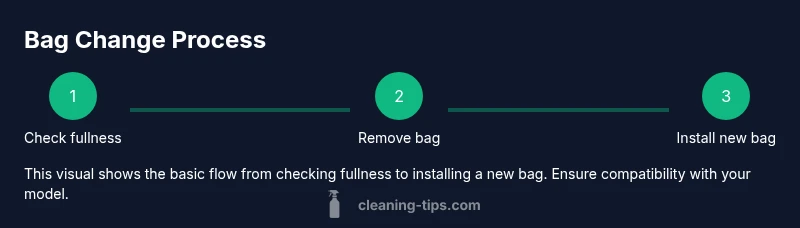
Step-by-step overview of a typical bag change
- Remove the canister lid, locate the bag, and prepare a trash bag.
- Gently slide the bag out without shaking to avoid dust clouds.
- Seal the old bag and place it in a trash bag before disposing.
- Install the new bag securely and reseal the compartment.
- Power on briefly to confirm airflow is restored.
Note: If your model uses motorized brush belts, check the belt after replacing the bag to ensure proper operation.
Safety and disposal best practices
- Unplug the vacuum before any bag handling.
- Do not force a bag that won’t fit; use the correct size.
- Wear gloves to minimize contact with dust; dispose of bag promptly.
- Dispose of the bag in the exterior trash if allowed by your local waste guidelines.
Pro tip: Keep a spare bag on hand so you’re never caught mid-cleaning.
Maintenance routines to extend bag life
- Vacuum weekly on a low setting to reduce large debris.
- Empty dust canisters regularly if your model is bagless; otherwise rely on bag fullness as a guide.
- Replace filters during major cleaning sessions, not just when the bag is full.
- Keep floors free of tracked-in dust and pet hair to reduce debris that fills bags faster.
Troubleshooting suction loss without obvious bag fullness
- If suction drops but the bag isn’t full, inspect filters and seals for leaks.
- Check for a clog in the wand or hose; remove obstructions carefully.
- Ensure that the bag is seated correctly; a misaligned bag can block airflow.
- Run a quick test on low power to observe changes after adjustments.
Planning for bag changes: a practical routine
- Create a simple calendar reminder every 1–2 months based on your usage.
- Record signs you notice to tailor timing for your household.
- Stock up on compatible bags ahead of time to prevent delays.
- Consider a quick DIY check before major cleaning days to avoid surprises.
The Cleaning Tips verdict
The Cleaning Tips team recommends treating bag changes as a regular preventive maintenance task, not a reaction to poor performance alone. A proactive approach sustains suction, protects the motor, and maintains air-quality in living spaces. By recognizing the indicators early and using the correct bag size, you’ll enjoy consistent cleaning results and fewer interruptions. The Cleaning Tips team recommends following the replacement guidance for best results.
Tools & Materials
- Vacuum cleaner bag (correct type/size)(Check model compatibility before purchasing)
- Replacement bag or bag set(Use genuine or compatible high-quality bags)
- Trash bag or disposal bag(Seal old bag securely to prevent dust clouds)
- Gloves(Optional to minimize dust exposure)
- Soft brush or microfiber cloth(For cleaning the bag compartment)
- Scissors or bag sealer(Only if your bag requires trimming)
- Flashlight(To inspect for leaks or tears)
- Owner's manual or model number(Helpful for bag type and procedure)
Steps
Estimated time: 10-15 minutes
- 1
Unplug and prepare
Ensure the vacuum is unplugged and cool. Move to a well-lit workspace and gather the replacement bag and trash bag. This prevents accidental activation and keeps dust contained. Safety first.
Tip: Always unplug before touching internal parts. - 2
Open bag compartment
Open the cover or door that hides the bag. Some models have a latch; others require a gentle twist. Use a flashlight if visibility is tight.
Tip: Handle hinges slowly to avoid snapping them. - 3
Remove old bag
Grip the bag by its tab or collar and pull straight out. Avoid shaking to minimize dust clouds and exposure.
Tip: Close the old bag immediately in its own trash bag. - 4
Inspect and decide
Check the bag fullness through the window or by feel. If it’s bulging or dusty, replacement is advised. If torn, replace anyway.
Tip: If you’re unsure, err on the side of replacement. - 5
Seal and dispose
Seal the old bag securely in a trash bag and place it in an exterior bin if possible. This keeps dust contained.
Tip: Double-bag for dusty climates. - 6
Prepare the new bag
Unpack the new bag and inspect for any defects. If the bag uses a fold, ensure it’s fully opened and aligned with the housing.
Tip: Don’t tear or crease the new bag. - 7
Install new bag
Insert the new bag so the opening aligns with the port. Push until it seats snugly and the collar locks in place.
Tip: If your model has a bag collar clip, ensure it clicks securely. - 8
Check filters and seals
While you’re here, inspect pre-motor and exhaust filters for clogs and seals for gaps. Clean or replace as needed.
Tip: A clean filter improves suction significantly. - 9
Reconnect and test
Reassemble the vacuum, plug in, and run a brief test on low suction to verify airflow is restored.
Tip: Listen for whirring that sounds normal, not strained. - 10
Document and store
Note the date of replacement and keep spare bags nearby. This reduces future guesswork and downtime.
Tip: Create a simple replacement log for quick reference.
Questions & Answers
How do I know which bag size to buy for my vacuum?
Check the model number and owner's manual; manufacturers list bag size and type there. If in doubt, bring an old bag to a store and verify compatibility.
Check the model number and manual to find the exact bag size.
Can I continue vacuuming with a full bag?
No. A full or clogged bag reduces suction and can overwork the motor, increasing wear. Replace promptly to maintain performance.
Don’t continue; replace the bag for best performance.
How often should I replace the bag if I have pets?
Pet owners typically replace more often due to hair and dander. Rely on fullness and odor cues to guide timing rather than a fixed schedule.
If you have pets, check more often.
Are HEPA bags worth it?
HEPA bags can improve air quality by trapping fine particles, but confirm compatibility with your vacuum. They’re most beneficial for allergy-prone households.
HEPA bags can help, but confirm compatibility.
What should I do with a torn bag?
Torn bags should be replaced immediately; handle carefully to minimize dust exposure. Do not attempt to patch a torn bag.
Replace it right away.
Is bagless easier to maintain than bagged?
Bagless requires regular filter maintenance and canister cleaning; bagged models rely on bag replacement. Each has different maintenance tasks.
Bagless has different maintenance—filters matter.
Watch Video
The Essentials
- Look for suction drops, fullness, and odor as bag-change cues.
- Use the correct bag size to maintain performance.
- Inspect filters and seals when replacing the bag.
- Schedule regular checks based on usage to avoid surprises.
- Keep replacement bags handy for quick, hassle-free changes.