When to Replace Air Cleaner Element: A Practical Guide
Discover when to replace an air cleaner element, signs to watch for, and a clear, step-by-step approach to keep your air purifier effective and your indoor air healthy.

You should replace an air cleaner element when you notice reduced airflow, musty odors, visible dirt, or after the unit’s recommended interval. Many homes replace every 3 to 6 months, but actual timing depends on usage, outdoor air quality, and whether the element is disposable or washable. Always follow the manufacturer’s guidance for your model.
Why replacing the air cleaner element matters
According to Cleaning Tips, maintaining clean filtration is essential for indoor air quality and for the long-term efficiency of your purifier. A dirty element forces the unit to work harder, increasing energy use and reducing airflow. Replacing at the right time prevents particles from bypassing filtration and helps your home feel fresher, especially for household members with allergies or asthma. In this guide, we break down how to recognize when to replace and how to do it safely and effectively. We’ll also differentiate disposable versus washable elements and show how to extend element life with simple maintenance routines.
Signs it's time to replace the element
- Decreased airflow: you notice weaker air output or longer times to achieve the same filtration.
- Odors or dust buildup: musty smells or visible dirt on the element or housing.
- Indicator light or countdown: some units show a dirty filter icon or a change in operating sound.
- Time-based cues: even with light use, disposable elements may require replacement after 3-6 months; washable elements require cleaning and re-use per manufacturer guidance.
- Allergies or symptoms: more sneezing or congestion when the unit runs could indicate reduced filtration efficiency.
How to determine replacement interval in your home
No single rule fits all; start with the manufacturer's timer or suggested interval in the manual. If you can’t find it, assume every 3-6 months for a typical household with normal usage. High-traffic homes, heavy pollution, or pet dander will require more frequent checks. Keep a log of dates and any signs you noticed. If you live in a high-pollution area or have pets, you may see visible dirt accumulate more quickly, prompting earlier replacement.
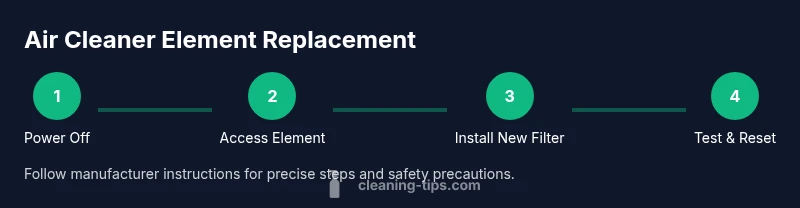
Step-by-step overview of the replacement process
Begin by identifying whether your unit uses a disposable or washable element. Gather the necessary tools and a fresh replacement element. Prepare a clean workspace and protect surfaces from dust. Access the filter compartment according to the model’s manual, remove the old element, inspect the housing for debris, install the new element in the correct orientation, and finally reset any indicator and test the unit to confirm proper operation.
Maintenance tips to extend element life
Regularly inspecting the housing and seals helps prevent unfiltered air from bypassing the element. For washable elements, follow the manufacturer’s cleaning schedule—do not skip drying times, as moisture can promote mold growth. Place the purifier away from high-humidity zones and ensure sufficient clearance for airflow. Using a pre-filter or pre-cleaning the surrounding area can reduce the amount of dust reaching the main element, extending its life and maintaining efficiency.
Common mistakes to avoid
Mistakes include selecting the wrong size or type of element, not aligning the filter correctly, failing to reset indicator lights, and ignoring manufacturer guidelines. Avoid forcing a filter into place; misfit filters can stress the motor and reduce performance. Never operate the unit with a missing or damaged element, as this can release unfiltered air into the room and compromise air quality.
How to choose the right replacement element
Start by checking the unit’s model number and the exact filter part number in the user manual or on the unit’s label. Match the size and connector style precisely. Consider efficiency ratings (like MERV) that are compatible with your purifier and your indoor air needs. If you have allergies or asthma, opt for higher-efficiency elements recommended by the manufacturer and consider a disposable filter with a higher filtration grade to maximize particle capture.
Safety, warranty, and long-term care
Always unplug the unit before opening the housing. Wear gloves to minimize contact with dust and replace filters in a well-ventilated area. Document replacement dates to support warranty claims and to build a maintenance routine that keeps your unit performing at its best. Regular upkeep not only improves air quality but can extend the life of the purifier itself.
Tools & Materials
- Replacement air cleaner element (filter)(Exact size and model compatibility required)
- Phillips head screwdriver(Only if your unit uses screws to access the filter compartment)
- Gloves(Protect hands from dust and sharp edges)
- Microfiber cloth(Wipe housing surfaces and seals)
- Vacuum with brush attachment(Optional for removing dust around the unit)
- Seal replacement (if needed)(Check if housing gaskets need replacement during filter change)
Steps
Estimated time: 30-45 minutes
- 1
Power down and unplug
Turn off the purifier and unplug it from the wall to prevent shocks or moving parts from operating during the replacement. This simple step safeguards you and ensures a stable work surface.
Tip: If the unit is mounted or heavy, request assistance to avoid injury. - 2
Open the filter compartment
Access the filter area by removing the front panel or lid as specified in the manual. Use the screwdriver if screws are present; handle clips gently to avoid breaks.
Tip: Keep track of any small screws or clips so you don’t lose them. - 3
Remove the old element
Carefully lift the old element out, noting its orientation. Inspect the area for dust or debris that can fall into the intake and clean with a microfiber cloth.
Tip: Do not pull from the filter by force; it may be wedged or sealed. - 4
Clean the housing
Wipe the interior surfaces and seals to remove accumulated dust. If you see mold or moisture, address it before inserting a new element.
Tip: Let any damp areas dry completely before installing the new filter. - 5
Install the new element
Insert the new element in the same orientation as the old one. Ensure it sits securely and the doors or clips lock firmly.
Tip: Double-check that the element is fully seated and aligned with airflow arrows. - 6
Test and reset indicators
Plug the unit back in, power it on, and run for a few minutes. Reset any filter indicators or timers per the manual to reflect the new element.
Tip: If you hear unusual noises, turn off and recheck the installation.
Questions & Answers
How often should I replace the air cleaner element?
Replacement frequency depends on usage, environment, and element type. Disposables typically 3-6 months; washable elements may last longer with proper cleaning. Monitor airflow, odors, and any indicator lights to guide timing.
Most units require replacement every few months for disposables, or longer for washable elements with proper care.
Can I clean a disposable element instead of replacing it?
Disposable elements are not designed to be cleaned. Cleaning can damage filtration and reduce effectiveness. If the filter is dirty, replace it with the exact model.
No. Disposable filters should be replaced, not cleaned.
What if I have pets or allergies?
Pet dander accelerates filter loading. Replace more frequently and consider higher-efficiency filters compatible with your unit to improve indoor air quality.
Pets and allergies often require more frequent replacement or higher-efficiency filters.
How do I know the replacement is the correct size?
Check the unit’s label, manual, or the existing filter for the exact part number and dimensions. Purchase a filter that matches those specifications precisely.
Always verify size and model compatibility before buying.
What should I do with old filters?
Seal used filters in a bag and dispose according to local guidelines. Some areas have recycling options for certain filter materials.
Dispose the old filter properly and check local guidelines.
Watch Video
The Essentials
- Inspect regularly for airflow and odor changes.
- Choose disposable vs washable per model.
- Replace within manufacturer guidelines.
- Keep a replacement log.