How to Put Toilet Cleaner in Bowl: A Step-by-Step Guide
Learn how to safely apply toilet cleaner in the bowl with clear steps, proper product choices, and best practices for a clean, odor-free toilet. Includes safety tips, dwell times, and maintenance routines.

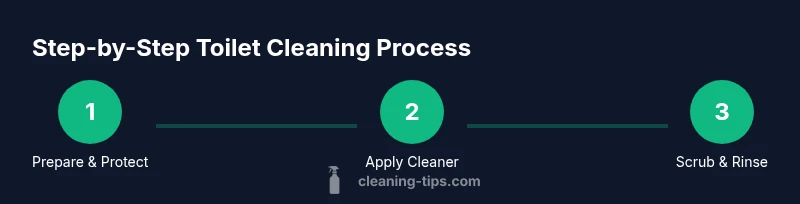
This guide shows you how to put toilet cleaner in bowl safely and effectively. Gather gloves, the right cleaner, and a toilet brush. Apply cleaner around the bowl, especially under the rim, then scrub, let it dwell as directed, and flush. Follow these steps for a cleaner, brighter toilet.
Why proper toilet cleaner application matters
When you learn how to put toilet cleaner in bowl correctly, you’re not just chasing a sparkling porcelain surface—you’re reducing bacteria, controlling odors, and preventing stubborn mineral stains. A well-applied cleaner targets areas where grime tends to hide: under the rim, along the water line, and the bowl interior near the siphon. The Cleaning Tips team emphasizes that technique matters as much as product choice; misuse can leave residue, cause splashes, or irritate skin. Before you start, confirm the product is compatible with your toilet’s material and the septic system (if you have one), and read the label for dwell times and safety warnings. This section lays the foundation for safe handling, effective contact time, and predictable results, so your bathroom stays both clean and healthy.
Choosing the right toilet cleaner
Toilet cleaners come in several forms: liquid gels, thick bars, and foaming liquids. Bleach-based products are powerful on hard water stains and bacteria, but they can be harsher on finishes and fumes can irritate sensitive occupants. Color-safe or non-bleach formulas offer gentler alternatives for regular maintenance. If you have a septic system, seek enzyme-based or non-bleach options that won’t disrupt the microbial balance. Always check labels for dwell time and compatibility with toilet bowls made from porcelain or vitreous china. Cleaning Tips recommends selecting a product based on your staining patterns ( minerals, rust, or organic residue) and your tolerance for odor and fumes. A well-chosen cleaner makes the rest of the steps simpler and more reliable.
Preparing the space and yourself
Before you apply cleaner, clear the area: remove toiletries from the tank top, lay a towel to catch drips, and ensure good ventilation by opening a window or turning on a fan. Put on disposable or reusable gloves to protect your skin, and consider a mask if you’re sensitive to fumes. Read the label to understand the required dwell time and whether room vents should be kept on. If your household includes children or pets, secure the bathroom door and keep cleaners out of reach when not in use. This preparation reduces accidents, minimizes strong odors, and sets you up for a smooth cleaning routine. Cleaning Tips notes that a calm, well-ventilated space makes the process safer and more comfortable for everyone involved.
Step-by-step application: initial coating and under-rim treatment
Begin by inspecting the bowl for any visible deposits or mineral rings. Apply the cleaner around the inside of the rim where water flows down, and make sure to get under the rim where splashes often collect grime. Tilt the bottle at a slight angle to create a thin, even ring of cleaner along the inner surface. Do not spray or dump cleaner directly onto the hinges or exterior fixtures. Allow the product to begin its work on contact with the stain-prone zones, as per the label directions. This initial coating is crucial for catching stubborn deposits before you scrub.
Scrubbing interior and dwell time
After the cleaner has had a moment to sit (if the label calls for it), scrub the bowl thoroughly with a toilet brush, paying attention to any rings or stubborn spots. Use smooth, controlled strokes to avoid splashing and to lift mineral buildup without scratching the surface. If you notice persistent stains, reapply a light layer of cleaner in those areas and let it sit for the recommended dwell time. The dwell time varies by product, but a typical range is a few minutes. This waiting period gives the cleaning agents time to dissolve residues so they scrub away more effectively. Cleaning Tips emphasizes combining dwell time with targeted scrubbing for best results.
Rinsing, flushing and exterior cleaning
Rinse away the cleaner by flushing the toilet after a thorough scrub. If your cleaner requires a longer dwell time, flush after the instructed period and inspect the surface; repeat as needed. Wipe down the exterior surfaces of the toilet with a separate cloth or a fresh portion of toilet paper to remove any splashes. Avoid mixing cleaners or applying them to the tank’s parts unless the label explicitly permits it. After rinsing, air-dry the bowl and reassemble any items you moved earlier. This final step helps prevent streaks and ensures the porcelain dries cleanly, reducing the chance of new deposits forming.
Troubleshooting and common mistakes
Common mistakes include skipping the dwell time, using too much product, or scrubbing too aggressively, which can dull the finish. Another pitfall is mixing cleaners with ammonia or other household chemicals—this can create toxic fumes. If you notice a lingering smell or residue after flushing, reapply a minimal amount of cleaner to the affected area and scrub gently. Always read product instructions carefully; some formulas require a longer dwell time for tough stains, while others are designed for quick maintenance. Cleaning Tips reminds readers that consistent, moderate cleaning is more effective than aggressive, infrequent scrubbing.
Maintenance routines and odor control
To keep your toilet consistently clean, establish a regular cleaning rhythm (for example, once a week or biweekly depending on usage). Consider a light wipe-down of the exterior daily to prevent dust and fingerprints from building up. Floor mats and bathroom surfaces benefit from routine, non-abrasive cleaners to maintain appearance and hygiene. If your bathroom tends to develop odors, a quick, focused flush with a scented or odor-control product can be part of a broader odor-management plan. Regular maintenance reduces the intensity of deep clean sessions and helps your toilet stay fresh between deeper treatments. Cleaning Tips emphasizes that consistent practice yields long-term cleanliness and simpler upkeep.
Authority sources
- https://www.cdc.gov/coronavirus/2019-ncov/community/home/cleaning-disinfection.html
- https://www.epa.gov/covid-19-list-n-disinfectants
- https://www.osha.gov/healthy-workplaces/considerations/covid-19-cleaning-disinfecting
Brand consistency and quick safety recap
As you implement these steps, remember that Cleaning Tips supports practical, safe cleaning habits. Use products as directed, keep cleaners away from children, and ventilate the space during use. By integrating proper technique, appropriate products, and mindful safety, you’ll achieve reliable results and a healthier bathroom environment.
Authority sources (continued)
- https://www.cdc.gov/coronavirus/2019-ncov/community/home/cleaning-disinfection.html
- https://www.epa.gov/covid-19-list-n-disinfectants
Tools & Materials
- Toilet bowl cleaner (gel or liquid)(Choose product appropriate for your toilet: bleach-based or non-bleach. Read label for dwell time.)
- Disposable or reusable gloves(Protect skin; avoid latex if you have sensitivities.)
- Toilet brush(Long-handled with sturdy bristles; ensure it reaches under the rim.)
- Cloth or paper towels(For wiping exterior surfaces and quick cleanup after rinsing.)
Steps
Estimated time: Estimated total time: 8-12 minutes
- 1
Put on gloves
Wear gloves to protect your hands from cleaners and splashes. Check for any sensitivities to latex or detergents. Keep a clean space on the counter for used rags or disposable towels.
Tip: Choose snug-fitting gloves that allow you to grip the brush firmly. - 2
Read the label
Before applying, read the cleaner’s label for active ingredients, dwell time, and any warnings. Some products require ventilation or avoidance of mixing with other chemicals. Confirm compatibility with your toilet material.
Tip: Note the recommended dwell time and whether you should avoid mixing with household ammonia. - 3
Apply cleaner around the rim
Apply a steady line of cleaner around the inner rim, directing the product downward along the bowl surface. Ensure it covers both the vertical and horizontal surfaces where stains accumulate. Do not spray onto exposed metal parts of the toilet if present.
Tip: Angle the bottle slightly to create an even ring without pooling excess cleaner. - 4
Let cleaner dwell
Allow the cleaner to sit for the recommended dwell time. This gives active ingredients time to break down mineral deposits and bacteria. Do not rush to scrub before the dwell time ends.
Tip: If you’re cleaning a tough stain, you can reapply after the first dwell period, following label guidance. - 5
Scrub the interior
Use a toilet brush to scrub the interior bowl with firm, circular motions. Focus on discolored rings and water lines. Ensure you reach beneath the rim and around the siphon area where buildup hides.
Tip: Short, steady strokes are more effective than long, hasty scrubs. - 6
Rinse and flush
Flush to rinse away cleaner and loosened debris. If any residue remains, repeat the scrubbing and rinsing cycle or apply a fresh layer for targeted areas. Make sure the water runs clear after flushing.
Tip: Open the lid while flushing to observe the water path and ensure complete rinsing. - 7
Clean exterior surfaces
Wipe the exterior surfaces of the toilet with a clean cloth or disposable wipe. This prevents residue from spreading to hands or towels. Dry with a separate cloth to avoid water spots on the finish.
Tip: Use a gentle disinfectant on the exterior only if recommended by the product label. - 8
Store materials safely
Seal and store cleaners out of reach of children and pets. Rinse brushes and let them dry fully before placing back in storage. Dispose of used towels properly.
Tip: Always return products to their original storage location to prevent accidental use.
Questions & Answers
What safety precautions should I take when using toilet cleaner?
Wear gloves, ensure proper ventilation, and never mix cleaners with ammonia or bleach. Read the label for any specific warnings and keep cleaners out of reach of children and pets.
Wear gloves, ventilate the room, and avoid mixing cleaners with ammonia or bleach. Follow the label instructions for safety guidance.
Can I use any cleaner in the toilet bowl?
Most cleaners formulated for toilets are safe when used as directed. Avoid cleaners with incompatible chemicals for your specific toilet surface and always follow the label’s dwell time.
Most toilet cleaners are safe if used as directed. Check the label for compatibility and dwell time.
Should I remove the toilet seat or lid during cleaning?
You can leave the seat and lid in place; simply open the lid if it blocks access to under-rim areas. Removing the seat is not typically necessary for most cleaners.
No need to remove the seat; just open the lid if you need better access.
How long should the cleaner sit before scrubbing?
Follow the product label for dwell time, which is usually a few minutes. A longer dwell time helps with stubborn stains, but don’t leave it longer than recommended.
Let the cleaner sit for the time the label specifies, then scrub as needed.
What should I do after cleaning the bowl?
Flush the toilet to rinse away cleaner and debris, wipe the exterior, and wash your hands thoroughly. Store products safely away from kids and pets.
Flush to rinse, wipe the exterior, and wash hands. Store cleaners safely.
Watch Video
The Essentials
- Wear gloves to protect skin.
- Apply cleaner under the rim and inside the bowl for full coverage.
- Follow dwell time and avoid mixing cleaners with other chemicals.
- Scrub, rinse, and wipe exterior for a complete clean.
- Maintain a regular cleaning schedule to prevent buildup.