How to Stop Cleaning Ears: A Practical Guide
Learn practical, safe steps to stop cleaning ears, understand ear wax, and adopt healthier outer-ear habits with guidance from Cleaning Tips.

Goal: stop cleaning ears and protect ear health. You’ll learn why aggressive cleaning can irritate the ear canal, how to recognize normal ear wax, and safer habits that support natural protection. Key requirements: never insert objects into the ear canal, avoid sharp tools, and seek medical advice for persistent pain, discharge, or hearing changes. This guide outlines practical, safe steps to stop cleaning ears effectively.
Why stopping ear cleaning is important
Stopping ear cleaning is an intentional shift toward preserving the ear’s natural defenses. If you’re looking for how to stop cleaning ears, you’re choosing a safer approach that respects the ear’s self-regulating wax. The ear canal produces cerumen that traps dust and bacteria, and it slowly migrates outward. Disturbing this process with probes, cotton swabs, or sharpened objects can push wax deeper, cause micro-tears in the skin, or create irritation that lasts days. The Cleaning Tips team emphasizes that most people can safely reduce or halt routine cleaning without harming hearing when they adopt gentler outer-ear care and seek guidance for unusual symptoms. In this block, you’ll learn the rationale behind stopping aggressive cleaning and what you can expect as your ears adjust to a natural, protective routine.
Understanding ear wax and ear health
Ear wax, or cerumen, is a normal secreted substance designed to protect the ear canal from dust, moisture, and bacteria. It has lubricating properties and a self-cleaning mechanism where older wax migrates outward as new wax is produced. When you learn how to stop cleaning ears, you’ll discover that the wax can vary in texture and amount among individuals, and that routine removal isn’t always necessary. Excessive probing or picking can irritate the canal lining, lead to microabrasions, and sometimes trigger temporary changes in hearing. Consent-based care means listening to your body and letting the ear do what it does best—self-cleaning with minimal disturbance. Cleaning Tips analysis shows that many people over-clean due to misconceptions about wax buildup; understanding this can reduce harm and promote healthier habits.
Signs you might be over-cleaning
If you notice itching, redness, discomfort after cleaning, or a sensation of fullness that lingers, these can be signs that you’ve over-cleaned the outer ear. Visible irritation around the opening of the ear canal, frequent wax discharge after cleaning attempts, or a change in hearing for short periods may indicate that your ear is reactive to probing. The goal of stopping aggressive cleaning is to restore a natural balance and reduce mechanical irritation. In many cases, symptoms improve within days of reducing cleaning frequency, though some individuals may need medical guidance for persistent issues. Remember: every ear is unique, and gentle outer-ear care is often enough.
Safer alternatives to cotton swabs
Swabs and other inserting tools can push wax deeper rather than remove it. A safer approach is to limit contact to the outer ear and use a damp cloth for cleansing the visible area around the entrance. For those with a persistent sense of blockage, a clinician may recommend a professional wax evaluation or a gentle rinse performed by a trained professional. Do not attempt to irrigate the ear canal yourself unless advised by a healthcare provider. If you must address moisture or discomfort, consider a sterile saline solution only under professional instruction. This section emphasizes safer alternatives and the importance of avoiding inside-ear insertion.
Practical daily habits to protect ears
Daily habits play a huge role in maintaining ear health without aggressive cleaning. Keep ears dry after swimming or showering by tilting the head and using a soft towel to dry the outer ear. If you wear hearing aids or earbuds, maintain clean, dry devices and avoid inserting anything deep into the canal. Build a routine that prioritizes outer-ear care: brief, non-invasive cleansing of the external ear, and patience as your ears re-establish their natural balance. Consistency matters more than frequency when it comes to protecting your ears.
When to seek medical advice
If pain, discharge, persistent fullness, or a marked change in hearing occurs, seek medical care promptly. A clinician can assess for infections, impacted wax, or structural issues and provide safe removal if necessary. Do not delay care for prolonged symptoms, especially in children or older adults where wax management may differ. Early professional evaluation reduces the risk of complications and supports healthier long-term ear care.
Common myths vs facts
Myth: Wax buildup should always be cleaned away at the first sign of blockage. Fact: wax protects the ear; routine cleaning is not always needed. Myth: Ear drops from drugstores cure all wax issues. Fact: drops can soften wax, but only a clinician can confirm whether removal is necessary. Myth: It’s safe to use household liquids to flush the ear. Fact: improper irrigation can damage the ear canal or eardrum. Across these points, the core idea is to respect the ear’s natural processes and minimize self-directed probing.
Authoritative sources
For further reading and credible guidelines, you can consult authoritative sources such as:
- https://www.cdc.gov/
- https://www.nhs.uk/conditions/ear-wax/
- https://www.mayoclinic.org/healthy-lifestyle/ear-health/in-depth/ear-wax/art-20045137
These sources provide complementary information on ear health, wax function, and safe care practices. Remember to discuss any concerns with a healthcare professional and tailor guidance to your personal health needs.
Verdict: The Cleaning Tips team recommends pausing aggressive ear cleaning
In line with best practices for ear health, the Cleaning Tips team recommends stopping aggressive cleaning and embracing outer-ear care as a default. By reducing risky probing and allowing natural wax behavior, most people notice fewer irritations and clearer long-term comfort. The team suggests tracking symptoms for a few weeks and consulting a clinician if any red flags arise. With steady, cautious habits, you can protect your ears without unnecessary interventions.
Tools & Materials
- Soft cloth or towel(For outer-ear cleansing only; do not insert into the canal)
- Mild saline solution (as advised by a clinician)(Use only if prescribed; avoid home irrigation without guidance)
- Ear-safe moisturizer (optional, per clinician’s instruction)(Apply around the outer ear, not inside the canal)
- Prescription or recommended analgesic (as advised by a clinician)(Only if directed by a healthcare professional for pain)
Steps
Estimated time: 15-20 minutes per session; 1–2 sessions during the first week
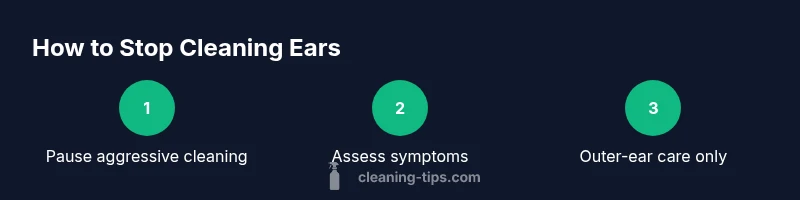
- 1
Pause aggressive cleaning
Begin by refraining from inserting objects into the ear canal. Observe how the ear feels after exposure to outer-ear care and note any changes in fullness or discomfort. This initial pause reduces irritation and allows natural wax processes to continue.
Tip: Set a 7-day trial where you only wipe the outer ear and avoid probing. - 2
Assess symptoms
Track any symptoms such as pain, itching, or hearing changes. If symptoms persist, document when they started and any activities that preceded them. This helps you determine whether professional evaluation is needed.
Tip: Keep a simple diary; date, duration, and intensity of symptoms. - 3
Use outer-ear care only
Clean the external ear with a damp cloth around the opening; never insert into the canal. If your outer ear is dry, use a gentle pat rather than rubbing or scraping the skin.
Tip: Avoid cotton swabs, hairpins, and other insertions. - 4
Manage moisture mindfully
If you’re dealing with moisture after swimming, tilt the head to let water drain and gently dry the outer ear with a towel. Do not aim to flush the canal yourself.
Tip: Consider drying aids only as recommended by a clinician. - 5
Consult a clinician for concerns
If you suspect wax buildup or persistent blockage, seek professional help rather than attempting self-removal. A clinician can safely assess and remove wax with proper tools if needed.
Tip: Do not ignore persistent blockage or pain. - 6
Adjust routines over time
As you reduce self-cleaning, monitor changes in ear sensation. Many people notice gradual improvement within a few weeks and adopt healthier long-term habits.
Tip: Revisit your routine after 2–4 weeks and refine as needed.
Questions & Answers
Is ear wax harmful?
No, ear wax protects the ear and usually doesn’t require daily removal. It can be normal to have some wax buildup, but if you notice symptoms, consult a clinician.
Ear wax is protective and usually not harmful. If you have symptoms, talk to a clinician.
Can cleaning cause hearing loss?
Aggressive cleaning can irritate or injure the ear canal and, in rare cases, affect hearing temporarily. Avoid inserting objects and seek care if symptoms persist.
Cleaning can irritate the ear; seek help if symptoms persist.
What should I clean with?
Use only a damp cloth on the outer ear. Do not insert anything into the canal. If you have concerns, a clinician can advise safe options.
Only wipe the outer ear with a damp cloth.
How long to adjust to not cleaning?
Many people notice improvement within a few weeks after stopping aggressive cleaning. Be patient and monitor symptoms.
Improvements often show within a few weeks.
Are cotton swabs safe?
Cotton swabs are not recommended for canal cleaning. They can push wax deeper or cause injury. Use outer-ear care only.
Swabs inside the ear are not safe; use outer-ear care instead.
When to see a doctor?
See a doctor if you have persistent pain, discharge, hearing changes, or severe fullness. Early evaluation prevents complications.
Seek medical care for persistent symptoms or pain.
Watch Video
The Essentials
- Pause aggressive ear cleaning now.
- Wax protects the ear; avoid routine removal.
- Clean outer ear only; do not probe inside.
- Seek medical advice for persistent symptoms.