Where to Clean Ear Wax: Safe, At-Home Tips
A practical, step-by-step guide on where to clean ear wax safely, when to avoid at-home cleaning, and how to consult a clinician if you have persistent buildup or symptoms.

To clean ear wax safely, focus on the outer ear and use gentler methods. Do not insert objects into the ear canal. If wax buildup persists or you have pain or hearing loss, consult a clinician for safe removal.
What Ear Wax Is and Why It Matters
Ear wax, or cerumen, is a natural substance produced by the ear to trap dust and debris and protect the ear canal. It also helps moisturize the skin inside the ear and has antimicrobial properties. The Cleaning Tips team emphasizes that a small amount of wax in the outer ear is normal and often benign. According to Cleaning Tips, the main goal of ear hygiene is to remove excess wax from the outer ear while preserving the protective barrier. If you notice itching, mild fullness, or a brief change in hearing, these can be normal fluctuations but should be monitored. When wax builds up, some people experience muffled sound or a feeling of fullness that prompts a cleaning attempt. Understanding the difference between safe outer-ear cleaning and risky canal probing is essential for ear health.
Where to Clean Ear Wax: Outer Ear vs Ear Canal
The ear canal is a delicate, air-filled space lined with skin. You should clean only the outer ear (the part you can see with the naked eye) and never insert objects into the canal. The danger zone is inside the ear canal, where puncture or rupture can occur, potentially leading to infection or hearing loss. The outer ear can be cleaned with a damp washcloth or tissue. If you have a hearing aid, a pierced eardrum, recent ear surgery, or a history of ear infections, consult a clinician before attempting any home cleaning. Cleaning Tips recommends keeping the canal intact and prioritizing safety over aggressive removal. For most people, routine outer-ear care is sufficient, and professional removal is reserved for stubborn buildup.
Safe At-Home Methods for Outer Ear Cleaning
Safe outer-ear cleaning focuses on removing visible wax from the exterior ear without entering the canal. Use a soft, damp cloth to wipe the outer ear after a shower when the wax is soft. Avoid pushing wax into the canal with any tool. Regular brushing or rinsing inside the canal is not recommended. If you feel wax there, stop and re-evaluate: removing wax from the canal itself is best left to professionals. The aim is gentle maintenance, not aggressive removal, to prevent irritation or injury. Hydration and routine hygiene can help maintain a healthy ear environment. In short, outer-ear cleaning is the safe, practical approach for most people.
When to Avoid Home Cleaning and Seek Medical Help
Certain signs require professional evaluation rather than DIY cleaning. Do not attempt home cleaning if you have ear pain, bleeding, discharge, fever, or a history of ear surgery or a perforated eardrum. Also avoid at-home approaches if you experience dizziness, a damaged eardrum, or a cochlear implant. Cleaning Tips notes that these red flags warrant a clinician’s assessment to prevent complications. If you wear ear tubes, or you recently had ear surgery, skip improvisation and seek an ENT evaluation. Persistent blockage or recurrent wax buildup should be discussed with a healthcare professional.
At-Home Ear Wax Softening: Drops and Timelines
Softening wax with over-the-counter ear drops can make removal easier. Most products use mineral oil, olive oil, or carbamide peroxide. Follow the product directions and typically wait several days to allow the drops to soften the wax. If you notice irritation, rash, or worsening symptoms, discontinue use and consult a clinician. Keep the hearing environment comfortable: sit upright, avoid leaning to the side for extended periods, and do not overuse drops. Cleaning Tips analysis suggests that short-term use to soften wax is generally safe for adults without ear disease, while longer use should be supervised by a professional.
Ear Irrigation: Step-by-Step at Home (If Appropriate)
Irrigation can be an option for some individuals, but it must be performed with care and only when there are no contraindications. Do not irrigate if you have a perforated eardrum, ear infections, or a history of tympanoplasty. Use body-temperature water to avoid dizziness. Gently direct water toward the top back wall of the ear and allow it to flow out. Avoid forcing water into the canal or using excessive pressure. If there is resistance or pain, stop immediately. Always dry the outer ear afterward and avoid prolonged exposure to moisture.
How Doctors Remove Ear Wax Safely
When self-care fails or there are risk factors, professionals remove ear wax using specialized tools and techniques. Clinicians may use suction devices, micro-instrument removal, or irrigation with controlled pressure in a sterile environment. The procedure typically lasts only a few minutes and is tailored to the patient’s anatomy and wax consistency. If you have recurrent wax buildup, discuss preventive strategies with your clinician, such as scheduled cleanings and wax-softening regimens prescribed by a doctor. This professional approach minimizes complications and preserves the ear’s protective barriers.
Frequency and Long-Term Care
Most people do not need daily ear cleaning. Frequency should be based on symptoms rather than a fixed schedule. Outer-ear cleaning after showers or when wax is visibly present is often sufficient. If you use devices like hearing aids or earbuds, ensure they are clean and avoid introducing moisture into the canal. Regular check-ins with a clinician can help you tailor a safe ear-hygiene routine. The goal is to keep ear canals dry and wax at a safe, natural level that protects the ear without causing discomfort.
Common Myths About Ear Wax
Myth: Ear wax should always be removed completely. Reality: A small amount of wax is normal and protective. Myth: Cotton swabs are safe for canal cleaning. Reality: Inserting anything into the canal can push wax deeper and damage the eardrum. Myth: Ear drops are dangerous. Reality: For most people, OTC drops are safe when used as directed, though certain conditions call for medical advice before use. Understanding these myths helps prevent harm and encourages safer hygiene practices.
Authority Sources and Further Reading
For more information on ear health, consult authoritative sources such as the National Institute on Deafness and Other Communication Disorders and Mayo Clinic resources. These sources provide guidance on safe cleaning practices, symptoms that require professional evaluation, and preventive care. You can reference resources at:
- https://www.nidcd.nih.gov/health/ear-wax
- https://www.mayoclinic.org/diseases-conditions/ear-wax
- https://www.clevelandclinic.org/health/ear-wax
Tools & Materials
- Mineral oil or carbamide peroxide ear drops(Use for 3-4 days to soften wax unless your clinician advises otherwise)
- Bulb syringe for ear irrigation(Use only with guidance; do not force water into canal)
- Warm (body-temperature) water(Avoid hot water to prevent dizziness)
- Soft towel or cloth(Dry outer ear after cleaning)
- Gloves (optional)(Keep hands clean while performing at-home steps)
- Saline solution (optional)(Alternative to oil drops if recommended by a clinician)
Steps
Estimated time: 30-60 minutes
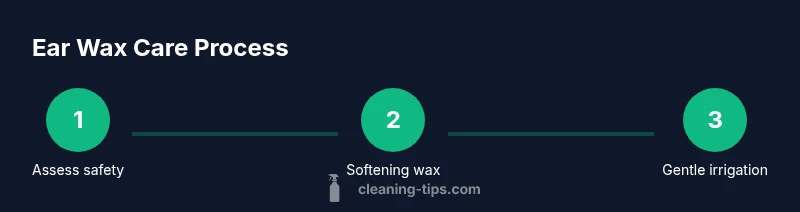
- 1
Check safety and symptoms
Before starting, review any ear history (tubes, perforation, recent surgery) and look for red flags like pain, discharge, fever, or dizziness. If any are present, stop and seek professional care. This ensures you’re not introducing risk by DIY cleaning.
Tip: If in doubt, err on the side of caution and consult a clinician before attempting home cleaning. - 2
Gather all necessary tools
Assemble mineral oil or OTC ear drops, a bulb syringe, warm water, and a soft towel. Having everything ready reduces the risk of pausing mid-process and introduces the chance of using improper temperature.
Tip: Keep all items at safe, body temperature and ensure your hands are clean. - 3
Soften the wax
Instill a few drops of ear drops into the outer ear to soften the wax. Wait the recommended duration (often several days, per product directions) with the head tilted to facilitate distribution. Repeat as advised by the product or clinician.
Tip: Do not exceed the recommended number of daily applications; overuse may irritate the ear canal. - 4
Position for irrigation (if advised)
Tilt your head to a comfortable angle with the outer ear facing upward. Keep the irrigation syringe aiming toward the upper back part of the canal, never straight into the canal wall. Gentle, slow pressure helps avoid injury.
Tip: Use body-temperature water to minimize vertigo. - 5
Irrigate gently
Carefully squeeze the bulb syringe to release a short, gentle stream of warm water. Allow the water to flow back out along with loosened wax. Do not force water in or use strong jets.
Tip: If you feel resistance or pain, stop immediately. - 6
Dry the outer ear
Tilt the head to help drainage and gently pat the outer ear with a towel. Keep the ear dry for at least a few minutes, then use a hair dryer on the lowest setting held at a safe distance to evaporate residual moisture.
Tip: Avoid rubbing or inserting towels deep into the ear canal. - 7
Evaluate the result
Check if the ear feels clearer and if sounds return to baseline. If wax remains or symptoms persist, avoid repeating irrigation and seek professional guidance.
Tip: Do not over-clean; repeated attempts can irritate the canal. - 8
Consider repeating if advised
Some people may require a second, gentle attempt after a waiting period if the wax persists. Follow clinician or product guidelines to avoid over-cleaning.
Tip: Allow adequate time between attempts to prevent damage. - 9
Know when to stop and seek care
Stop DIY cleaning if pain, bleeding, fever, or persistent hearing loss occurs. Persistent symptoms warrant clinician evaluation to prevent complications.
Tip: Red flags require prompt professional assessment. - 10
Prevent future buildup
Maintain routine outer-ear hygiene, avoid canal insertion tools, and discuss preventive options with a clinician if wax recurs frequently.
Tip: Use targeted, physician-approved prevention strategies rather than aggressive cleaning.
Questions & Answers
Can I use cotton swabs to clean ear wax?
No. Inserting cotton swabs into the ear canal can push wax deeper and injure the eardrum. Clean only the outer ear or seek professional help for buildup.
Cotton swabs shouldn't go into the ear canal; only outer-ear cleaning is safe. For stubborn wax, consult a clinician.
When should I see a doctor for ear wax?
If you have severe pain, fever, discharge, hearing loss, or persistent blockage after home care, consult a clinician.
See a doctor if you have pain, discharge, fever, or lasting hearing changes.
Are ear drops safe for everyone?
Most people can use OTC ear drops to soften wax, but avoid if you have a perforated eardrum or active ear infection, or if you are diabetic or immunocompromised.
OTC drops are generally safe, but check with a clinician if you have certain conditions.
Can ear wax be removed at home with irrigation?
It can be, but only with proper technique and after softening; avoid if you have a perforated eardrum or tubes, and stop if pain occurs.
Irrigate only with proper guidance and no risk factors.
How often should I clean ear wax?
There is no fixed frequency; clean only when there is noticeable buildup or as advised by a clinician; repeated attempts can irritate the canal.
Clean when you notice buildup, not on a fixed schedule.
What are signs of dangerous ear wax buildup?
Severe pain, persistent hearing loss, fever, discharge, or dizziness; stop cleaning and seek medical help.
Seek care if you have severe symptoms or persistent symptoms after cleaning.
Watch Video
The Essentials
- Clean only the outer ear; avoid canal insertion.
- Use ear drops to soften wax if advised.
- Seek medical help for persistent buildup, pain, or hearing loss.
- Treat wax as protective; unnecessary removal can cause harm.
- Follow safe, step-by-step guidelines for best results.