What Clean Bathtub With: A Practical How-To Guide
Learn what clean bathtub with and how to safely clean various tub surfaces with practical, step-by-step methods, tools, and maintenance tips for a spotless bathroom.

By the end of this guide you’ll know exactly what to clean a bathtub with and how to choose safe, effective cleaners for every surface. You’ll get a practical, step-by-step method, a complete tools list, and safety tips to avoid damage. Whether you’re battling soap scum, mineral deposits, or discoloration, this quick answer gives you a clear path to a spotless tub.
What to use to clean a bathtub with
If you're asking what clean bathtub with, you’re not alone. The surface you’re cleaning largely drives your cleaner choice, since porcelain, acrylic, fiberglass, and cultured marble each respond differently to chemicals. According to Cleaning Tips, the safest path starts with a mild, versatile kit built from common pantry and household products. This section outlines basic cleaners, how they work, and how to pair them with your tub material for optimal results. The goal is to lift soap scum, mineral buildup, and body oils without scratching or dulling the finish. By understanding what to use, you’ll form a foundation for a routine that keeps your tub gleaming between deep cleans. In everyday practice, starting with the right cleaners reduces the chance of damage and makes maintenance easier over time.
Surface-aware cleaning: porcelain, acrylic, fiberglass
Bathtub surfaces vary in porosity and glaze, which affects how cleaners interact with them. Porcelain enameled tubs respond well to non-abrasive cleaners and gentle scrubbing, while acrylic tubs tolerate a broader range of household products. Fiberglass surfaces require extra care to avoid dulling or gouging. Cleaning Tips recommends testing any new cleaner on a hidden corner first and avoiding abrasive powders on softer surfaces. When you understand the material you’re dealing with, you can tailor your routine to prevent etching, discoloration, or scratches, preserving a glossy finish for longer.
Preparing your workspace and tools
A clean workspace helps you work efficiently and reduces the risk of cross-contamination. Clear the surrounding area, remove toiletries, and lay out your tools within easy reach. Wearing rubber gloves protects your skin from cleaners and moisturizers. Open a window or turn on the exhaust fan for ventilation, especially if you plan to use stronger cleaners. Pre-wetting the tub helps cleaners spread evenly and prevents streaking. This setup phase is a small step that pays big dividends in speed and results.
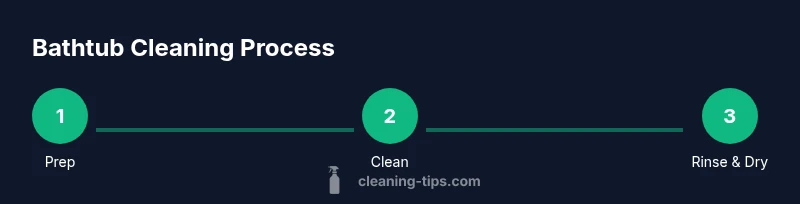
Step-by-step cleaning method: a practical routine
A solid routine combines safety, efficiency, and effectiveness. Start by choosing an appropriate cleaner for your tub material, then follow a consistent scrub-and-rinse cycle. Remember to work in sections, especially around corners and drains, to ensure thorough coverage. This section outlines a proven approach that minimizes scrubbing time while maximizing stain removal. Consistency matters; a routine keeps soap scum from building up and makes every cleaning session shorter.
Tackling tough stains: soap scum and mineral deposits
Soap scum and mineral buildup are the most stubborn challenges in many bathrooms. For soap scum, a paste of baking soda and water provides gentle abrasion without scratching the surface. For mineral deposits, white vinegar can dissolve scale when used with warm water. Let cleaners sit for several minutes, then scrub with a non-scratch sponge. If stains persist, repeat the treatment or switch to a slightly stronger cleaner appropriate for your tub material, avoiding harsh solvents that can degrade finishes.
Eco-friendly options and safe ingredients
Many homeowners prefer greener choices that reduce chemical exposure. Vinegar, baking soda, and mild dish soap form a powerful trio for routine cleaning without harsh fumes. A paste of baking soda and water can tackle grout lines and stubborn spots, while a diluted vinegar solution is excellent for mineral deposits. When in doubt, stick to products labeled safe for your tub material and look for low-VOC cleaners. Cleaning Tips emphasizes using the minimum effective amount to avoid buildup and waste.
Quick routines for maintenance and prevention
Prevention is the best cleaning strategy. After showers, wipe down the tub with a dry microfiber cloth to reduce water spots and soap scum. Keep a small spray bottle of a mild cleaner in the bathroom for quick touch-ups. Regularly rinse the drain area to prevent clogs and wipe down the faucet handles to minimize residue. Establishing a weekly 10-minute wipe-down can dramatically reduce the effort needed for deep cleans and keep your bathtub shining.
Safety and allergy considerations
Some cleaners release fumes that can irritate eyes, lungs, or the skin. Always read label directions, use gloves, and ensure adequate ventilation. If you have sensitivities or allergies, choose fragrance-free or hypoallergenic products and test on a small patch first. Never mix cleaners with bleach, ammonia, or acids, as dangerous gases can form. If you experience symptoms after cleaning, step outside for fresh air and seek medical advice if needed.
Troubleshooting common issues
If your tub looks dull after cleaning, you may have used too much cleaner or not rinsed thoroughly. Make sure you rinse until water runs clear and wipe dry to prevent water spots. If residue lingers around grout or caulk, reapply a gentle cleaner and scrub with a soft brush. For persistent mildew, use a dedicated mold cleaner approved for bathroom use and ensure the area dries completely after each cleaning.
When to call a professional
If you encounter persistent staining, severe discoloration, or damaged surfaces that cleaning cannot restore, professional help may be warranted. A licensed cleaner can assess the tub material, recommend safe products, and perform deeper cleaning or resurfacing if needed. Regular professional maintenance can extend the life of high-end tubs and prevent costly repairs.
Tools & Materials
- Non-scratch scrub sponge(Soft, non-abrasive surface)
- Plastic spray bottle(For diluted cleaners and even distribution)
- White vinegar (5-8% acidity)(Good for mineral deposits)
- Baking soda(Mild abrasive and deodorizer)
- Dish soap (mild)(Degreasing action)
- Microfiber cloths (2-3)(For drying and polishing)
- Rubber gloves(Protect skin from cleaners)
- Bucket(Rinse water and mixing)
- Old toothbrush or corner brush(Clean grout and tight spots)
- Squeegee (optional)(Drop-off water for quick dry)
- Safety goggles (optional)(Eye protection for splashes)
Steps
Estimated time: 45-60 minutes
- 1
Clear the area and protect yourself
Remove all items around the tub and wipe away loose hair or debris. Put on gloves to protect your skin and keep cleaners off your clothing. This prep prevents accidental re-soiling and makes the cleaning quicker.
Tip: Use a drop cloth or old towel to catch drips. - 2
Gather tools and choose cleaners
Lay out your cleaners and tools so you can reach them without stepping away. Match cleaners to your tub material and plan to test any new product on a hidden corner first.
Tip: Label bottles if switching between products. - 3
Moisten surfaces and apply cleaner
Lightly spray or sprinkle cleaner on the tub’s surface, focusing on soap scum areas. Wetting the surface helps the cleaner spread evenly and reduces friction during scrubbing.
Tip: Work in small sections to prevent drying. - 4
Let cleaner sit for a few minutes
Allow the cleaner to break down buildup before scrubbing. A brief dwell time improves efficacy and minimizes scrubbing effort.
Tip: Avoid covering the entire tub with cleaner at once to prevent drying. - 5
Scrub in manageable sections
Use a non-scratch sponge in circular or back-and-forth motions. Focus on corners, drain areas, and grout lines where buildup is heaviest.
Tip: Apply extra pressure only on stubborn spots. - 6
Rinse thoroughly
Rinse from the far end toward the drain to push dirty water away. Ensure no cleaner residue remains, which can attract more grime.
Tip: Use warm water for better rinse efficiency. - 7
Address stubborn stains
For tough spots, reapply a mild paste or switch to a slightly stronger cleaner appropriate for your tub type. Scrub gently and rinse again.
Tip: Avoid metal brushes that can scratch. - 8
Dry and inspect
Dry with a microfiber cloth to prevent water spots and to reveal any missed areas. Inspect for streaks or remaining residue and re-clean if necessary.
Tip: Keep a dry towel handy for a final buff. - 9
Establish a maintenance routine
Schedule a quick weekly wipe-down and a deeper clean monthly to prevent heavy buildup. This keeps surfaces gleaming with less effort over time.
Tip: Set a reminder on your phone to stay consistent.
Questions & Answers
Can I use bleach to clean a bathtub?
Bleach can be effective on many surfaces, but never mix it with ammonia or acids, and ensure good ventilation. Follow label directions and avoid prolonged exposure on sensitive materials.
Bleach can work, but ventilate and never mix with ammonia or acids.
What is the best cleaner for acrylic tubs?
Mild dish soap or a baking soda paste works well for acrylic tubs. Avoid abrasive powders that can scratch the surface.
Mild soap or baking soda paste is best for acrylic tubs.
How do I prevent mold in the tub area?
Keep the area dry after use, clean weekly, and fix any leaks promptly. Good ventilation helps inhibit mold growth.
Dry the area after use and clean weekly to prevent mold.
Can I mix vinegar with baking soda for cleaning?
They fizz when combined, which can help loosen grime, but for best results use them separately in most cleaning tasks. Rinse well between applications.
They fizz together, but for best results use them separately.
Is it safe to use a scrub brush on porcelain?
Yes, but stick to soft-bristled brushes or sponges to avoid scratching the glaze. Avoid metal bristles altogether.
Soft brushes are fine; avoid metal bristles on porcelain.
Watch Video
The Essentials
- Match cleaner to tub material for safety
- Use non-scratch tools to protect finish
- Rinse thoroughly and dry after cleaning
- Ventilate and test new cleaners first
- Maintain a regular routine to prevent buildup