What to Clean Ear Piercings With: A Safe Cleaning Guide
Learn how to clean ear piercings safely using saline, mild soap, and gentle routines. This guide covers safe cleaners, step-by-step methods, timing, and signs of infection to watch for.

This guide shows you how to clean ear piercings safely and effectively. You’ll learn what to clean with, what to avoid, how often to clean, and a simple step-by-step routine that minimizes infection risk and promotes healing. Follow hygienic practices and choose gentle, non-irritating cleaners for best results. This quick answer helps you start confidently today.
Why proper cleaning matters for ear piercings
Healing a fresh ear piercing requires consistent care to prevent infection and ensure proper tissue recovery. The ear's delicate cartilage and surrounding skin can become irritated by bacteria if residue is left on the skin or jewelry. Regular, gentle cleaning helps remove crusties, reduce swelling, and keep the piercing comfortable during the healing window. According to Cleaning Tips, maintaining a regular cleaning routine lowers irritation and supports healing when done with appropriate solutions. The Cleaning Tips team found that gentle saline routines are less traumatic to healing tissue than harsher cleansers. In practice, this means focusing on the piercing site, not scrubbing the jewelry, and avoiding irritants like alcohol or hydrogen peroxide during the initial healing period. For homeowners and renters seeking a healthier home environment, this approach also reduces the chance of introducing bacteria from hands to the piercing. Always wash hands before touching the piercing and keep the surrounding area clean to minimize contamination. If you notice increasing redness, warmth, or discharge, stop cleaning and seek professional advice promptly. This careful approach helps you stay on track toward a healthy, comfortable piercing.
What to clean ear piercings with: safe cleaners and common myths
Cleaning around ear piercings isn’t about harsh scrubbing; it’s about using the right solution and gentle technique. Safe cleaners include sterile saline solution (0.9% NaCl) and a mild, fragrance-free soap mixed with warm water. A pre-packaged sterile saline rinse or a sterile saline spray can be very convenient, especially when you’re on the go. A clean towel or disposable paper towels are essential for drying without introducing bacteria. Common myths—such as soaking in saltwater or using essential oils or alcohol—can irritate tissue and delay healing. The reality is simple: stick with saline and mild soap, avoid alcohol-based products, and never rely on home remedies that haven’t been vetted by medical guidance. The goal is to keep the area clean without drying it out or stripping its natural oils. If you choose a spray, use it as directed and avoid spraying directly onto the piercing jewelry. This approach keeps the jewelry free of residue while maintaining skin hygiene. Remember to keep jewelry in place during cleaning unless you’re instructed otherwise by a professional, and always wash your hands before touching the piercing.
Tools & Materials
- Saline solution (0.9% NaCl)(Sterile, pre-packaged or boiled and cooled)
- Mild fragrance-free soap(Unscented, gentle formula)
- Warm water(For rinsing and creating a mild soap solution)
- Clean, lint-free towels or disposable paper towels(Pat-dry only; avoid rubbing)
- Cotton swabs (optional)(Only for around the jewelry, not for cleaning the piercing itself)
- Sterile saline spray (optional)(Use if saline liquid isn’t available)
- Disposable gloves (optional)(Provides an extra layer of cleanliness if desired)
Steps
Estimated time: 15-30 minutes
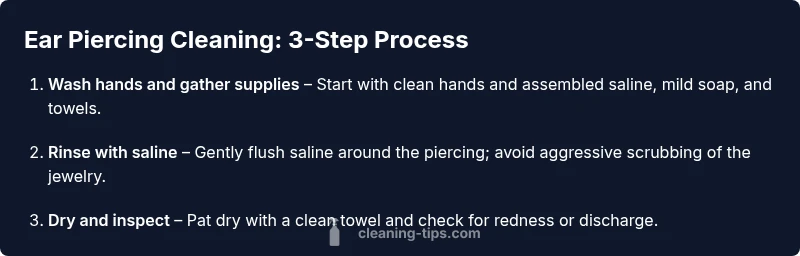
- 1
Wash hands thoroughly
Begin by washing your hands with soap and warm water for at least 20 seconds. Dry with a clean towel before touching the piercing. Clean hands reduce the transfer of bacteria to the pierced area, which is crucial during the healing window.
Tip: Keep fingernails short and avoid touching other surfaces after washing to minimize contamination. - 2
Gather your supplies
Assemble saline solution, mild soap, clean towels, and any optional tools before starting. Having everything within reach reduces the need to touch the piercing mid-cleaning. Check that products are within their use-by dates and that packaging remains sterile.
Tip: Open any packaged items right before use to maintain sterility. - 3
Rinse with saline
Tilt the head and gently flush saline along the outside and around the piercing. Do not scrub or rotate the jewelry while cleaning. The saline bath helps loosen crusties and flush away debris without irritating tissue.
Tip: Avoid spraying saline directly onto the jewelry if possible; aim at the skin around the piercing instead. - 4
Clean the surrounding skin with mild soap
Add a small amount of mild, fragrance-free soap to a moistened cloth or your gloved hand and gently cleanse the skin around the piercing. Rinse away all soap with clean lukewarm water. Pat the area dry with a clean towel and avoid rubbing the piercing site.
Tip: Do not use harsh or scented products on or near the piercing. - 5
Dry and inspect
Gently pat dry with a clean towel. Inspect the piercing for redness or unusual swelling. If you notice signs of irritation, continue gentle cleaning and avoid irritants. Do not reuse towels that may have harbored bacteria from other tasks.
Tip: If crusties persist, continue cleaning but do not force crusts off. - 6
Return jewelry to position and monitor
If advised by a professional, reinsert jewelry smoothly and ensure it sits comfortably without tugging. Monitor for signs of infection over the next 24–48 hours and seek medical advice if redness spreads or pain increases.
Tip: Avoid twisting or rotating the jewelry; movement can irritate healing tissue.
Questions & Answers
How often should I clean a new ear piercing?
During the initial healing period, clean the piercing 2-3 times per day using sterile saline or mild soap and water. After healing, reduce frequency to maintain hygiene without drying the skin. Always follow your piercings’ professional aftercare instructions.
Clean new piercings a few times a day during healing, then reduce frequency as advised by a professional.
Can I use hydrogen peroxide or alcohol to clean ear piercings?
Hydrogen peroxide and alcohol can irritate the healing tissue and delay recovery. Stick to sterile saline or mild fragrance-free soap for cleaning until healing is complete.
Avoid hydrogen peroxide and alcohol; they can irritate healing tissue.
Is it safe to remove the jewelry while cleaning?
Do not remove the jewelry during healing unless a clinician instructs you to. Removing jewelry can trap bacteria or trap pus and cause complications. If you must adjust, seek professional guidance.
Don’t remove the jewelry during healing unless a professional says it’s okay.
What are signs of infection I should watch for?
Signs include increasing redness, warmth, swelling, pain, fever, or pus. If you notice these, contact a clinician promptly for evaluation and potential treatment.
Watch for redness, swelling, warmth, or unusual discharge and seek care if they worsen.
Can I make saline at home for cleaning?
Commercial sterile saline is best. If you make saline at home, use sterile water and precise salt concentration (0.9%). Improper mixing can irritate tissue or cause infection.
Use properly mixed saline or commercially prepared saline; avoid improvised solutions.
What should I do if cleaning hurts or worsens symptoms?
Pain that increases after cleaning warrants stopping the routine and seeking medical advice. Reassess technique, dilution, and any products used to ensure they’re appropriate for your skin.
Pain after cleaning isn’t normal—stop and consult a clinician if it continues.
Watch Video
The Essentials
- Use saline as your primary cleaner
- Do not rotate or remove jewelry during healing
- Always wash hands before cleaning
- Monitor for signs of infection and seek care if needed