Bleach and Mold: What Happens When You Clean Mold at Home
Learn how bleach works on mold, its limits, and how to use it safely on nonporous surfaces. A practical guide from Cleaning Tips for homeowners.

Goal: Learn how to use household bleach to address mold on nonporous surfaces, understand its limits, and apply safety precautions. By following the steps, ensuring proper ventilation, and avoiding mixing with ammonia, you can reduce visible mold and prevent fumes. This quick answer previews the step-by-step approach homeowners should use, with moisture control and safe disposal emphasized.
Why bleach is used for mold
Many homeowners reach for household bleach when they find mold because it's familiar and can kill mold on nonporous surfaces. Bleach, or sodium hypochlorite, oxidizes mold and can remove the visible stain, creating a cleaner appearance. However, it doesn’t address the root cause of moisture that allowed mold to grow, and its effectiveness depends on surface type, mold depth, and ventilation. According to Cleaning Tips, understanding when bleach helps—and when it doesn't—is essential for safe, effective cleanup. Nonporous surfaces like ceramic tile, glass, enamel-coated metal, and finished surfaces often respond to a bleach solution, because the liquid can contact and kill surface mold colonies and leave a cleaner, whitened appearance. On the other hand, porous materials—drywall, wood, cardboard—may absorb moisture and harbor mold growth behind the surface, which bleach cannot reach. The Cleaning Tips team has found that even when bleach seems to remove mold from sight, spores can remain hidden inside porous substrates, ready to regrow if moisture returns. The key is to pair bleach cleaning with moisture control: fix leaks, improve airflow, and dry each area thoroughly after washing.
What bleach can and cannot do
Bleach can be effective at killing mold on nonporous surfaces such as tiles, glass, and finished enamel when used properly and with adequate dwell time. It is less reliable for porous materials where mold has penetrated below the surface, such as drywall or shredded wood fibers. In those cases, bleach may remove surface staining but not eradicate embedded mold, and odors can linger. The point of using bleach is not to substitute for moisture control, but to interrupt surface mold growth while you address the moisture source. Cleaning Tips notes that bleach works best when there's a clean, non-porous contact area and when surfaces are pre-cleaned of grime that could shield mold. Always follow label directions and avoid mixing with other cleaners, especially ammonia or acids, to prevent dangerous fumes.
Safety first: ventilation and PPE
Ventilation is essential any time you use bleach for mold cleanup. Open windows and, if possible, run a fan to push fumes away from living spaces. Protect your eyes with safety goggles, your skin with chemical-resistant gloves, and your lungs with a proper mask or respirator. Never mix bleach with ammonia or vinegar; the resulting fumes can be toxic and irritating. If you smell strong chlorine or irritants, stop, leave the area, and ventilate longer before resuming. In a moist bathroom, place a towel under the door to minimize fumes in adjoining rooms, and consider doing mold work during a time when occupants are away. For homeowners with sensitive individuals or pets, consider safer alternatives or professional services.
Surface suitability and preparatory steps
Before applying a bleach solution, determine the surface type and the mold extent. Nonporous surfaces like ceramic, glass, and sealed metal are generally suitable for bleach treatment when mold coverage is light and the area is easily rinsed and dried. Porous materials or surfaces with extensive deep contamination may require replacement rather than cleaning. Clear the area of items, remove standing moisture, and test a small, inconspicuous spot to ensure the surface isn’t damaged by bleach. If you’re cleaning grout lines or textured surfaces, a scrub brush designed for bathrooms can help reach into crevices without abrading the substrate. Always proceed gradually, reassess after cleaning, and be prepared to stop if the surface shows signs of deterioration.
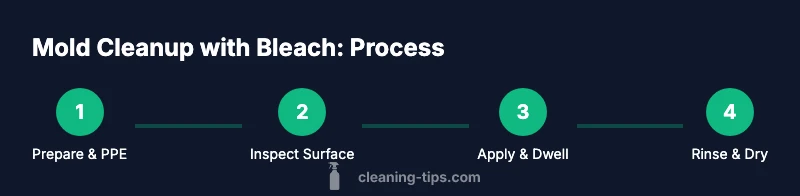
Step-by-step approach to treating mold with bleach
The following approach gives a practical, surface-safe method for mold cleanup on nonporous surfaces. Begin by preparing the area and PPE, then apply a bleach solution, wait briefly, scrub away growth, rinse, and dry. After cleaning, re-check for remaining mold and moisture. This is a high-level overview intended to set expectations before you dive into the formal step-by-step guide below. Remember that the best long-term defense against mold is moisture control, prompt leak repair, and ongoing ventilation. In all cases, follow product labels for dilution and dwell times and never mix bleach with ammonia or acids. The goal is a clean, dry surface with no lingering odors or damp patches.
Aftercare: drying, disposal, and prevention
After treating mold, dry the area thoroughly to prevent regrowth. Wipe surfaces with a dry cloth, use a dehumidifier or fan to remove residual moisture, and keep the space well-ventilated for 24-48 hours. Dispose of used rags or disposable wipes in a sealed bag to prevent spreading mold spores. Rinse brushes and containers with clean water and allow them to dry completely before reuse. To prevent future mold problems, fix leaks promptly, monitor humidity levels, and ensure that bathrooms and laundry rooms have adequate airflow. Regular cleaning with mild detergents can also deter mold from taking hold on susceptible surfaces.
Common mistakes and safer alternatives
Common mistakes include using bleach on porous materials, skipping ventilation, and mixing bleach with ammonia or acids, which releases toxic gases. Bleach may also leave behind residual odors if surfaces aren’t dried thoroughly. For some surfaces or stubborn growth, alternatives like hydrogen peroxide, baking soda pastes, or simple soap and water can be effective without fumes. If mold growth covers a large area or reappears after cleaning, it may indicate a moisture problem that needs professional evaluation. Remember: safety first, and when in doubt, consult a mold remediation professional.
Real-world scenarios and limitations
In a bathroom with ceramic tile and sealed grout, bleach can clear surface mold and whiten grout lines with careful application and thorough rinsing. In a wood-framed closet with hidden leaks, the mold may be embedded; bleach alone may not be enough, and replacement or deep drying may be required. In basements with high humidity, mold can spread quickly behind walls; in such cases, addressing humidity and moisture sources is essential alongside any cleaning. The Cleaning Tips team emphasizes that every cleaning scenario is unique, and a visual assessment plus moisture readings—when available—can guide your decision about whether bleach is the right tool.
Troubleshooting mold and when to call professionals
If mold returns after a bleach cleaning, or if you notice symptoms like persistent odors, water leaks, or extensive growth, it’s time to call a professional. Bleach is a temporary fix for surface growth and should be part of a broader moisture-management plan. The Cleaning Tips team recommends reaching out to a mold remediation specialist when growth spans large areas, involves porous materials, or recurs despite cleaning. Early intervention often saves time and reduces the risk of structural damage and health concerns.
Tools & Materials
- household bleach (regular 5-6% sodium hypochlorite)(Keep out of reach of children; use in well-ventilated area)
- water(For dilution per label instructions)
- rubber gloves(Protect skin from splashes)
- eye protection (safety goggles)(Prevent splashes to eyes)
- mask or respirator(Protect lungs from fumes)
- bucket(For mixing and rinsing)
- scrub brush or sponge(Non-metallic brush for scrubbing)
- rag or disposable cloths(For wiping and cleanup)
- plastic sheeting or painter's tape(To seal off adjacent areas if needed)
Steps
Estimated time: 40-60 minutes
- 1
Prepare area and PPE
Put on gloves, goggles, and a mask before touching any moldy area. Open windows or run a fan to ensure good ventilation. Clear the space of movable items and cover nearby surfaces to protect them from splashes.
Tip: Ventilate for several minutes before starting to reduce fume buildup. - 2
Test surface and decide approach
Inspect whether the surface is nonporous (tile, glass, sealed metal) or porous (drywall, plywood). If the mold has penetrated deeply or covers a large area, plan for professional help. This step prevents wasted effort on surfaces unlikely to respond well to bleach.
Tip: If in doubt, start with a small test patch and observe for damage. - 3
Dilute bleach per label
Prepare the bleach solution according to the product label. Do not mix with ammonia or acids. Pour the solution into a clean bucket and ensure you have plenty of ventilation during the process.
Tip: Never mix cleaners; fumes from improper mixing can be hazardous. - 4
Apply bleach to moldy area
Saturate the moldy area with the solution using a cloth or spray bottle, avoiding pooling. Cover the entire affected zone to prevent regrowth from unseen hidden spore layers.
Tip: Apply in sections to maintain control and safety. - 5
Let the solution dwell
Allow the solution to remain on the surface for several minutes so it can work. Do not let it dry completely on the surface, as dry residues can recontaminate the area.
Tip: Keep it moist but not running dry for maximum effectiveness. - 6
Scrub away mold
Gently scrub the treated area with a non-metallic brush to dislodge mold colonies. Work from the outer edges toward the center to avoid spreading spores. Rinse the brush frequently.
Tip: Avoid aggressive scrubbing on delicate finishes. - 7
Rinse and dry thoroughly
Rinse the area with clean water and wipe dry with a clean cloth. Use a fan or dehumidifier to speed up drying and reduce residual moisture.
Tip: Drying is crucial to prevent regrowth. - 8
Dispose of contaminated materials
Seal and dispose of used wipes, disposable gloves, and any porous materials that could not be cleaned. Wash reusable tools with soap and water and air-dry.
Tip: Double-bag waste to prevent spore spread. - 9
Prevent recurrence
Address moisture sources such as leaks, poor ventilation, or high humidity. Regularly inspect prone areas and maintain airflow to discourage future mold growth.
Tip: Keep humidity levels low and surfaces dry.
Questions & Answers
Can bleach kill mold on all surfaces?
Bleach can kill mold on nonporous surfaces but is less effective on porous materials where mold penetrates deeper. Surface cleaning may not address hidden growth.
Bleach works on nonporous surfaces but might not reach mold embedded in porous materials.
Is it safe to mix bleach with ammonia?
No. Mixing bleach with ammonia creates dangerous chloramines that can irritate eyes, lungs, and skin. Always keep cleaners separate.
Never mix bleach with ammonia; the fumes are hazardous.
How long should bleach stay on mold?
Product labels provide recommended dwell times. Generally, keep the solution on the mold for a short period while avoiding pooling, then rinse and dry.
Follow the product label for how long to leave it there.
Does bleach remove all mold stains?
Bleach can remove visible stains on contact with nonporous surfaces, but it may not eliminate odors or deeply embedded mold.
It removes surface stains but may not reach embedded mold.
What should I do after cleaning mold with bleach?
Dry the area thoroughly, fix moisture problems, and monitor for recurrence. Consider replacing porous materials if mold returns.
Dry thoroughly and fix moisture to prevent recurrence.
Are there safer alternatives to bleach?
Yes—hydrogen peroxide, detergent solutions, or vinegar can work on some surfaces without strong fumes. Always test first.
There are alternatives to bleach that can work depending on the surface.
When should I call a professional?
If mold covers a large area, recurs after cleaning, or involves structural materials, professional remediation is advised.
Call a mold pro if the problem is large or keeps coming back.
Watch Video
The Essentials
- Bleach can kill mold on nonporous surfaces when used properly.
- Bleach is not a universal solution for porous materials.
- Ventilation and PPE are essential for safe cleanup.
- Moisture control is the long-term defense against mold recurrence.
- Never mix bleach with ammonia or acids.