Car Clean Detail: A Complete How-To Guide
Learn how to perform a thorough car clean detail, from exterior wash to interior care and protective finishes. Follow practical steps, safety tips, and a repeatable checklist from Cleaning Tips to keep your vehicle looking its best.

Complete a thorough car clean detail that covers exterior washing, interior vacuuming, and protective finishes. This step-by-step guide shows prep, product selection, safe techniques, and a full checklist to keep your vehicle looking showroom-ready. By following these methods, you’ll reduce wear and preserve value while enjoying a healthier, cleaner cabin. According to Cleaning Tips, consistent detailing boosts long-term cleanliness and car care.
Why a Car Clean Detail Matters
A car clean detail isn't just about aesthetics; it helps preserve paint, protect upholstery, and maintain a healthier cabin environment. Regular detailing reduces the buildup of dirt, grime, and odors that degrade surfaces over time. The Cleaning Tips team notes that a consistent detailing routine supports better long-term car care, resale value, and overall satisfaction with your vehicle. By investing effort into a detail, you set a foundation for easier upkeep in the weeks and months that follow.
Core Components of a Detail: Exterior, Interior, and Engine Bay
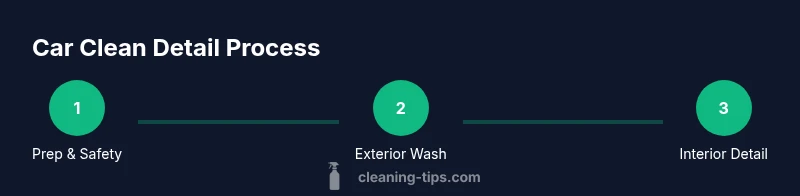
A comprehensive detail splits into three major areas: exterior, interior, and, if you choose, the engine bay. Exterior work includes washing, decontaminating, and protecting paint and trim surfaces. Interior work covers vacuuming, wiping, and treating materials to maintain color and texture. Engine bay cleaning is optional and should be approached with caution, avoiding sensitive electrical components. This section outlines what each area typically entails and how to prioritize tasks for efficiency and effectiveness. The overview also helps you plan your time and budget so you can approach a car clean detail with confidence. Cleaning Tips emphasizes that a structured plan reduces guesswork and improves results.
Exterior Detailing: Wash, Decontaminate, Protect
Exterior detailing begins with a safe washing ritual designed to minimize swirl marks and marring. Use a two-bucket method, a dedicated wash mitt, and a microfiber drying towel. After washing, consider a clay bar or decontamination product to remove embedded contaminants. Finish with a protective layer such as wax or sealant to extend shine and guard against weathering. Rinse thoroughly, dry completely, and inspect for missed spots that may require a second pass. Practical tips include working from top to bottom, keeping cleaning tools clean, and avoiding harsh brushes on delicate trim. Cleaning Tips notes that consistent exterior care helps maintain factory-fresh looks longer.
Interior Detailing: Vacuum, Clean, Protect
Interior detailing focuses on removing dust, crumbs, and stains from every surface. Start with a thorough vacuum, including seats, carpets, mats, and under seats. Wipe hard surfaces with a vinyl-safe cleaner, then treat with a conditioner or protectant. Clean windows last to avoid transferring dust. For fabric upholstery, consider a gentle deodorizing treatment. Use brushes to reach vents and seams. A well-executed interior detail improves comfort and air quality, while professional-grade cleaners can extend the life of interior materials. The Cleaning Tips analysis shows that well-maintained cabins feel cleaner and more inviting.
Maintenance and Safety Considerations
Safety and maintenance are essential for a successful car clean detail. Always work in a shaded area to prevent water spots and product evaporation. Test cleaners on inconspicuous areas first. Read label directions and follow dilution guidelines. Use proper protective gear, and keep water away from electrical components. Store products securely after use and dispose of used towels responsibly. This section also covers common hazards, such as slippery floors or chemical exposure, and how to minimize risk during a DIY detail.
Common Mistakes and How to Avoid Them
Avoid common pitfalls such as washing in direct sun, using dirty towels, or neglecting to dry surfaces promptly. Refrain from applying wax or sealants on dirty or damp surfaces, which can trap contaminants. Don't rush the interior work; take time to reach crevices and door pockets. Regularly replace worn towels and brushes to avoid scratches. By recognizing these traps early, you can preserve your car’s surfaces and reduce rework. Cleaning Tips encourages a methodical pace and consistent checks to ensure you don’t miss spots.
Quick Troubleshooting Checklist
If you encounter streaks, odors, or leftover contaminant layers, revisit the corresponding section of the detail. Re-wash problem areas with clean water, re-clay any affected panels, and reapply protective coatings only after surfaces are fully dry. Document what worked for future details and adjust your product choices to suit your climate and vehicle type. This practical checklist helps you stay organized and avoid frustration during a long detailing session.
Conclusion: Building a Routine for Longer-Lasting Shine
A car clean detail is not a one-and-done task; it’s a maintenance habit that preserves aesthetics, value, and comfort. By following a repeatable process—from prep to protection—you create lasting improvements in both the exterior finish and interior cleanliness. Cleaning Tips emphasizes that consistency matters most: small, regular details compound into a dramatically better-looking car over time.
Tools & Materials
- Two-bucket wash system (one soapy water, one clean rinse)(Use separate rinse bucket to avoid soaking dirt back onto panels)
- Microfiber wash mitt(Gentle on paint; use with clean water and soap)
- Microfiber drying towels(One for drying, one for buffing to remove water spots)
- Wheel brush(Stiffer bristles for wheels; avoid chrome surfaces)
- Wheel cleaner (non-acidic)(Follow label directions; test on a hidden area first)
- All-purpose cleaner (dilutable)(Dilute according to product instructions)
- Glass cleaner (streak-free)(Use with a clean microfiber cloth)
- Interior cleaner (vinyl/leather-safe)(Choose a product suitable for your interior materials)
- Vacuum with attachments(Crevice tool helps reach tight spaces)
- Detail brushes / cotton swabs(Clean vents, seams, and cup holders)
- Clay bar or iron decon product (optional)(For heavy contamination on bumpers and panels)
- Wax or sealant (optional)(Apply after decontamination for longer protection)
Steps
Estimated time: 2-4 hours
- 1
Prepare workspace and vehicle
Park in shade, gather all supplies, and close doors. Remove personal items and mats to give full access to surfaces. Inspect the vehicle for obvious issues and plan the order of operations.
Tip: Test a small area with your cleaners before broad application. - 2
Set up two-bucket wash system
Fill one bucket with soapy water and the other with clean rinse water. Place your wash mitt in the soapy bucket, wring lightly, then rinse in the clean bucket before another pass.
Tip: Rinse mitt often to avoid rubbing dirt into the paint. - 3
Rinse the vehicle exterior
Lightly rinse from top to bottom to remove loose dirt and debris. This reduces the chance of scratching during washing. Avoid high-pressure aiming directly at edges and seals.
Tip: Always keep the nozzle moving to prevent water from pooling. - 4
WASH exterior panels
Wash in sections using the two-bucket method. Use long, straight strokes and rinse frequently. Work from the roof downward to minimize recontamination of cleaned areas.
Tip: Switch to a fresh section of the mitt on each panel if dirt builds up. - 5
WASH wheels and tires separately
Use a wheel brush with a dedicated cleaner to remove brake dust. Rinse wheels thoroughly and avoid spraying cleaners toward sensitive trim or the paint.
Tip: Keep wheel cleaners away from painted surfaces. - 6
Dry exterior surfaces
Pat dry with clean microfiber towels; avoid dragging damp cloths across edges. If you see water spots, buff with a dry towel until the surface looks uniform.
Tip: Drying helps prevent water spots and streaks. - 7
Vacuum interior thoroughly
Vacuum seats, carpets, mats, and hard-to-reach areas. Remove floor mats to vacuum underneath and shake them out before vacuuming again.
Tip: Use a crevice tool to reach under seats and between cushions. - 8
Clean interior surfaces and protect
Wipe down all hard surfaces with an interior-safe cleaner. Apply conditioner or protectant to plastics and vinyl as appropriate. Clean glass surfaces last to avoid smudges.
Tip: Allow treated surfaces to dry before use; this helps products cure properly. - 9
Optional: apply wax or sealant
If you opted for protection, apply wax or sealant once surfaces are clean and dry. Buff to a crisp shine according to product directions.
Tip: Work in small sections and follow the cure time advised by the product.
Questions & Answers
What is a car clean detail?
A car clean detail is a thorough cleaning that covers exterior washing, interior vacuuming, surface wiping, and protective finishes to restore appearance and protect surfaces.
A car clean detail is a thorough inside-and-out cleaning that includes protection for future longevity.
How long does a full detail take?
A full detail typically takes several hours depending on vehicle size, condition, and how deep you want to go with protection.
Expect several hours depending on the car and how thorough you are.
Do I need to wax or seal after detailing?
Waxing or sealing after a detail adds a protective barrier and enhances shine, especially on painted surfaces. Apply only after surfaces are clean and dry.
Yes, waxing or sealing after detailing helps protect the finish.
Can I detail my car at home?
Yes, a home detail is feasible with proper space, clean water access, and ventilation. Use the right products and follow safety guidelines.
Yes, you can detail at home with the right setup.
What products are best for interior cleaning?
Choose interior-safe cleaners appropriate for vinyl, leather, and fabric surfaces. Test any product on a hidden area first and follow dilution directions.
Pick cleaners suited for each interior material and test first.
Is engine bay cleaning part of a detail?
Engine bay cleaning is optional and should be done with caution. Cover electrical components and avoid soaking wiring or air intake areas.
Engine bay cleaning is optional; be careful around electrical parts.
Watch Video
The Essentials
- Plan your detail in shade for best results
- Use the two-bucket method to protect the finish
- Dry thoroughly to prevent water spots
- Protect surfaces with wax/sealant for longevity
- Regular detailing maintains value and cleanliness