Car Clean: A Practical How-To Guide for Your Vehicle
Learn a practical, eco-friendly car clean routine covering exterior wash, interior detailing, stain removal, and ongoing maintenance to keep your vehicle looking and smelling fresh.

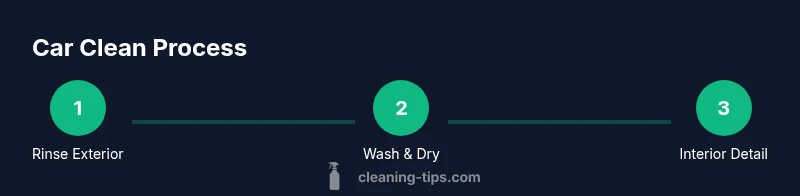
You’ll learn a complete, step-by-step car clean routine that covers exterior washing, interior detailing, stain removal, and ongoing maintenance. This guide emphasizes safe products and efficient techniques to achieve a thorough, long-lasting result for your vehicle while saving time and effort. By following these steps, you’ll keep your car looking like new with a healthier interior.
Why Car Clean Matters
A thorough car clean does more than make your vehicle look good—it protects paint, improves safety, and enhances comfort for you and your passengers. Regular cleaning reduces the buildup of dirt, grime, and road salts that can cause corrosion and wear over time. A clean car also improves visibility by keeping windows and lights clear, and it helps maintain resale value by preserving interior surfaces and exterior coatings. In this guide we’ll walk through practical, proven methods for a complete car clean that you can do with common supplies. According to Cleaning Tips, a systematical approach reduces swirl marks and keeps finishes looking new, especially when you use microfiber tools and proper washing techniques. The Cleaning Tips team found that consistent, repeatable steps are more effective than sporadic, rushed cleans. This article aims to make your next car clean efficient, enjoyable, and environmentally considerate.
Quick Start: What You’ll Need for a Car Clean
Before you dive in, gather the essentials you’ll use for both exterior and interior tasks. Having everything organized minimizes wasted time and helps you maintain a steady rhythm during the session. A well-planned car clean also reduces the likelihood of applying cleaners to the wrong surfaces. For best results, use tools designed for automotive care and eco-friendly products when possible. Cleaning Tips analysis shows that a two-bucket wash with microfiber towels dramatically lowers paint swirl and streaks, especially on light-colored cars. Prepare a dedicated space where you can rinse, dry, and wipe without leaving water spots or residue on surrounding surfaces. Clean, dry air in the workspace keeps your cleanup efficient and enjoyable.
Exterior Cleaning: Wash, Dry, and Protect
Exterior cleaning starts with a thorough rinse to remove loose dirt. Use a dedicated car wash soap that’s pH-balanced to protect wax and clear coat. Work from top to bottom to prevent dragging dirt across areas you’ve already cleaned, and use a microfiber wash mitt to trap grit safely. Rinse frequently and dry promptly with a plush towel or chamois to minimize water spots. After washing, apply a wax or sealant to protect the finish and make future cleans quicker. Safe, water-friendly practices reduce environmental impact while preserving your car’s shine. The cleaner you keep the surface, the easier maintenance will be between full washes.
Glass and Windows: Streak-Free Shine
Clean glass last in exterior cleaning to avoid contaminating fresh paint. Use a dedicated glass cleaner or a vinegar-water mix on a microfiber cloth to remove streaks and smudges. Wipe side windows in a vertical motion and rear window in a horizontal pass to optimize visibility. For interior glass, pull the shade or window controls down to keep glass dry and avoid overspray on upholstery. Proper technique yields crystal-clear visibility and a safer driving experience.
Interior Cleaning: Seats, Mats, and Surfaces
Interior car clean begins with removing loose items and vacuuming thoroughly: carpets, mats, seats, and consoles. Treat fabric seats with a suitable upholstery cleaner and a soft brush to lift dirt from fibers. Use an all-purpose interior cleaner on hard surfaces, paying attention to armrests and control panels where oils accumulate. Don’t forget the vents—use a small brush or compressed air to clear dust. A fresh interior reduces odors and makes rides more pleasant for every passenger. Cleaning Tips notes that using microfiber towels for interior work minimizes lint and moisture while keeping surfaces looking new.
Detailing Tricks for Crevices and Hard-to-Reach Areas
Small gaps around door seals, emblems, and trim can trap grime. Use a detail brush or an old toothbrush to loosen dirt in crevices, then wipe away with a damp microfiber cloth. For stubborn grime, a light solvent or cleaner recommended by your product’s label can help—test on an inconspicuous area first. Avoid over-wetting areas adjacent to electronics or upholstery, which can cause swelling or mold. Patience and precision pay off in a car clean that feels meticulously finished.
Stain Removal Guide for Fabrics and Upholstery
Stains on seats or carpets require targeted treatment. Blot spills immediately to prevent deep penetration. For common fabric stains, a mild cleaner and a soft brush can lift soils without abrading fibers. For oily stains, use a degreaser designed for fabrics, then blot and air-dry. Always allow cleaned areas to dry completely before use. If a stain persists, repeat with a fresh cleaner or consider a professional cleaning to prevent permanent damage. A methodical approach minimizes the chance of re-staining future trips.
Maintenance Routine: How Often and Why
A consistent maintenance schedule makes car clean more manageable and less time-consuming. Short, frequent cleaning sessions prevent heavy buildup and help you stay on top of issues before they escalate. For most vehicles, a light wipe-down weekly and a full detail every 4–6 weeks keeps surfaces in top condition. Seasonal checks align with weather changes, ensuring wax protection in winter and UV protection in summer. A routine helps maintain resale value and reduces the need for costly restorations. The Cleaning Tips team recommends setting reminders on your calendar so you never skip a routine clean.
Eco-Friendly Car Clean: Safe Products and Alternatives
Eco-conscious cleaners, microfiber towels, and water-efficient methods reduce environmental impact without sacrificing results. Choose pH-balanced soaps and avoid harsh solvents that can harm finishes or the surrounding ecosystem. For stubborn grime, consider safe alternatives like baking soda pastes for odor removal and white vinegar for glass. Always check product labels for automotive compatibility and test in an inconspicuous spot.
Troubleshooting Common Issues During a Car Clean
Even experienced cleaners hit snags. If you notice streaks after drying, re-evaluate your drying technique and towel type, and ensure you’re using the right product for your surface. If the wax appears cloudy, it may be incompatible with the underlying sealant or left on too thick. In hot, direct sun, products can dry too quickly, leaving residues; work in shade when possible and rinse surfaces thoroughly. With consistent practice and the right supplies, most issues are quickly resolved.
Final Quick Checklist Before You Drive
Before you hit the road, do a final walk-around to verify there are no water spots, visible residues, or loose mats; ensure all doors close cleanly and no cleaning products remain on pedals or seats. Confirm windows are dry, and the vehicle’s interior is free of odors. A thorough check guarantees a confident drive and a truly car clean result.
Tools & Materials
- bucket (2)(One for wash water, one for rinse water using the two-bucket method)
- microfiber wash mitt(Soft, non-abrasive mitt to trap dirt)
- car wash soap(pH-balanced, soap formulated for automotive finishes)
- microfiber towels(Multiple towels for drying, wiping, and detailing)
- wash brushes/wheel brush(Wheel-specific brush to safe-guard rims)
- glass cleaner(Streak-free formula for all glass surfaces)
- interior cleaner(Suitable for vinyl/plastic surfaces and dashboards)
- vacuum(HEPA or high-suction for mats and compartments)
- drying towel or chamois(Plush, lint-free to prevent water spots)
- clay bar (optional)(If you want a flawless finish on paint; use with lubricant)
- detailing spray (protectant)(For quick touch-ups and protection)
Steps
Estimated time: 1 hour 30 minutes
- 1
Prepare workspace and tools
Choose a shaded, well-ventilated area. Gather all supplies and place them within easy reach. This minimizes back-and-forth movement and helps you stay organized during the car clean.
Tip: Set up two buckets with separate rinsing water to prevent transferring dirt back onto the car. - 2
Rinse the exterior
Rinse the car from top to bottom to remove loose dirt. A thorough rinse reduces scratch risk during washing and helps the soap work more effectively.
Tip: Keep the nozzle at a low spray setting to avoid forcing dirt into crevices. - 3
Wash the paint surfaces
Dip the wash mitt in the soapy bucket and start at the roof, working downward. Rinse the mitt frequently and use straight, overlapping strokes to lift dirt without rubbing it deeper into the clear coat.
Tip: Use a dedicated car wash soap rather than household cleaners for paint-safe results. - 4
Rinse again and dry
Rinse off all suds completely, then dry with a plush towel or chamois. Pat dry rather than rubbing aggressively to prevent micro-scratches.
Tip: Dry between panels to prevent water spots from forming. - 5
Clean wheels and tires
Use a wheel brush and a separate bucket of soapy water. Scrub spokes and tires, then rinse thoroughly to remove brake dust. Dry with a clean towel.
Tip: Avoid letting wheel cleaner contact painted surfaces; wheels deserve their own dedicated tools. - 6
Clean interior surfaces
Vacuum the cabin, including seats, mats, and carpets. Wipe down dashboards, door panels, and handles with an appropriate cleaner. Treat fabric areas with a suitable upholstery cleaner.
Tip: Test cleaners on a small area first to confirm colorfastness. - 7
Clean glass and mirrors
Spray glass cleaner on a microfiber cloth and wipe in a consistent pattern to prevent streaks. Avoid spraying directly onto gauges or electronics.
Tip: Use circular or vertical strokes to prevent smear marks. - 8
Apply protectant and wax
Apply a wax, sealant, or spray protectant to exterior surfaces, following product directions. Buff to a high gloss for a longer-lasting shield against the elements.
Tip: Work in sections and allow proper curing time before exposing to rain or sun. - 9
Final inspection and touch-ups
Check for missed spots, re-wipe problematic areas, and ensure everything is completely dry. Re-seat mats and check the trunk for stray debris.
Tip: A final wipe with a clean cloth helps catch any overlooked residues.
Questions & Answers
What is the best order for a car clean?
Start with exterior washing, then dry, clean wheels, vacuum the interior, and finish with glass and interior protection. This minimizes recontamination and makes the process efficient.
Start with the outside, dry it, then move inside, and finish with glass and protection for best results.
Can I use household cleaners on my car surfaces?
Household cleaners can be too harsh for automotive finishes and plastics. Use pH-balanced car wash soaps and interior cleaners designed for vehicles to prevent damage.
Avoid household cleaners; opt for car-safe products to protect finishes.
Is it safe to wax the car on the same day as washing?
Yes, after a thorough wash and complete drying. Waxing on a damp surface can trap water and reduce shine. Give time for any lingering moisture to evaporate.
You can wax after drying, but make sure the surface is completely dry first.
How do I remove tough stains from upholstery?
Treat stains with a fabric-safe cleaner and a soft brush. For persistent marks, reapply cleaner and allow it to dwell as directed, then blot and air-dry.
Try a fabric-safe cleaner and a soft brush, then blot and dry thoroughly.
How often should I clean the car interior?
A light wipe-down weekly plus a deep interior detail every 4–6 weeks keeps odors and soils under control. Adjust frequency with seasons and usage.
Clean inside weekly and do a deep interior detail every month or so.
What should I avoid when cleaning a car?
Avoid abrasive tools on paint, strong solvents on plastics, and direct sprays on electrical components. Always follow product labels for safety.
Don’t use harsh abrasives or strong solvents near electronics.
Watch Video
The Essentials
- Plan the car clean before you start
- Use proper tools to avoid scratches
- Work top-to-bottom for efficiency
- Keep surfaces dry to prevent water spots
- Choose eco-friendly cleaners when possible