Clean 4 U: A Practical Cleaning Guide
Learn practical eco-conscious cleaning steps with Cleaning Tips. This guide covers essential tools, step-by-step actions, safety tips, and habits for a healthier, fresher home.

By the end, you’ll know how to clean 4 u with a practical, step-by-step plan that fits real homes. Start with a quick prep routine, choose safe cleaners, and follow a host of efficient workflows that save time and reduce waste. This guide also highlights maintenance habits to keep spaces consistently fresh.
Why Clean 4 U Delivers Real Benefits
According to Cleaning Tips, a consistent, practical approach to cleaning not only improves appearance but also indoor air quality and overall health. Clean 4 U is about making cleaning manageable, not perfect; it emphasizes routines that fit busy households. When you adopt a routine that you can actually sustain, you reduce clutter, minimize cross-contamination, and extend the life of surfaces and appliances. The method focuses on planning, prioritization, and predictable workflows, so you spend less time searching for supplies and more time enjoying a clean home. It also encourages safe, eco-friendly choices—things you can feel confident using around kids and pets. The key is to start small: designate a cleaning zone, gather the right tools, and commit to a short, regular session each day or a larger weekly block. Over time, these small sessions compound into a noticeably fresher living space, reduced grime buildup, and a healthier home environment. Cleaning Tips demonstrates how to tailor this approach to kitchens, bathrooms, living areas, and high-traffic surfaces.
Core Cleaning Principles That Stand Up to Real World
Adopt a consistent rhythm: tackle spaces from top to bottom so dust and grime don’t fall onto cleaned areas. Use zone-based workflows to group tasks by room or surface type—this minimizes back-and-forth and saves time. Always prepare surfaces and tools before you begin; a ready kit makes the job smoother. Test cleaners on inconspicuous areas first to avoid damage, and never mix cleaners with unknown ingredients. Emphasize dwell time for disinfectants, then wipe away residue to prevent streaks. Separate the dry and wet phases so you avoid spreading moisture across clean surfaces. Finally, treat frequently touched surfaces—doorknobs, switches, and counters—with a quick wipe-down every day or after heavy use. The aim is steady, repeatable progress rather than heroic single-clean events. By focusing on simple, repeatable steps, homeowners and renters can sustain a high standard of cleanliness with less effort, more confidence, and fewer mistakes.
Essential Tools and Materials for a Successful Clean
Having the right tools makes the difference between a job you’ll tolerate and one you’ll actually enjoy. Start with a set of microfiber cloths in different colors (designate one color for each area to avoid cross-contamination). Keep a versatile spray bottle, a dedicated bucket, and a non-scratch sponge or microfiber pad. For ingredients, stock baking soda and white vinegar for eco-friendly scrubs and deodorizing action. Add an all-purpose cleaner for general surfaces and an approved bathroom cleaner for grime-prone zones. Gloves protect hands, and a soft-bristled brush helps reach crevices without scratching finishes. Finally, keep a small squeegee for glass and shower doors and a list of safety reminders (childproof caps, label directions). Remember to rotate cloth colors if you have a few extra, so you always know which materials belong where.
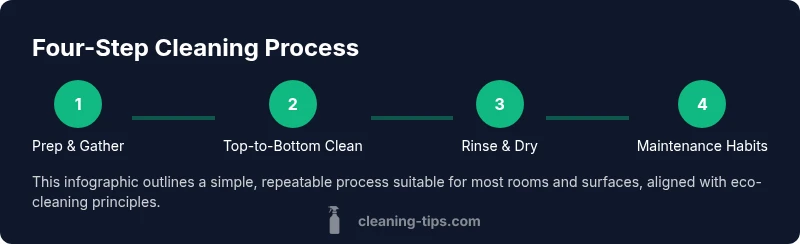
Step-by-Step Routine: From Prep to Post-Clean
Prepare a clean workspace by removing clutter and mapping out zones. Gather tools in a portable caddy so you can move efficiently. Clean top-to-bottom in each zone, starting with ceilings and shelves, then walls, counters, and finally floors. Rinse or wipe surfaces to remove residue, then dry to avoid water marks. If you use disinfectants, allow them to remain on the surface for the recommended dwell time before wiping. Finish with a quick daily maintenance check—open windows, wipe high-touch areas, and replace or refresh supplies as needed. With consistent practice, you’ll develop a routine that’s faster, safer, and gentler on surfaces. The steps below break this into concrete actions with time estimates to help you plan.
Eco-Friendly Substitutes and Safety Considerations
Many common cleaning tasks can be accomplished with simple, non-toxic ingredients. Baking soda provides gentle scrubbing power and deodorizes soft surfaces; white vinegar is a versatile deodorizer and mineral residue remover. Avoid mixing vinegar with bleach or ammonia—the resulting gases can be harmful. Use warm water to dissolve residues more effectively and reduce the need for harsh solvents. For stubborn grime, apply a paste of baking soda and water, then scrub with a soft brush. Always ventilate rooms when cleaning and wear gloves to protect skin. Store cleaners out of reach of children and pets, and label each bottle. Finally, read product labels to verify compatibility with surfaces (wood, stone, metal) to prevent damage. Your goal is a cleaner home that is safe for everyone while minimizing environmental impact.
Common Mistakes and How to Avoid Them
Overloading a spray bottle with cleaner slows you down and creates wasted products. Under-diluting concentrates can leave residue, and over-applying products can damage finishes. Skipping prep time or failing to ventilate can worsen results or create odors. Mixing incompatible cleaners is a common hazard—stick to one main cleaner per task and test first. Not drying surfaces can lead to water spots or mold growth. Finally, neglecting high-touch surfaces means grime builds up quickly; incorporate a daily wipe-down to prevent issues.
Maintenance Habits for Lasting Cleanliness
Create a 5-minute daily blitz: quick wipe-down of counters, a dent-free sweep, and a quick glance at trouble spots. Schedule a weekly deep-clean session for tough zones such as bathrooms and the kitchen sink. Use a monthly rotation of tasks to prevent boredom and ensure coverage (e.g., dusting, window cleaning, grout refresh). Use checklists to track progress and celebrate milestones—small wins help sustain the habit. Finally, adjust the routine as needed based on household changes (pets, kids, seasonal use) so the system stays practical and effective.
Authority Sources
- EPA: Safer Choice program — https://www.epa.gov/saferchoice
- CDC: Healthy Homes Cleaning & Disinfecting — https://www.cdc.gov/healthyhomes/cleaning-disinfecting.html
- OSHA: Workplace safety resources — https://www.osha.gov/
Tools & Materials
- Microfiber cloths (color-coded)(At least 3 colors; use dedicated color per room to avoid cross-contamination)
- All-purpose cleaner(Choose a safe, non-toxic option for everyday surfaces)
- Spray bottle(Label with room designation; use separate bottles if possible)
- Bucket(For rinsing and soaking cloths; keep separate from toilet cleaners)
- Sponge or microfiber pad(Non-scratch; reserve for delicate finishes)
- Baking soda(Mild abrasive for scrubbing and deodorizing)
- White vinegar(Great deodorizer and mineral residue remover; do not mix with bleach)
- Latex gloves(Protect skin; choose snug-fitting for dexterity)
- Soft-bristled brush(Reach crevices without scratching finishes)
- Squeegee(For glass and shower doors; prevents streaks)
Steps
Estimated time: 60-90 minutes
- 1
Gather supplies
Collect all cleaners, tools, and protective gear. Check expiration dates, label bottles, and assemble a portable caddy. This preparation minimizes back-and-forth and sets a clear plan.
Tip: Use a color-coded system to quickly identify tools for each area. - 2
Declutter and prep surfaces
Remove loose items from surfaces and dust visible buildup. Clear the floor first to create space to move. A clean workspace makes subsequent steps faster and more effective.
Tip: Dust before cleaning to prevent smearing mud onto already-cleaned surfaces. - 3
Clean top to bottom in zones
Work in small zones, starting from ceilings and shelves, then walls, counters, and finally floors. Use the appropriate cleaners and apply with a damp cloth, not soaking wet, to avoid warping finishes.
Tip: Move methodically; avoid skipping areas to prevent re-cleaning later. - 4
Rinse and dry surfaces
Wipe away cleaner residue with a clean damp cloth, then dry using a microfiber for a streak-free finish. Drying minimizes watermarks and mold growth in damp areas.
Tip: Rinse equipment regularly to prevent spreading residue between surfaces. - 5
Disinfect high-touch areas
Apply disinfectant as directed, ensuring sufficient dwell time before wiping. Prioritize doorknobs, switches, and handles for daily upkeep in busy households.
Tip: Ventilate room and avoid mixing cleaners to prevent harmful fumes. - 6
Maintenance routine
Finish with a 5-minute daily blitz and a broader weekly deep-clean schedule. Update checklists as needs change (pets, kids, seasons) to stay consistent.
Tip: Use a timer to keep sessions short and focused.
Questions & Answers
What does 'clean 4 u' mean in practical terms?
Clean 4 U means following a practical cleaning routine tailored to your home, prioritizing efficiency, safety, and sustainability.
Clean 4 U means a practical routine that's easy to implement at home.
Which cleaners are truly eco-friendly?
Look for products with simple, non-toxic ingredients and reusable containers; you can also rely on classic ingredients like baking soda and vinegar.
Eco-friendly cleaners use simple, non-toxic ingredients.
How often should I clean high-touch surfaces?
Clean high-touch surfaces every day or after heavy use, with a deeper weekly routine.
Clean high-touch surfaces daily.
Can baking soda and vinegar replace all cleaners?
They work for many tasks but avoid mixing; some jobs require commercial cleaners for disinfection.
Baking soda and vinegar cover many tasks, but not everything.
Why do I see streaks on glass after cleaning?
Streaks come from residue or hard water; use distilled water, wipe with a microfiber, and dry with a lint-free cloth.
Streaks happen from residue; use microfiber and dry thoroughly.
Is it safe to clean appliances with household cleaners?
Yes, follow manufacturer guidance; avoid harsh solvents on electronics and finishes; test in an inconspicuous area.
Always follow the manufacturer guidance.
Watch Video
The Essentials
- Prepare your space before cleaning for faster results.
- Choose eco-friendly products to minimize chemical exposure.
- Work top-to-bottom to avoid re-cleaning.
- Establish a quick daily routine to sustain cleanliness.