Clean Air Duct Cleaning: Step-by-Step Guide for Homeowners
Learn a practical, step-by-step approach to clean air duct cleaning for a healthier home. This guide covers signs you need cleaning, DIY vs pro options, safety, budgeting, and maintenance tips.

This quick answer shows you how to approach clean air duct cleaning: decide if cleaning is needed, choose between DIY or professional service, and follow safety steps to protect your home. You’ll learn the signs that indicate cleaning, what to expect from a reputable service, and how to minimize dust during the process.
Why clean air duct cleaning matters
Air ducts carry air from your HVAC system to every room in your home. Over time, dust, pollen, pet dander, and moisture can accumulate in ducts and on surfaces inside the plenum. Clean air duct cleaning can help reduce airborne irritants, improve indoor air quality, and maintain HVAC efficiency when contaminants are clearly visible or have caused odors. The Cleaning Tips team emphasizes a measured, evidence-based approach: don’t rush to clean unless there is a visible problem or health concern, and always weigh cost against potential benefits. Independent guidance from trusted sources such as the EPA supports evaluating the need rather than routine cleaning, especially in healthy homes. This section lays out a practical framework you can follow today.
Signs you may need air duct cleaning
Look for indicators that dusty air may be circulating: visible dust around vents, musty or moldy odors, excessive debris on diffusers, increased allergy symptoms after using the system, or after home renovations where dust spread through the HVAC. If occupants report sinus irritation, coughing, or asthma symptoms that improve when the system is off, consider a professional inspection. Additionally, a significant moisture event, flood, or mold growth inside HVAC components is a clear signal to arrange a cleaning. Cleaning Tips suggests using a structured checklist to decide if cleaning is warranted, rather than assuming it is always necessary.
DIY vs professional cleaning: pros and cons
DIY duct cleaning can seem appealing for smaller homes, but it carries risks such as pushing dust deeper into the system, damaging components, or spreading contaminants through living spaces. Pros of DIY include cost savings and control over the process; cons include limited equipment and limited ability to seal off the system. Professional cleaners bring negative pressure, HEPA filtration, and thorough duct access with proper containment. They typically follow NADCA standards to ensure safety and effectiveness. The choice depends on duct condition, home health concerns, and your comfort with handling specialized equipment.
How to prepare your home for cleaning
Before cleaning, clear access to all ducts and registers. Move furniture and fragile items away from work areas. Cover floors and valuables with drop cloths or plastic sheeting. If anyone in the home has allergies or respiratory issues, consider temporarily relocating during the service. Turn off the HVAC system as directed by the contractor, and seal off supply vents if requested. Removing loose items from around the work area minimizes the risk of dust dispersion and helps the crew work efficiently.
What to expect during a professional cleaning
A professional service typically performs a visual inspection, establishes containment to prevent dust from escaping, then uses negative pressure equipment and HEPA filtration. They will clean supply and return ducts, registers, and diffusers, and may remove and clean or replace components such as grilles or filters. After cleaning, they should provide a summary of work performed and any recommendations for ongoing maintenance. Expect some dust and noise during the process, but a properly executed cleaning should noticeably improve air quality.
How to evaluate a contractor
Start with NADCA or equivalent affiliations, request a written service agreement, and confirm the scope of work in detail. Ask about containment, cleaning methods, and whether they seal off the system to prevent dust migration. Check that the contractor uses HEPA-filtered equipment and has adequate insurance. Read reviews and ask for references. Get multiple quotes and verify that the price reflects the full scope of work rather than a bait-and-switch offer.
Cleaning methods and tools used
Modern duct cleaning relies on negative pressure and HEPA filtration. Common methods include vacuuming, brushing, and using special scraping tools for stubborn buildup. Technicians may clean air handlers, diffusers, and plenums, and they should avoid damaging delicate components. High-quality equipment reduces the risk of cross-contamination and helps keep dust contained inside the ductwork. The goal is to remove visible contaminants and minimize recontamination during and after the service.
Common myths and facts
Myth: Cleaning ducts always improves health outcomes. Fact: Improvements depend on preexisting conditions; if ducts are not contaminated, cleaning may have little effect. Myth: Cleaning releases more dust. Fact: Proper containment and equipment minimize this risk. Myth: It is always necessary after renovations. Fact: Renovation dust can be addressed with targeted cleaning, but not every job requires full duct cleaning.
Safety considerations and best practices
Protective gear like NIOSH-approved respirators and disposable coveralls help reduce exposure. Ensure the work area is well contained and that all sensitive belongings are protected. Confirm that the contractor follows safety standards and properly vents the area. Do not attempt to clean moldy ducts without professional help. Maintain clear communication about any hazardous materials found during the process.
Aftercare and maintenance between cleanings
Keep filters clean and replaced on schedule; use high-efficiency filters if your system supports them. Schedule periodic inspections to detect moisture intrusion and mold growth early. Address water leaks promptly and maintain humidity levels to discourage microbial growth. A regular maintenance plan helps extend duct cleanliness between professional cleanings.
Final checklist before booking
Confirm the scope of work and containment plan in writing. Ask for a pre-cleaning inspection and a post-cleaning report. Verify the equipment used is HEPA-rated and that the crew holds proper insurance. Review customer references and ensure there are no hidden fees. Finally, schedule a follow-up check if you notice any changes in air quality after cleaning.
Tools & Materials
- HEPA-filter vacuum (sealed system)(HEPA filtration, seals to prevent recirculation of dust)
- Access tools (screwdriver set)(To remove or reattach vents and grilles)
- Drop cloths or plastic sheeting(Protect floors and furniture)
- N95 or P100 respirator(For occupants, optional for technicians depending on policy)
- Protective gloves and eye protection(Safety gear for cleaner and residents)
- Duct tape or painter's tape(Seal access openings as needed)
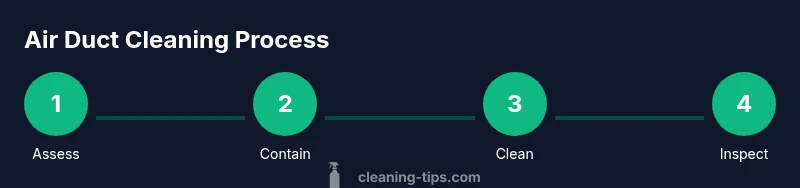
Steps
Estimated time: 2-4 hours
- 1
Assess system access and prep space
Before any work begins, inspect all access points and note any damaged ducts. Clear the area around vents and prepare drop cloths to protect floors. This initial assessment helps prevent surprises during cleaning.
Tip: Document the condition of vents with photos for reference - 2
Shut down and isolate the HVAC system
Power down the HVAC unit and, if advised, isolate the system to prevent dust movement through the home. Safety first; follow the contractor’s instructions for de-energizing equipment.
Tip: Do not restart the system until the contractor approves it - 3
Set up containment and negative pressure
Position negative pressure equipment and seal off supply vents to create a controlled dust environment. This minimizes dust spread to living areas and protects your belongings.
Tip: Check that doors and windows are closed to maintain containment - 4
Clean ducts and components
Technicians use brushing, agitation, and vacuum extraction to remove debris from ducts, plenums, and diffusers. They target visible contamination and ensure access points are thoroughly cleaned.
Tip: Ask technicians to show before-and-after photos of the ducts - 5
Clean registers and diffusers
Remove and clean registers, diffusers, and grilles; wipe surrounding surfaces to remove any residual dust. Proper cleaning improves airflow and air quality near living areas.
Tip: Do not use harsh chemicals that might corrode metal parts - 6
Inspect and reseal as needed
After cleaning, inspect ductwork for gaps or damage. Seal any minor leaks and re-seal seams to maintain negative pressure and airflow efficiency.
Tip: If structural damage is found, consult a licensed contractor - 7
Document work and provide a report
Receive a written report detailing work performed, locations cleaned, and any recommendations for maintenance. Keep this for your records and future reference.
Tip: Ask for warranties or guarantees on the cleaning service - 8
Return to normal operation and monitor
Once cleared by the technician, restore power and monitor air quality and odors over the next few days. Note any persistent symptoms and communicate with your provider if needed.
Tip: Allow a short period for the air to stabilize after cleaning - 9
Plan maintenance and future cleanings
Set up an ongoing maintenance plan, including filter changes and periodic inspections. Schedule follow-up cleaning if signs of contamination reappear.
Tip: Keep a calendar reminder for filter changes and inspections
Questions & Answers
Do I really need to clean air ducts in a healthy home?
In a healthy home without visible contamination, cleaning may not yield noticeable health benefits. Consider signs of contamination, a recent moisture event, or verified mold growth before proceeding.
If your home shows signs of contamination or mold, cleaning might be needed. Otherwise, it may not provide significant health improvements.
How often should air ducts be cleaned?
There is no universal schedule. Cleaning is typically considered only when there is a clear need, such as contamination, persistent odors, or after certain renovations.
There isn’t a universal schedule; only clean when there is a proven need.
Can I clean air ducts myself without professional help?
DIY cleaning can spread dust and potentially damage components. It is generally safer to hire a qualified professional for most homes, especially with complex systems or contaminants.
DIY can spread dust; professionals handle most cases.
What signs indicate mold or moisture in ducts?
A musty odor, visible mold growth, or excessive moisture around ducts are key signs to investigate further and possibly conduct remediation.
Musty smell or visible mold means you should get a professional assessment.
How long does cleaning air ducts take?
Time varies with system size and contamination level, but most residential cleanings take a few hours. Schedule the estimate to confirm timing.
Most jobs take a few hours depending on system size.
Will cleaning air ducts make my home healthier?
Cleaning can improve air quality if contaminants are present; it is not a cure-all and works best when combined with good filtration and other maintenance.
It can help if contaminants are present, but it’s not a guaranteed health fix.
Watch Video
The Essentials
- Assess need before cleaning, not every home requires duct cleaning
- Choose between DIY or professional based on contaminants and risk
- Containment and HEPA filtration are critical for safe cleaning
- Inspect, document, and plan maintenance after cleaning