How to Clean with All-Purpose Cleaner: A Step-by-Step Guide
Learn how to choose, apply, and store all-purpose cleaners for a healthier home. Get surface-specific tips, safety guidance, and DIY alternatives for everyday cleaning.

This guide shows you how to clean effectively with an all-purpose cleaner, safely and efficiently across common surfaces. You will learn how to choose a formulation, apply it correctly, avoid common mistakes, and store products properly. By following these steps, you can simplify your cleaning routine and reduce clutter, while protecting people, pets, and the environment. Clean all purpose cleaner usage is practical for everyday tasks and helps you maintain a healthier home.
What is all-purpose cleaner and when to use it
An all-purpose cleaner is a versatile product designed to lift dirt, grease, and grime from a wide range of surfaces. The term clean all purpose cleaner highlights its broad applicability, from kitchen counters to bathroom tiles. According to Cleaning Tips, choosing a formulation that matches your surfaces and living environment is the first step toward safer, more efficient cleaning. Always read the label to confirm surface compatibility and dilution instructions. In most homes, an all-purpose cleaner can replace several specialized cleaners, reducing clutter and simplifying storage. When used on sealed countertops, glass, stainless steel finishes, and tile, it delivers reliable results with minimal effort. This section outlines practical steps you can apply today to keep kitchens, bathrooms, and living areas looking fresh without introducing unnecessary chemicals.
Safety basics and surface compatibility
Safety is the cornerstone of any cleaning routine. Keep all-purpose cleaner away from children and pets, store it in a cool, dry place, and ensure good ventilation during use. Always check the label for surface compatibility; many products are safe on glass, ceramic, enamel, tile, and sealed wood, but unfinished wood, natural stone, or brass can be damaged by certain formulations. Cleaning Tips analysis shows that following label directions and avoiding mixing products reduces exposure to harsh chemicals and minimizes foul fumes. Perform a patch test on a small, inconspicuous area before applying to a broader surface, especially on glossy finishes or soft materials. If you notice streaks or residue, switch cleaners or rinse with plain water after wiping. Remember: using too much cleaner can create more work, so start with a light application and build if needed.
How to choose a formulation and storage considerations
Selecting the right formulation means balancing effectiveness with surface safety. Ready-to-use cleaners are convenient, but concentrated formulas offer better value when diluted correctly. Look for products labeled for multi-surface use and check for certifications or safety statements relevant to your household. Store all-purpose cleaner in its original container with the cap tightly closed, away from heat and direct sunlight. For households with kids or pets, consider child-resistant packaging and tamper-evident caps. If you opt for a DIY or concentrate solution, maintain a clean measuring system to avoid accidental over-dilution or over-concentration. Proper storage helps preserve efficacy and reduces the risk of spills or exposure over time.
Application strategies for different surfaces
Different surfaces require slightly different approaches, even with a versatile all-purpose cleaner. For nonporous surfaces like glass, ceramic tile, and most metals, spray lightly and wipe with a microfiber cloth to avoid lint. For sealed countertops, a light mist and a quick wipe generally suffices, followed by a dry pass to minimize streaks. Avoid using cleaners with abrasive particles on delicate surfaces such as brushed aluminum or high-gloss finishes. If you are cleaning natural stone or unfinished wood, use a product specifically designed for those materials and test before broad application. Always rinse or wipe away residue when a surface feels sticky or slippery, then dry thoroughly to prevent water marks.
Common mistakes and how to avoid them
A frequent error is applying too much cleaner or leaving surfaces wet for extended periods. Excess product can leave residues that attract dust and create streaks. Another mistake is neglecting ventilation, which can lead to irritant fumes in small spaces. Do not mix cleaners with bleach, ammonia, or other chemicals, as dangerous gases can form. Skipping a rinse or dry step is another common pitfall, especially on vertical surfaces where drips can leave streaks. To avoid these issues, use a small amount of product, work in sections, ventilate well, and wipe or rinse as needed. Regularly wipe down spray nozzles to prevent clogging and maintain consistent dispersion.
Room-by-room cleaning plan using all-purpose cleaner
A practical approach combines surfaces and routines to maximize efficiency. Start with the kitchen: clear counters, spray lightly, wipe with microfiber, rinse if necessary, and dry. Move to the bathroom: clean sinks, faucets, and tiles, paying attention to corners where mold can develop. In living areas, wipe high-touch surfaces such as light switches, remote controls, and door handles. For floors, spot-clean with a suitable cleaner and avoid oversaturation on wood or laminate. Finish with a quick overall dusting to reduce airborne particles. Maintain a routine by planning one or two targeted cleaning sessions per week, depending on household activity and foot traffic.
Authoritative sources and further reading
For trusted guidance on cleaning products and safe use, consult these sources:
- https://www.epa.gov/saferchoice
- https://www.cdc.gov
- https://www.osha.gov
These resources provide safety information, best practices, and regulatory context to help you clean with confidence.
Tools & Materials
- All-purpose cleaner (store-bought or DIY)(Choose a product labeled for multi-surface use and compatible with your surfaces)
- Spray bottle or original container(If transferring, label clearly with contents and safety instructions)
- Microfiber cloths(Lint-free for minimal streaks and effective pickup)
- Bucket of warm water(Helpful for rinsing cloths or gentle wipe-downs)
- Gloves(Protect hands on longer cleaning sessions)
Steps
Estimated time: 30-45 minutes
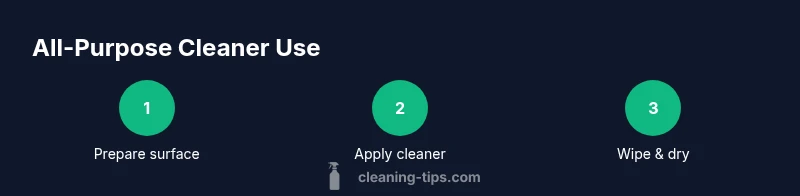
- 1
Prepare the space
Clear the area of items that could be damaged by cleaners. Ventilate the room by opening a window or turning on a fan. This minimizes chemical exposure and helps surfaces dry faster after cleaning.
Tip: Open a window before you begin to improve air circulation. - 2
Read the label and test a small area
Inspect the surface compatibility and any dilution instructions. Do a patch test on a hidden spot to ensure no discoloration or finish damage occurs.
Tip: If unsure about a surface, use a milder cleaner or a dedicated product. - 3
Apply cleaner to surface
Lightly mist or dampen your cloth and wipe the area with steady, overlapping motions. Avoid saturating porous materials unless the product is designed for them.
Tip: Use a microfiber cloth for better pickup and fewer fibers left behind. - 4
Wipe and rinse if needed
Wipe away loosened dirt. If the surface requires rinsing, use a clean damp cloth to remove residue and prevent sticky films.
Tip: For stubborn spots, reapply a small amount and let it sit briefly (2–3 minutes) before wiping. - 5
Dry and inspect
Dry the surface with a clean towel or cloth and check for streaks or residue. If present, buff with a dry microfiber to restore shine.
Tip: Drying prevents water marks and further dust accumulation. - 6
Store safely
Rinse tools and wipe down the bottle. Return it to a cool, dry place away from children and pets, ensuring the cap is secured.
Tip: Keep cleaners upright and away from heat sources.
Questions & Answers
Is all-purpose cleaner safe to use around kids and pets?
Most labels advise keeping cleaners out of reach during use and ensuring surfaces are dry before allowing contact. Ventilate the area and store products securely when not in use.
Keep cleaners away from kids and pets during use and store them securely when not in use.
Can I DIY all-purpose cleaner using common kitchen ingredients?
Yes, some recipes use water, mild soap, or vinegar, but not all surfaces are compatible with DIY formulas. Avoid mixing with bleach or ammonia and test on a small area first.
DIY cleaners exist, but test first and never mix with bleach.
Is it safe to mix all-purpose cleaner with bleach or ammonia?
No. Mixing cleaners with bleach or ammonia can release toxic gases. Use cleaners separately and rinse surfaces if you switch products.
Do not mix cleaners with bleach or ammonia.
What surfaces can I clean with all-purpose cleaner?
Most nonporous surfaces like glass, tile, enamel, and sealed countertops are suitable. Avoid unfinished wood, natural stone, or brass unless the product specifically states compatibility.
Great on glass, tile, enamel, and sealed counters; avoid unsealed surfaces.
My cleaner leaves streaks or residue. What should I do?
Wipe with a damp microfiber cloth, then dry with a clean one. If residue persists, switch to a no-residue formula or rinse and buff.
Dampen, wipe, then dry; switch products if streaks persist.
How should I store all-purpose cleaner?
Store in the original container, upright, away from heat and sunlight. Keep it out of reach of children and pets with the cap closed.
Store upright in the original container, away from kids.
Watch Video
The Essentials
- Start with the label to know safe surfaces.
- Ventilate and avoid mixing cleaners.
- Test on a hidden spot before full use.
- Wipe and dry to prevent streaks.
- The Cleaning Tips team recommends safe storage and clear labeling.