Clean Cleanse: A Step-by-Step Home Cleaning Guide for 2026
Discover a practical clean cleanse routine for a healthier home. Learn eco-friendly methods, room-by-room tasks, and maintenance tips to keep surfaces sparkling and air fresh throughout the year.

By the end of this guide, you will be able to perform a thorough clean cleanse routine for your home. You’ll plan a practical schedule, clean from top to bottom, select safe, eco-friendly products, and establish a simple maintenance cadence that keeps surfaces sparkling, air fresh, and surfaces free of grime.
Why a deliberate clean cleanse matters
A routine you can repeat matters more than a one-off deep clean. When you adopt a deliberate clean cleanse, you reduce stress, improve air quality, and extend the life of surfaces. According to Cleaning Tips, a planned approach combines preparation, consistent maintenance, and safe practices to create a healthier home. The idea is simple: move from a reactive, quick wipe to a proactive system that keeps spaces fresher with less effort over time. Cleaning Tips analysis suggests that routines with a defined scope and room-by-room order are easier to maintain and less overwhelming than ad-hoc cleans. A clear standard helps everyone in the household contribute and maintain a consistent result.
This approach is not about perfection; it’s about sustainability. By prioritizing airflow, decluttering, and deliberate product choices, you reduce residue buildup, shorten future cleaning sessions, and create a healthier living environment. Start with a shared definition of “clean” for your space and set expectations for each zone. The payoff is steady, cumulative improvements rather than sporadic, exhausting scrubs.
To begin, sketch a simple weekly plan: where you’ll touch surfaces daily, what you’ll tackle every weekend, and which areas require a deeper reset each month. Your plan should be realistic and adaptable for real-life schedules. The goal is consistency, not intensity.
In sum, a clean cleanse is a system, not a sprint. The Cleaning Tips team emphasizes building habits that fit your home’s rhythm while prioritizing safety and sustainability. A thoughtful plan can transform how you live in and perceive every room.
note2Cpp}
Building a practical cleaning plan
A practical cleaning plan translates intention into action. Start by dividing your home into zones (e.g., kitchen, baths, living areas, bedrooms) and assign a cadence to each based on traffic and dirt levels. A simple approach uses daily quick cleans, a weekly refresh, and a monthly deep clean for stubborn buildup. The benefit is a predictable rhythm that prevents overwhelming piles of tasks and makes consistent progress visible.
Set concrete, achievable targets: identify one or two tasks per zone for the week, and reserve a larger block for the monthly deep clean. Keep your plan visible—print a checklist or pin it on the fridge—so every household member can participate. When days feel busy, you can swap tasks between zones, as long as you stay within the weekly cadence. This kind of flexibility reduces the “all-or-nothing” pressure and keeps your home cleaner over time.
Incorporate air quality and floor care into your plan. Open windows when possible to improve ventilation, and schedule floor cleaning to align with your week. For high-traffic zones, consider a slightly more frequent cadence. The goal is to maintain a balance between achievable daily wins and meaningful weekly progress. The insights from Cleaning Tips reinforce that a zone-based plan increases clarity, accountability, and long-term satisfaction with your home.
Finally, build in safety checks and product rotation. Use non-toxic cleaners where feasible, test products on inconspicuous areas first, and avoid mixing chemicals. A well-structured plan reduces decision fatigue, making it easier to stay on track even when life gets busy.
description3
Essential tools and materials
No plan succeeds without the right tools. Gather a dedicated cleaning kit with essentials and a separate setup for each zone to streamline tasks. The idea is to keep your most-used items within arm’s reach in each area, so you don’t waste time searching between rooms. Below is a practical roster of core items you’ll want on hand, with notes on why they’re important.
- All-purpose cleaner (essential): Versatile for counters, appliances, and most surfaces. Choose a formula that’s gentle on skin and the environment.
- Microfiber cloths (essential): Durable, lint-free, and reusable. They grab dust and grime with minimal residue.
- Scrub brushes (essential): Different stiffness for grout, tiles, and glass surfaces.
- Baking soda (essential): Mild abrasive and deodorizer for dull surfaces and sinks.
- White vinegar (essential): Natural deodorizer and disinfectant; use diluted for most surfaces.
- Buckets (essential): At least two for wet cleaning and rinsing.
- Gloves (essential): Protect hands from cleaning agents and moisture.
- Trash bags (essential): For decluttering and disposal during the cycle.
- Duster with microfiber head (essential): Quick reach for high surfaces.
- Optional: steam cleaner, protective mask, and apron (optional but helpful in busy homes).
Organize supplies by zone, using labeled caddies or baskets. This keeps tools ready for use and reduces cross-contamination between rooms. Remember to replace old cloths and empty cleaning solutions as they run low, and store products safely away from children and pets. A well-stocked, organized kit speeds up every cleaning session and minimizes the chance of missing steps.
The Cleaning Tips team recommends setting up a dedicated, eco-friendly cleaning kit. Prioritize products that are non-toxic, biodegradable, and fragrance-free when possible to protect indoor air quality and reduce chemical exposure for family members and pets. With the right tools, you can execute your plan with confidence and efficiency.
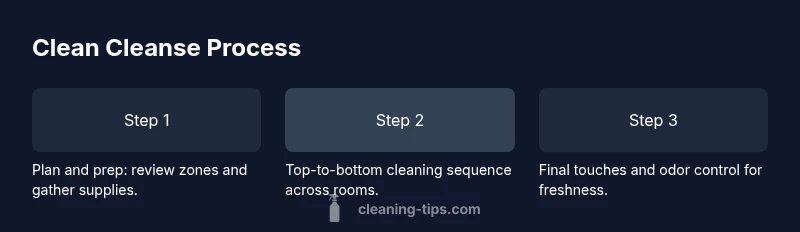
Step-by-step routine overview
A practical step-by-step routine acts as a bridge between planning and execution. The process below provides a high-level framework that aligns with room-by-room tasks and safety guidelines. Use this as a scaffold to guide your STEP-BY-STEP actions, ensuring you stay on track without getting overwhelmed.
- Plan and prep: Review your zone-based plan and gather supplies. Clear surfaces and remove obvious clutter before you start. This reduces interruptions and helps you prioritize tasks efficiently.
- Declutter first: Removing unnecessary items creates space for cleaning and allows you to see where grime hides. Return items to their proper places after each zone, so you don’t reintroduce clutter.
- Top-to-bottom approach: Begin with ceilings, light fixtures, and shelves, then move downward to counters, appliances, and finally floors. This minimizes re-dirtied surfaces.
- Clean with purpose: Use targeted products for each surface (glass, metal, wood, fabric) and follow label directions for best results. Maintain a consistent motion to reduce streaking and missed spots.
- Floors and fabrics last: Vacuum or sweep floors first, then mop or spot-clean as needed. Launder textiles and cushions when scheduled in your plan.
- Kitchen and bathrooms: Address high-traffic, germ-prone areas with extra care. Sanitize frequently touched surfaces and ensure proper ventilation during and after cleaning.
- Final checks and ventilation: Wipe away any remaining streaks, reopen windows, and let air move through the space. A quick door-to-door walk-through helps confirm you didn’t miss anything.
- Maintenance scheduling: Log your next cleaning date in a calendar or app. Use short daily routines to sustain the gains from your deep cleans.
Estimated total time: 2-3 hours, depending on home size and cleanliness level. For best results, complete the plan in a single focused session or split into two shorter sessions across consecutive days. The goal is consistency and momentum rather than perfection.
Safer cleaning agents and techniques
Choosing safer cleaning methods is a cornerstone of a true clean cleanse. Eco-friendly products minimize chemical exposure while still delivering solid results. For many surfaces, simple ingredients like vinegar and baking soda, when used correctly, can remove grime and neutralize odors without harsh fumes. Always dilute products as directed and avoid mixing cleaners that can react to form dangerous gases.
Techniques matter as much as products. Apply cleaners in a controlled manner, using microfiber cloths to trap dust rather than spreading it. Allow cleaners to sit for a short time on tougher stains to maximize effectiveness, then wipe away with a clean, damp cloth. For stone, wood, or natural surfaces, test a small area first to confirm compatibility. Protect delicate finishes by using soft cloths and avoiding abrasive tools.
Ventilation supports safer cleaning. Open windows, use exhaust fans, and, when possible, clean during daytime hours to take advantage of air circulation. Avoid introducing new odors by sticking to unscented or mild fragrances. The Cleaning Tips team emphasizes that safer products and thoughtful technique reduce risk and create a more enjoyable cleaning experience for you and your household.
Stain and odor removal strategies
Stains and odors are common roadblocks in a successful clean cleanse. Start with a routine stain remover approach: treat, blot, and rinse. For water-based stains, a mild cleaner with a soft cloth can lift the stain without embedding it further. For grease or oil, a paste of baking soda and water can act as a gentle abrasive to lift residues from surfaces.
Persistent odors often indicate trapped moisture or organic buildup. Start by addressing the source: damp fabrics, pet areas, or under-sink spaces. Ventilate, launder fabrics on a warm cycle if possible, and use absorbent powders or activated charcoal to absorb lingering smells.
Always test cleaners on inconspicuous areas first. Keep a log of what works for different surfaces (tile, grout, laminate, fabric) to streamline future sessions. The goal is to minimize repeated efforts and protect materials from damage through incorrect cleaners or aggressive scrubbing.
In the Cleaning Tips framework, a disciplined approach to stain and odor management yields long-term improvements in cleanliness and comfort. Consistency, rather than brute force, tends to provide the best results over time.
Maintenance tips and common mistakes
The maintenance phase is where most people lose momentum. A few smart habits can dramatically extend the results of your clean cleanse. Schedule regular micro-cleans, such as 10-minute daily touch-ups, to prevent buildup. Create a routine that aligns with your weekly plan, making it easier to keep pace without letting tasks pile up.
Avoid common mistakes that reduce effectiveness. Don’t mix cleaners or ignore surface-specific guidelines. Don’t skip ventilation or assume a quick wipe is enough for high-traffic zones. Taking shortcuts reduces long-term cleanliness and can create safety hazards.
One effective approach is to treat high-traffic areas with a lighter, frequent touch, and reserve deeper tasks for the monthly cleanse. This cadence helps maintain air quality, reduces the need for harsh scrubbing, and makes the process more enjoyable.
The Cleaning Tips team consistently observes that households who adopt a dependable maintenance cadence report higher satisfaction and fewer deep-clean headaches. A steady rhythm creates predictable outcomes, reinforces healthy cleaning habits, and strengthens overall home hygiene.
Tools & Materials
- All-purpose cleaner(Choose eco-friendly formula.)
- Microfiber cloths(Lint-free, washable.)
- Scrub brushes(Different stiffness for tiles, grout.)
- Baking soda(Deodorizes and mild abrasive.)
- White vinegar(Natural deodorizer; dilute for most surfaces.)
- Buckets(Two 1-gallon buckets recommended.)
- Gloves(Protect hands from cleaners.)
- Trash bags(For decluttering and disposal.)
- Duster with microfiber head(Reach high surfaces easily.)
- Steam cleaner (optional)(Useful for deep sanitizing if available.)
- Protective mask (optional)(Use in poorly ventilated spaces.)
Steps
Estimated time: Total time: 2-3 hours
- 1
Plan and assess scope
Review your zone-based plan, set clear goals for each room, and determine which tasks require a deeper clean this session. This upfront step saves time by preventing mid-task decision fatigue.
Tip: Write down one target per room to stay focused. - 2
Gather and organize
Bring all your tools and materials into a single workspace. This minimizes back-and-forth trips and helps you maintain a steady rhythm throughout the session.
Tip: Keep cleaners with compatible surfaces grouped together. - 3
Declutter surfaces
Remove unnecessary items from countertops, shelves, and floors within the chosen zones. A clutter-free area makes cleaning more effective and reduces re-dirtied areas.
Tip: Return items to their proper spots as you finish each zone. - 4
Dust from top to bottom
Begin with ceilings, light fixtures, and shelves, then move to furniture and fixtures. This prevents dust from settling on freshly cleaned surfaces.
Tip: Use a microfiber cloth for better particle capture. - 5
Wipe and sanitize
Clean surfaces with appropriate cleaners for each material. Rinse or wipe off residue to avoid streaks and ensure surfaces stay safe for contact.
Tip: Avoid over-wetting porous surfaces. - 6
Floor care and textiles
Vacuum or sweep hard floors, mop with a damp (not soaking) cloth or mop, and launder textiles if applicable. This ties the whole cleaning cycle together.
Tip: Work in logical zones to minimize cross-contamination. - 7
Kitchen and bathroom specifics
Address high-traffic areas with extra care—grease in the kitchen and soap scum in bathrooms. Ensure proper ventilation during cleaning.
Tip: Rinse surfaces well to prevent residue buildup. - 8
Final checks and schedule
Inspect for missed spots, re-clean as needed, and set a reminder for your next maintenance date. A consistent cadence helps sustain results.
Tip: Log your next clean in a calendar or app.
Questions & Answers
What is a clean cleanse routine?
A clean cleanse is a planned, eco-friendly cleaning approach that organizes tasks by zones, cleans from top to bottom, and maintains spaces through regular, manageable routines. It emphasizes safety and sustainability while delivering consistent results.
A clean cleanse is a planned, eco-friendly cleaning approach that cleans by zones and maintains spaces with regular, manageable routines.
How long does a typical deep clean take?
A typical deep clean can take several hours depending on home size and current condition. The goal is to spread tasks across a planned session or two shorter sessions to avoid fatigue and maintain quality.
A deep clean usually takes a few hours, but breaking it into two sessions keeps it manageable.
Can I use natural cleaners around children and pets?
Yes, natural cleaners like diluted vinegar and baking soda are generally safe when used correctly. Avoid strong fragrances and always test surfaces first. Ensure good ventilation and keep products out of reach of children and pets.
Natural cleaners are generally safer when used correctly and with good ventilation; test surfaces first.
How often should I perform a maintenance clean?
A maintenance clean can be a short 10-15 minute routine several times a week, focusing on high-traffic areas. A deeper weekly or monthly routine helps prevent buildup and keeps spaces consistently fresh.
Keep up with short daily cleans and a deeper weekly or monthly session to prevent buildup.
What should I do if a surface doesn’t respond to cleaners?
If a surface resists cleaning, reassess the cleaner choice and method. Try a gentler approach, test in a hidden area, or consult surface-specific care guidelines to avoid damage.
If something won’t clean, try a gentler method or a different product and test first.
Watch Video
The Essentials
- Plan before you start to save time
- Gather essentials and organize by zone
- Clean from top to bottom for efficiency
- Choose eco-friendly products to protect health
- Maintain a regular schedule to prevent buildup