How to Clean: A Practical Home Cleaning Guide
Discover a practical, step-by-step approach to cleaning your home efficiently. Learn tools, safe cleaners, room-by-room strategies, and a maintenance routine to keep your space fresh and healthier in 2026.

How to clean effectively starts with a simple, repeatable routine. Gather essential supplies, test cleaners on inconspicuous areas, and tackle surfaces from top to bottom using appropriate products. Focus on removing grime first, then disinfecting high-touch areas, and finish by drying to prevent residue. Cleaning Tips's approach emphasizes safe, efficient methods anyone can adopt.
The Foundations: Why Cleaning Matters
According to Cleaning Tips, regular cleaning is a practical way to learn how to clean effectively, reduce allergens, prevent mold, and preserve surfaces. A simple routine can dramatically improve indoor air quality and overall health for homeowners and renters alike. Cleaning is more than making things look neat; it minimizes bacteria, prevents unhealthy build-up, and saves time in the long run by reducing the need for deep, intensive scrubs. By establishing clear targets and a repeatable process, you empower every member of the household to contribute without feeling overwhelmed.
A consistent cleaning habit also supports better maintenance of furnishings, appliances, and finishes. When you clean regularly, you’re less likely to encounter stubborn grime that requires aggressive methods or harsh chemicals. The payoff is a cleaner home with fewer headaches and fewer surprises during hosting or daily routines.
Core Principles of Cleaning
Cleaning rests on a few core principles: start clean from the top down to prevent re-depositing dirt, use the right cleaner for each surface, and dry thoroughly to prevent new grime from sticking. Safety and ventilation matter for every room, and patch-testing cleaners on hidden spots helps protect delicate finishes. In practice, this means choosing a versatile toolkit: a basic set of cleaners, microfiber cloths, and appropriate brushes, plus a plan that keeps you moving forward rather than going in circles. By embracing these fundamentals, you can adapt to unexpected messes—whether a spill in the kitchen or muddy paw prints in the foyer—and still stay on track.
Consistent technique matters more than fancy gear. Small, deliberate actions—like wiping from clean to dirty or rinsing out a cloth before moving to the next surface—compound over time into noticeably cleaner spaces. This section lays out the principles you’ll apply in every room, so you can clean smarter, not harder.
Room-by-Room Strategy
A room-by-room strategy makes cleaning manageable and repeatable. Start with kitchens and bathrooms, where grime and bacteria are most common, then move to living spaces and bedrooms. For kitchens, wipe counters with an all-purpose cleaner, disinfect high-touch surfaces, and rinse away residue. In bathrooms, target soap scum with a gentle scrub, wipe faucets and tiles, and finish with a dry, streak-free surface.
Living areas benefit from dusting from the top down, followed by vacuuming or sweeping floors. In homes with kids or pets, spot-clean carpets or rugs promptly to minimize embedded stains. A practical approach is to allocate 15–20 minutes per room, then schedule a deeper clean monthly for areas that accumulate grime more slowly, like office spaces or dens. This rhythm keeps your home consistently fresh without overwhelming you on busy days.
Choosing Cleaners and Tools
Opt for eco-friendly cleaners when possible, especially in kitchens and bathrooms where food and skin contact occur. For common messes, keep a basic set: microfiber cloths, a mop, a bucket, a scrub brush, a squeegee, and a vacuum. Always read labels and patch-test cleaners on inconspicuous areas before full use. When cleaning around children or pets, prefer fragrance-free formulas and ensure adequate ventilation. If you prefer DIY options, baking soda and vinegar can handle many tasks, but avoid mixing them in ways that create unsafe fumes.
A well-chosen toolkit reduces the number of passes you need to make and minimizes surface damage. Store cleaners with clear labels, and group items by room so you can grab what you need quickly. Regularly replace worn sponges and cloths to maintain cleaning efficiency and prevent cross-contamination.
To help you visualize the process, refer to the near-term infographic showing the ideal sequence of supplies, surfaces, and steps for a smooth cleaning session. Authority sources provided below include safety guidelines from government agencies to keep you aligned with best practices.
Safety and Best Practices
Never mix cleaners. Bleach and ammonia, for example, release toxic fumes that can injure eyes, lungs, and skin. Use gloves if you have sensitive skin and ensure good ventilation, especially in smaller or poorly ventilated spaces. Store chemicals out of reach of children and pets, and label all containers clearly. If a spill occurs, ventilate the area and follow the product’s safety instructions before re-entering.
Always read the product label for dilution ratios and contact times. For wooden surfaces, avoid overly wet applications that can cause swelling or warping. When dealing with electrical outlets, electronics, or interior finishes like marble or natural stone, opt for surface-specific cleaners and test before use. This careful approach minimizes damage and keeps your home safer long-term.
Maintenance Routine: Keeping It Up
Create a simple weekly plan focusing on high-traffic zones, with a deeper monthly cleaning scheduled for kitchens and bathrooms. A consistent routine beats sporadic, heavy cleaning. Use a small checklist to track tasks and set reminders so you stay on pace. Rotating rooms on a weekly cycle helps you cover every area without burnout. Incorporate seasonal deep cleans such as grout refresh in bathrooms or appliance interiors during spring maintenance.
Over time you’ll notice that a steady rhythm extends the life of surfaces, reduces the effort needed for each session, and makes guests feel welcome. The aim isn’t perfection but ongoing, healthy cleanliness that supports well-being and comfort in your home.
Authority Sources
For further reading and safety guidelines, consult reputable sources from government and major health agencies:
- https://www.cdc.gov
- https://www.epa.gov
- https://www.osha.gov
Tools & Materials
- All-purpose cleaner(Choose a formula suitable for most surfaces)
- Disinfectant spray or wipes(Use on high-touch surfaces)
- Microfiber cloths(Washable and reusable)
- Sponges(Non-scratch for delicate finishes)
- Mop and bucket(For hard floors)
- Broom or vacuum(Remove loose debris before washing)
- Gloves(Protect skin from cleaners)
- Scrub brush(For stubborn grime)
- Ventilation (open windows or vents)(Reduce fumes)
Steps
Estimated time: 60-90 minutes
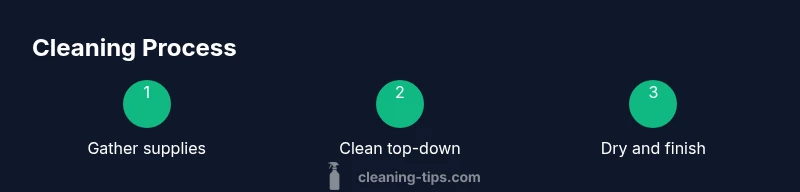
- 1
Gather supplies and prepare
Collect all cleaners, tools, and a towel. Clear the area to avoid moving obstacles during cleaning. This upfront prep saves time and reduces back-and-forth.
Tip: Set everything within arm's reach before you start. - 2
Declutter and prep surfaces
Remove objects from surfaces and dust loose dirt. This ensures cleaners reach grime rather than moving objects around. A tidy start makes the rest easier.
Tip: Dust top-down to prevent later re-dusting. - 3
Vacuum or sweep floors
Remove visible debris before washing floors. Use the appropriate attachment for corners. This step prevents dirt from turning into muddy streaks when you mop.
Tip: Work in sections to maintain momentum. - 4
Wipe surfaces with cleaner
Apply cleaner to microfiber cloth or sponge and wipe from top to bottom. Focus on high-traffic areas, then move to less-used spots. Rinse cloths frequently to avoid spreading grime.
Tip: Always test on a hidden spot first. - 5
Scrub stubborn grime
Use a damp sponge or brush on stained areas. Let any paste or spray sit for a minute to penetrate grime. Rinse and wipe clean when finished.
Tip: Avoid abrasive scrubs on delicate finishes. - 6
Rinse and dry
Rinse surfaces with a clean damp cloth if needed, then dry with a towel or microfiber to prevent streaks. Ventilate to speed drying and reduce moisture.
Tip: Drying prevents new dirt from sticking. - 7
Disinfect high-touch areas
Apply disinfectant to doorknobs, switches, and countertops. Follow label contact times for effectiveness. Allow surfaces to air-dry for best results.
Tip: Do not over-wet wood or electronics. - 8
Tidy up and declutter again
Return items to their places and take out trash. A quick final wipe around the room ensures nothing is missed. A neat space motivates ongoing upkeep.
Tip: Put away tools to avoid re-mess later. - 9
Review and plan next cleaning
Assess what went well and what to adjust next time. Note any tough spots to target in the future. A short plan keeps cleaning consistent.
Tip: Log notes in a simple checklist.
Questions & Answers
What surfaces can I clean with all-purpose cleaner?
Most nonporous surfaces like countertops, tiles, glass, and sealed wood can be cleaned with an all-purpose cleaner. Always check the label for surface compatibility.
All-purpose cleaners work on most nonporous surfaces such as countertops and tiles, but always check the label first.
Should I disinfect after cleaning?
Disinfect high-touch surfaces in kitchens and bathrooms or areas prone to contamination. Cleaning alone reduces dirt, while disinfection tackles germs with appropriate contact time.
Disinfect high-touch areas after cleaning to reduce germs, especially in kitchens and bathrooms.
How often should I deep clean my home?
Deep cleaning frequency depends on use. Busy households may benefit from a monthly deep clean; lighter-use homes can aim for quarterly deep cleaning.
Deep cleaning monthly or quarterly depending on use and traffic.
Can I use natural cleaners like vinegar?
Natural cleaners like vinegar are effective on many surfaces but avoid acidic vinegar on stone surfaces and always test first.
Natural cleaners work on many surfaces; avoid vinegar on stone and patch test first.
Is it safe to mix cleaners?
Never mix cleaners. Mixing bleach with ammonia or other cleaners can release toxic gases.
Never mix cleaners, especially bleach with ammonia; it can create dangerous fumes.
What about cleaning with pets in the home?
Choose pet-safe cleaners, ventilate well, and keep pets away from areas being cleaned until dry.
Use pet-safe cleaners and keep pets away until surfaces are dry.
Watch Video
The Essentials
- Start with a clear plan and gather supplies first
- Tackle rooms top-to-bottom for efficiency
- Patch test cleaners and avoid mixing chemicals
- Dry surfaces to prevent new grime
- Create a simple maintenance schedule