Clean Floors with White Vinegar: A Practical Guide
Discover a safe, cost-efficient way to clean floors with white vinegar. This guide covers dilution, surface compatibility, safety tips, and maintenance for a healthier home.

Cleaning floors with white vinegar is a simple, effective routine for many homes. For everyday grime, mix a mild vinegar solution and mop, then let the floor air-dry. Avoid using vinegar on stone surfaces like marble or untreated wood, and always test a small area first. This approach reduces residue and keeps floors looking fresh, using a common kitchen staple.
Why vinegar works for floor cleaning
White vinegar is a versatile, inexpensive cleaner that can help dissolve mineral deposits, grease, and basic grime on many sealed floor surfaces. Its mild acidity can cut through soap scum and residue without harsh chemicals, making it a popular choice for homeowners seeking a more natural routine. The Cleaning Tips team notes that while vinegar can improve cleanliness and shine, it should not be relied on as a disinfectant for all pathogens. Always pair vinegar cleaning with proper ventilation and frequent rinsing when necessary to prevent a lingering scent or film. For best results, use warm water and a soft mop, then allow the floor to air-dry in a ventilated space.
Surface compatibility and cautions
Most sealed floor types respond well to a vinegar wash, including ceramic tile, vinyl, and laminated flooring. However, avoid using vinegar on natural stone surfaces with exposed calcium or marble, limestone, or highly polished stone finishes, as the acid can etch the surface over time. Unsealed wood, waxed surfaces, and certain epoxy coatings may also be damaged or dulled by acidic cleaners. Always test a small, inconspicuous area first before cleaning the entire floor, and consult manufacturer guidelines if you’re unsure about your finish.
Dilution guidelines and cleaning ratios
A mild vinegar solution is typically sufficient for routine cleaning. Start with a low-concentration mix to minimize any risk of residue. A common starting point is a small amount of white vinegar diluted in warm water, enough to lightly scent the space and cut through grime without leaving a strong odor. For stubborn spots, you can increase the vinegar concentration slightly, but never exceed a stronger ratio than recommended by the floor manufacturer. After cleaning, ventilate the room to help the solution dissipate and prevent a lingering vinegar smell. Always dilute, never apply undiluted vinegar directly to floors.
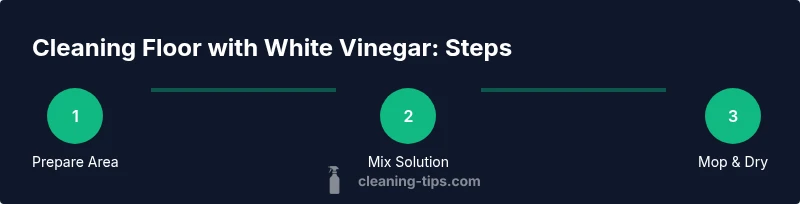
Step-by-step cleaning routine (overview)
The following steps outline the overall approach. The step-by-step section provides precise actions, but this overview helps you see the flow from prep to finish. Begin by prepping the space, mix your solution, mop in sections, and finish with drying and spot checks. If your floor requires special care, adjust the method to fit the surface and follow safety precautions. This routine emphasizes consistent motion and avoiding over-wetting to protect the floor’s finish.
Troubleshooting common issues
- Residue or film: Rinse with clean water and dry with a microfiber cloth to remove any film that might form from vinegar over time.
- Strong vinegar odor: Increase ventilation by opening windows or running a fan; the smell should fade as the floor dries.
- Streaks on glossy finishes: Wring the mop thoroughly and work in small sections to reduce pooling; finish with a quick pass using a dry mop to lift moisture.
Special cases by flooring type
- Vinyl and ceramic tile: Generally safe with a diluted vinegar solution. Avoid overly wet mops and ensure proper drying to prevent warping or slip hazards.
- Laminate: Use a lightly damp mop and avoid saturating the floor, since excessive moisture can seep into seams and cause swelling.
- Sealed hardwood: Only use damp mops, not soaking wet cloths; wipe dry promptly to protect the seal. For unsealed wood, use a gentler, soap-based cleaner instead.
- Natural stone: Avoid vinegar entirely; use pH-neutral cleaners recommended by the manufacturer to prevent etching.
Safety and environmental considerations
Wear gloves to protect your hands from prolonged contact with acidic solutions. Ensure good ventilation during cleaning to avoid inhaling the vinegar aroma, especially in small spaces. Do not mix vinegar with bleach or ammonia, as this can release hazardous gases. Store vinegar and cleaning tools securely out of reach of children and pets.
Maintenance and long-term care using vinegar safely
Incorporate a weekly vinegar-based mop routine for lightly soiled floors to maintain shine and reduce buildup. Rotate cleaning tasks with other gentle cleaners tailored to specific floor types to preserve finishes. Regularly inspect floor edges for warping or scratches and address any issues before they worsen. Proper storage and timely replacement of rags and mop heads help prevent cross-contamination and extend cleaning effectiveness.
Tools & Materials
- Bucket(Sturdy size for 1–2 gallons of water; consider a mop bucket with a wringer)
- Mop (or microfiber flat mop)(Choose a mop that holds and wrings moisture well; microfiber helps pick up grime without scratching)
- Warm water(Comfortable, not scalding; warm water helps dissolve grime more effectively than cold water)
- White distilled vinegar(Common kitchen staple; avoid flavored/vinegar with additives that could leave residues)
- Measuring cup(Useful for consistent dilution; 1/2 cup to 1 cup per gallon are typical ranges)
- Spray bottle (optional)(Useful if you prefer spot cleaning or spraying the solution directly onto the floor)
- Gloves(Protect hands from acidity and moisture; nitrile gloves recommended)
- Microfiber cloths(For drying, buffing, and spot cleaning; rewash between areas)
Steps
Estimated time: 25-40 minutes
- 1
Prepare the area
Clear floors of furniture and rugs. Sweep or vacuum to remove loose grit that can scratch finishes when mopped. Move fragile items to a safe spot and place towels or mats to catch drips.
Tip: Declutter first to prevent pushing dirt around while cleaning. - 2
Mix the vinegar solution
In a bucket, combine warm water with a small amount of white vinegar. Aim for a mild scent and a low acidity; avoid applying undiluted vinegar directly to the floor. Put on gloves before handling the solution.
Tip: Label the mixture if you prepare larger quantities for future use. - 3
Mop the floor in sections
Dip the mop into the solution, wring out well, and mop in small, overlapping sections. Work from the farthest corner toward the exit to avoid stepping on cleaned areas. Rinse the mop frequently to prevent spreading grime.
Tip: Use a figure-eight motion to lift grime without pushing it into seams. - 4
Rinse and wipe (if needed)
If you notice sticky residue, rinse the area with a clean water mop or damp cloth to remove it. Some finishes don’t require rinsing, but a quick rinse can prevent dulling from buildup.
Tip: Avoid soaking the floor; dampness is sufficient for most finishes. - 5
Dry and finish
Dry with clean microfiber cloths or allow air-drying with good ventilation. Drying prevents water spots and slip hazards, especially on glossy or laminated surfaces.
Tip: Open a window or turn on a fan to speed up drying.
Questions & Answers
Can I use white vinegar on all floor types?
No. Vinegar is generally safe on sealed ceramic, vinyl, and laminate floors, but it can damage natural stone and unsealed wood. Always test a small area and follow the floor manufacturer’s recommendations.
Vinegar works on many sealed floors, but not on stone or unsealed wood. Test a spot first.
Should I rinse after cleaning with vinegar?
Rinsing is optional for many finishes if you use a light dilution. If you notice a residue, pass a clean water mop over the area to reduce any film.
Rinse if you see residue after cleaning.
Is vinegar a disinfectant?
Vinegar has mild antimicrobial properties but is not a proven disinfectant for all pathogens. It’s best for routine cleaning, not for sanitizing surfaces.
Vinegar cleans, but it isn’t a strong disinfectant.
What if the vinegar smell lasts after cleaning?
Ventilate the room with a fan or open windows. The odor typically fades as the floor dries, especially with adequate air movement.
Open windows or use a fan to dissipate the smell.
Can I add essential oils to vinegar for scent?
Yes, you can add a few drops of essential oil to the diluted solution, but use sparingly to avoid masking any residue and ensure it doesn’t react with your floor finish.
A little essential oil can add scent, just don’t overdo it.
How often should I clean floors with vinegar?
For routine maintenance, cleaning once a week or when grime accumulates is common. For high-traffic areas, you may clean more frequently with a mild dilution.
Clean once a week or as needed in busy areas.
Watch Video
The Essentials
- Test vinegar on a small area first
- Dilute vinegar for routine cleaning; avoid stone/unfinished wood
- Dry floors completely to prevent residue and slips
- Avoid mixing vinegar with bleach or ammonia
- Follow floor manufacturer guidelines for best results