How to clean a room' effectively: A step-by-step guide
Learn a practical, step-by-step method to clean a room' from top to bottom. This expert guide covers planning, tools, eight concrete steps, and tips for a healthier, tidier space.

Clean a room' efficiently with a clear, repeatable routine: declutter, dust, wipe surfaces, vacuum, disinfect high-touch areas, and finish with fresh air. This guide provides the exact steps, tools, and timing to get a healthier, tidier space.
Why a clean room' matters
A truly clean room' supports healthier living by reducing dust and allergens, improving air quality, and making it easier to notice and address spills or mold early. The Cleaning Tips team emphasizes that consistency beats intensity: a quick, regular cleaning routine lowers the buildup of grime and stress. By keeping surfaces free of clutter and dust, you also reduce the chance of pests and create a calmer environment for work, study, and rest. According to Cleaning Tips, the practice of routine cleaning is as important as the tools you choose, because habits drive long-term results. A clean room' is not about perfection, but about sustainable cleanliness that fits with real life, especially in busy homes where kids and pets add daily challenges. Start with small, repeatable actions you can maintain over time, and you’ll feel the difference in both health and mood.
Planning your cleaning session
Successful cleaning begins before you touch a single surface. Set a realistic scope for the room', considering size, traffic, and current mess. Choose a start time when you won’t be interrupted, and determine a target time, such as 30–45 minutes, to prevent fatigue. Declutter first—collect papers, toys, and debris that otherwise distract you from cleaning surfaces. Create a simple checklist for yourself and a quick playlist to stay motivated. If you’re short on time, split the job into two focused sessions (a top-to-bottom sweep today and a deeper clean tomorrow). The key is to maintain a consistent rhythm so that the room' remains presentable and healthy between full cleans. Cleaning Tips analysis suggests that documenting your plan improves follow-through and reduces the chance you skip steps later.
Gather the right tools and supplies
Having the right tools at hand makes cleaning faster and more effective. Pull together microfiber cloths, a sturdy vacuum with attachments, a mop or damp cloth, an all-purpose cleaner, disinfectant wipes, a bucket, a squeegee (if you have glass), and gloves for skin protection. Use microfiber for dust removal and to trap dirt rather than spreading it around; it’s also gentle on surfaces. Keep cleaning solutions clearly labeled and stored away from kids and pets. If you share a home with others, place a small caddy in the room' to minimize trips to the supply closet. When you have the right kit, you’ll find you can complete the routine in a predictable amount of time and with fewer passes.
Step-by-step cleaning method (overview)
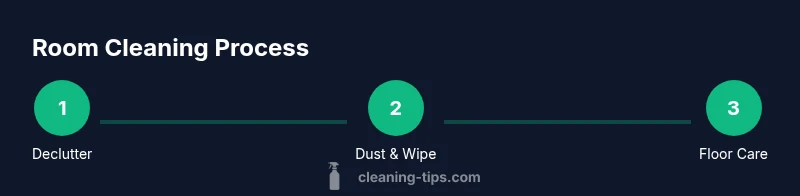
The core approach is top-to-bottom, left-to-right, and floor-up, so dirt doesn’t fall back onto cleaned areas. Start by addressing clutter, then dust high corners, wipe surfaces, clean devices and fixtures, and finally vacuum or mop the floor. Finish by refreshing the air—open a window if possible or run a fan—and do a quick final check for missed spots. This method reduces backtracking and ensures the room' feels visibly cleaner after each pass. In this section you’ll find an eight-step sequence that breaks down each action into concrete, repeatable tasks.
Common mistakes and how to avoid them
Common errors include cleaning in the wrong order (floor before dusting), using dirty cloths that smear dirt, and neglecting high-touch surfaces like door handles and light switches. Avoid mixing cleaners, which can release harmful fumes, and don’t oversaturate wood or electronics. Another frequent misstep is drying surfaces too slowly, which invites streaks and grease buildup. Don’t forget to ventilate: opening a window or running a fan helps remove cleaning fumes and dries surfaces faster. Finally, resist the urge to skip the final wipe-down; finishing touches matter for both appearance and hygiene.
Maintenance and long-term habits for a consistently clean room'
To keep the room' consistently clean, establish a mini-routine: 10-minute daily tidy, a weekly deeper clean, and a monthly seasonal refresh. Rotate tasks so you don’t burn out—alternate dusting, vacuuming, and surface wiping on separate days. Consider creating a visual cue system, such as an outlined checklist placed on the door or wall, to trigger cleaning reminders. Store frequently used items in the same place so stray clutter doesn’t accumulate. Finally, integrate air quality improvements by opening windows when feasible, using safer cleaners, and leveraging a purifier if needed. With a stable routine, the room' remains better organized and more inviting, even with a busy schedule.
Tools & Materials
- All-purpose cleaner(Choose non-toxic or low-VOC if possible)
- Microfiber cloths(Several, lint-free; use dampened for dusting)
- Vacuum cleaner with attachments(HEPA filter preferred for allergies)
- Broom and dustpan(Optional for hard floors; helps corner debris)
- Bucket and mop or damp cloth(Microfiber recommended for floors)
- Disinfectant wipes or spray(For high-touch surfaces)
- Gloves(Protect skin from cleaners and grit)
- Trash bags(Bag up waste during decluttering)
Steps
Estimated time: 40-60 minutes
- 1
Declutter and plan
Remove obvious clutter and create a quick plan for the cleaning pass. This reduces interruptions and ensures you cover every area in a logical order.
Tip: Starting with declutter saves time later and helps you see what needs cleaning. - 2
Dust from top to bottom
Dust ceilings, corners, shelves, and electronics. Use a microfiber cloth, dry first, then damp if needed to trap dust rather than scattering it.
Tip: Always move from high to low to avoid re-dusting. - 3
Wipe surfaces and fixtures
Wipe desks, window sills, picture frames, and light switches. Use a clean microfiber cloth for each surface type to prevent cross-contamination.
Tip: Rotate cloths to avoid spreading dirt. - 4
Clean glass and screens
Wipe windows, mirrors, and electronics screens with a microfiber cloth and a gentle cleaner, avoiding excessive moisture.
Tip: Use circular motions and dry with a second cloth to prevent streaks. - 5
Disinfect high-touch areas
Spray or wipe door handles, switches, and remote controls. Allow the product to sit for the recommended contact time before wiping.
Tip: Do not miss high-traffic zones in living spaces. - 6
Vacuum and mop floors
Vacuum carpets and rugs; sweep hard floors first to collect large debris, then mop or damp-wipe to remove residue.
Tip: Vacuum slowly to pick up embedded dust. - 7
Air out and refresh
Open windows or run a fan to improve air quality. Consider a quick odor-neutralization pass with a spray or light diffuser.
Tip: Short, frequent airing is more effective than long, infrequent airing. - 8
Final check and tidy
Walk the room' and spot-clean any missed spots. Return items to their place and set a reminder for the next cleaning.
Tip: Small, visible checks reduce the feeling of mess later.
Questions & Answers
How often should I clean a room'?
Most homes benefit from a weekly routine, with quick touch-ups in between. Adjust frequency based on room use, pets, and allergies.
Aim for a weekly clean, plus brief daily pickups in high-use rooms.
What order should I clean in?
Follow top-to-bottom and left-to-right, finishing with floors. This minimizes re-soiling and keeps debris from landing on already-cleaned areas.
Start at the top and work down to the floor.
What tools are essential for a clean room'?
A microfiber cloth, vacuum, mop, all-purpose cleaner, disinfectant, and gloves form a solid core kit. Adjust for room type and flooring.
Microfiber cloths, a good vacuum, and a mop are must-haves.
How can I improve air quality while cleaning?
Ventilate when possible, choose non-toxic cleaners, and consider an air purifier for spaces with limited ventilation or pets.
Ventilate and pick safer products for cleaner air.
How long does a typical room cleaning take?
A standard room clean generally takes 20–40 minutes, depending on size and clutter. Larger spaces or busy households may take longer.
Most rooms take under an hour with a steady rhythm.
What are common mistakes to avoid?
Avoid mixing cleaners, neglecting high-touch areas, and cleaning in the wrong order. Don’t skip the final wipe-down.
Don’t mix chemicals and don’t skip high-touch areas.
Watch Video
The Essentials
- Declutter first to accelerate cleaning
- Top-to-bottom, left-to-right is essential
- Maintain a consistent 40–60 minute routine
- Use microfiber and ventilate for best results