What to Do Clean: A Practical Home Cleaning Guide Today
Discover a practical, repeatable approach to cleaning your home. Learn what to do clean, build a routine, choose safe tools, and avoid common mistakes for a healthier living space in 2026.

A simple, repeatable cleaning routine is the fastest path to a healthier home. Gather supplies, clean top-to-bottom, and ensure high-touch surfaces get disinfected as needed. See our detailed guide for a full step-by-step plan. This approach reduces decision fatigue, saves time, and keeps dirt from piling up over days or weeks. It emphasizes plan, gather, execute, and review, with clear zones and a practical cadence. What to do clean becomes second nature when you adopt a consistent rhythm.
What to do clean: A practical framework
What to do clean isn’t about achieving perfection in every room; it’s about a practical framework you can repeat weekly. According to Cleaning Tips, a simple, repeatable routine reduces decision fatigue and builds lasting habits. Start with a quick audit of your spaces, list the surfaces you clean, and decide on a cadence that fits your lifestyle. The framework below focuses on four pillars: plan, gather, execute, and review. Plan includes defining zones (kitchen, bathroom, living areas, bedrooms, and utility spaces) and establishing top-to-bottom rules so you never miss dirt that falls from higher surfaces. Gather means collecting supplies you will actually use, storing them where you work, and choosing safer, effective products. Execute covers the actual cleaning actions—debris removal, dusting, wet cleaning, and drying—while review asks you to note what worked and what didn’t, adjusting for next time. The result is a calmer home with fewer lingering spots and a clearer sense of control. This approach also reduces cross-contamination by keeping zone-specific tools separate and by reserving a dedicated kit for kitchens and bathrooms. The Cleaning Tips team found that routines that align with natural daily rhythms tend to stick better.
Core cleaning principles that work
Effective cleaning rests on a few universal principles that stay true across spaces. Start at the highest point in a room and work downward, so dust and debris don’t fall on clean areas. Wipe, rinse, and dry to prevent streaks and soap scum buildup. Use the right cleaner for the surface: a mild detergent for counters and tabletops, a dedicated bathroom cleaner for tiles, and a streak-free solution for glass. Microfiber cloths trap dirt more efficiently than cotton rags, and a soft brush helps with grout and corners. Avoid mixing cleaners haphazardly; some combinations release fumes or reduce effectiveness. The Cleaning Tips analysis shows that consistent use of surface-appropriate products plus mindful drying yields the most stable, long-lasting results. Keep your supplies organized in color-coded kits to minimize cross-contamination and speed up sessions. The goal is predictable outcomes, not a marathon of scrubbing. When in doubt, test a small area first and adjust your technique based on the surface response.
Surface-specific routines: kitchens, bathrooms, living areas
Different surfaces require different approaches. For kitchen counters and tables, use a mild detergent or all-purpose cleaner and wipe in a straight or circular motion, then dry with a clean microfiber cloth to prevent water spots. Stainless steel appliances respond well to a microfiber cloth dampened with water or a mild cleaner; wipe in the direction of the grain to avoid streaks. Sinks, especially stainless steel, benefit from a light scrub with a nonabrasive sponge, followed by a rinse and dry to prevent water spots and mineral buildup. Bathrooms should be cleaned from top to bottom: mirrors and tiles first, then the sink and toilet, and finally the shower or tub. High-touch areas like doorknobs, light switches, faucet handles, and the toilet flush should be disinfected using an appropriate product, allowing the dwell time specified on the label. Living areas benefit from regular dusting, vacuuming, and wiping electronics with a dry microfiber cloth. For floors, vacuum first to remove loose dirt, then mop or wash with a floor-appropriate cleaner. Always allow floors to dry completely to prevent slips and moisture damage. This section emphasizes practical routines for kitchens, bathrooms, and living rooms while keeping safety in mind; adapt for bedrooms and utility spaces to maintain a consistently clean home. The guidance is designed to help renters and homeowners alike keep spaces welcoming and healthier over time.
Daily, weekly, and monthly routines
Consistency is easier when you separate tasks by cadence. Daily: wipe high-touch surfaces (doorknobs, light switches, countertop edges) and spot-clean spills to prevent buildup. Quick 5- to 10-minute sessions keep dirt from becoming entrenched, and maintain a sense of order between longer cleans. Weekly: perform a deeper lift by dusting hard-to-reach spots, vacuuming carpets and upholstery, mopping hard floors, and cleaning the microwave, stovetop, and sink. Consider a room-by-room rotation to avoid fatigue and ensure every space receives attention. Monthly: tackle areas that don’t need weekly attention but accumulate grime, such as behind appliances, vent covers, baseboards, and grout lines. The rhythm should align with your schedule: if you have kids or pets, you may need to increase frequency in high-traffic zones. A sustainable cadence reduces the risk of neglect and makes the home feel consistently fresh. Cleaning Tips suggests pairing routine checks with a simple checklist, which helps stay on track when life gets busy.
Choosing safe cleaners and tools
Safety and effectiveness come from matching cleaners to surfaces and using proper tools. For everyday cleaning, an all-purpose cleaner and a mild detergent handle most tasks. Disinfectants are appropriate for high-touch surfaces and areas where illness has occurred; always follow label directions and ensure proper ventilation. Use microfiber cloths, color-coded by room to minimize cross-contamination, and store cloths in closed containers between uses. Sponges and scrub brushes should be kept separate for different rooms to avoid spreading grime. Avoid abrasive pads on delicate surfaces, and never mix ammonia- or bleach-based products—this can create dangerous gases. When possible, opt for safer products with lower VOC content and test a small area first. Ventilation improves both cleaning efficiency and air quality, particularly in bathrooms and kitchens where moisture can promote mold growth. This section also covers safe storage: keep cleaners in a locked cabinet away from children and pets, in their original containers with readable labels. The goal is to minimize risk while maximizing cleaning effectiveness; always read labels and follow safety guidelines. For renters, choose removable, residue-free products to reduce buildup on walls and fixtures.
Common mistakes and how to avoid them
Many households make small but persistent mistakes that undermine cleaning results. Common errors include cleaning surfaces with dirty cloths, using overly wet wipes on electronics, skipping the drying step, and ignoring the top-to-bottom rule. Another frequent issue is using the wrong cleaner for a surface—stone countertops require pH-neutral products, while wood finishes need gentler cleaners. People often scrub too hard, leading to surface damage or dull finishes. Ventilation is frequently overlooked; disinfectants can irritate eyes and lungs in poorly ventilated rooms. Finally, homeowners sometimes delay cleaning sessions, letting grime accumulate and making routine maintenance harder. To avoid these pitfalls, follow a scheduled cadence, use color-coded cloths, and test products on inconspicuous areas before widespread use. Keep a simple checklist and update it as needed. If you notice persistent odors or dampness in a space, investigate further for moisture or mold and address the underlying cause promptly. Regular maintenance is simpler than sporadic deep cleans, and it keeps your space healthier in the long run.
Case studies: a typical apartment cleaning scenario
Consider a small apartment with a kitchen, bathroom, living room, and two bedrooms. Start by gathering supplies and setting a timer for the session. Clear counters, declutter surfaces, and dust from high corners. Wipe kitchen counters, the sink, and the stove; then disinfect high-touch areas like the faucet handles and cabinet pulls. Dust electronics in the living room, vacuum carpets, and mop hard floors. In bedrooms, make beds, organize clothes, and wipe nightstands. Throughout the process, you’ll use microfiber cloths, a sponge, a bucket, and a vacuum with a HEPA filter. The aim is to create a consistent routine that fits your schedule while maintaining a healthy living environment. The key is to stay organized, work top-to-bottom, and finish with a thorough dry-down to prevent streaks and moisture buildup. For renters, this approach helps preserve apartment surfaces and reduces the need for frequent deep cleans, while homeowners can use the same framework to manage large spaces efficiently. If you have pets or children, adjust the cadence to accommodate any allergies or sensitivities, prioritizing safety and comfort.
Authority sources and further reading
For authoritative guidance on cleaning, disinfection, and indoor air quality, consult the following resources:
- EPA: Cleaning and Disinfecting Your Home — https://www.epa.gov/coronavirus
- CDC: Household Cleaning and Disinfection Recommendations — https://www.cdc.gov/coronavirus/2019-ncov/prevent-getting-sick/cleaning-disinfection.html
- NIH/NIEHS: Indoor Environmental Health and Cleaning Tips — https://www.nih.gov or https://niehs.nih.gov/
- University extensions and major universities often publish practical cleaning guidelines; for example, Harvard's School of Public Health materials on indoor air quality and hygiene practices can be useful supplementary reading.
Note: Always verify current guidelines from official sources and tailor recommendations to your home’s specific surfaces and occupants.
Tools & Materials
- All-purpose cleaner(Choose a spray bottle with a comfortable nozzle; safe for most surfaces)
- Disinfectant(Follow label directions and ensure proper ventilation)
- Microfiber cloths(Use color-coded sets to avoid cross-contamination)
- Sponges(Non-abrasive on delicate surfaces)
- Scrub brushes(Different stiffness for tile grout and tough grime)
- Bucket(With handle for easy carrying)
- Mop and mop bucket(Choose a split mop for quick drying)
- Vacuum cleaner(HEPA filter preferred for dust control)
- Gloves(Protect hands from chemicals and moisture)
- Trash bags(Keep a roll nearby for quick disposal)
- Spray bottle(For dilutions and targeted cleaning)
- Glass cleaner(Optional for mirrors and windows)
- Ventilation option(Open window or use exhaust fan when disinfecting)
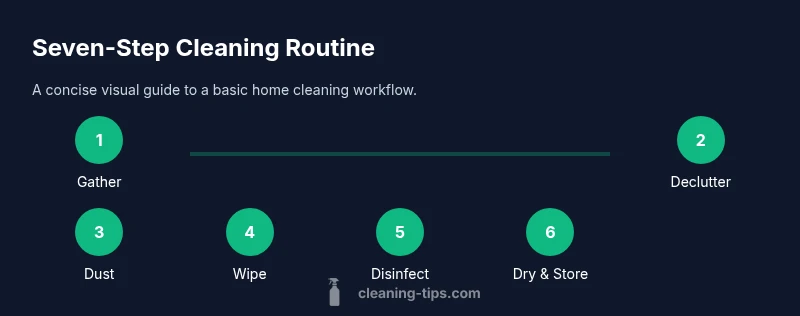
Steps
Estimated time: 60-90 minutes
- 1
Gather supplies and prepare space
Collect all cleaners, cloths, and tools in one portable kit. Clear the area and set a timer to avoid overrun. This reduces trips back and forth and helps you stay focused on the task.
Tip: Group items by room to minimize cross-contamination and save time. - 2
Declutter and clear surfaces
Remove objects from countertops, tables, and shelves. Put items away in their designated spots so you can access every surface. A tidy workspace speeds up cleaning and reduces the chance of re-dirtying surfaces.
Tip: A quick declutter saves time and prevents obstacle-based mistakes. - 3
Dust high to low, then wipe
Dust ceiling corners, light fixtures, and shelves, moving downward. Wipe surfaces with microfiber cloths, using the appropriate cleaner for each material. Finish by drying to prevent water marks.
Tip: Always dust before wiping to prevent redepositing dust on cleaned areas. - 4
Disinfect high-touch surfaces
Apply a disinfectant to handles, switches, faucet areas, and knobs. Follow the label for dwell time and ensure the area is well-ventilated. Air-dry for best results.
Tip: Ventilate the room while disinfecting to minimize fumes and irritation. - 5
Clean and wipe surfaces methodically
Wipe kitchen counters, sinks, and appliances with the right cleaners. Move in straight lines or circular motions as appropriate, then rinse with clean cloth if needed. Dry thoroughly to prevent streaks and moisture buildup.
Tip: Test new cleaners on inconspicuous areas first. - 6
Dry, store, and finish tidy
Dry all surfaces completely and return items to their places. Empty mop water, rinse cloths, and store tools in their designated spots. A tidy finish reinforces a sense of accomplishment and readiness for next cleaning.
Tip: Always end with a quick visual check for missed spots or moisture.
Questions & Answers
What is the best order to clean a room?
Begin with the highest surfaces (dusting), then wipe lower areas, finish with floors. This top-to-bottom approach prevents recontaminating cleaned zones.
Start at the top, move down, and finish with the floor to avoid re-dirtying cleaned surfaces.
Do I need to disinfect every surface?
Not every surface needs disinfection. Focus on high-touch areas and spaces used by multiple people, especially during illness or outbreaks.
Disinfect high-touch areas and follow guidelines for illness-prone spaces.
What cleaners should I avoid mixing?
Never mix ammonia-based cleaners with bleach. The chemical reaction can release toxic gases and irritants.
Never mix ammonia and bleach; it can produce harmful fumes.
How long should I wait after applying disinfectant?
Follow the label's dwell time to ensure effectiveness; typical times range from 1 to several minutes depending on the product.
Check the product label for the recommended waiting time.
Can natural cleaners replace chemical cleaners?
Natural cleaners like vinegar work for some surfaces but are not universal disinfectants and may not be safe for all surfaces, such as stone.
Vinegar helps on many surfaces but isn’t a universal disinfectant and isn’t suitable for all materials.
How should I store cleaning supplies safely?
Store cleaners in a locked cabinet, away from children and pets, in their original containers with clear labels.
Keep cleaners out of reach and in labeled containers.
Watch Video
The Essentials
- Plan your cleaning route before you start
- Use surface-appropriate cleaners for each area
- Clean top to bottom and dry surfaces
- Establish a regular cadence to stay consistent