How to Create and Use Clean Solutions at Home
Learn practical, safe techniques to create and use clean solutions at home. This guide covers ingredients, mixing, storage, and room-by-room application for a healthier, more effective cleaning routine.

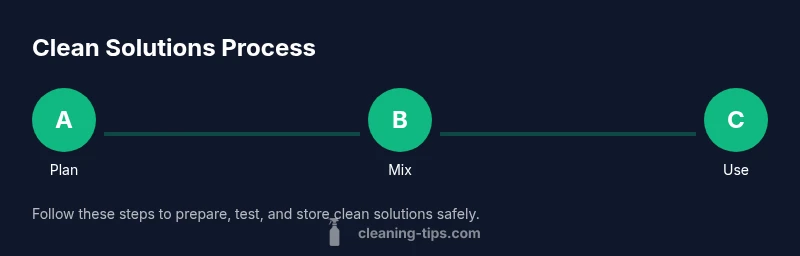
Learn how to create and use clean solutions safely at home. This guide shows you how to pick versatile ingredients, mix them correctly, and apply them room by room for effective cleaning without harsh chemicals. You’ll gain practical steps, safety tips, and a simple kit plan that adapts to kitchens, bathrooms, and living areas. By following these steps, you’ll achieve consistent results while protecting people and pets.
The science behind clean solutions
When we talk about clean solutions, we mean mixtures that break down dirt, cut through grease, and disinfect surfaces without posing unnecessary risks. The science hinges on surfactants, pH levels, and solvent strength. According to Cleaning Tips, the most effective formulations balance strength with safety, using common ingredients like vinegar, baking soda, and mild detergents. By understanding how these ingredients interact with micro-debris, homeowners can tailor solutions to different tasks.
Dirt is often made of oils, proteins, and minerals that cling to surfaces. Surfactants reduce surface tension, allowing water to wet and lift grime. Acids like vinegar help dissolve mineral deposits and mineral salts, while baking soda acts as a gentle abrasive and deodorizer. Hydrogen peroxide can disinfect when used properly, but it should be kept away from organic stains that bleach can worsen. Lemon juice provides a mild acidity and fresh scent, though its potency varies with concentration. The key is to start with a basic all-purpose solution and then adjust for specific jobs. Always test on an inconspicuous area before applying anywhere visible, especially on porous materials. This approach minimizes damage and waste, and it makes clean solutions more reliable for daily routines. In home cleaning, consistency beats complexity, and simple mixes often outperform fancy, expensive products.
Core ingredients and their roles
A clean solution relies on simple, safe ingredients that perform specific tasks: emulsifying grease, lifting dirt, and inhibiting odor. White vinegar is a mild acid that helps dissolve mineral residues and cut through grime on metal and glass. Baking soda serves as a gentle abrasive and deodorizer, great for sinks and tubs. Hydrogen peroxide acts as a mild disinfectant when used properly, but avoid mixing it with vinegar in the same container. Lemon juice provides a bright scent and mild acidity. A drop or two of mild dish soap lowers surface tension and helps lift oily residues. For delicate surfaces, use a smaller amount of any cleanser and always rinse thoroughly.
When selecting ingredients, prioritize compatibility with surfaces and avoid long mixtures that may leave residues. Always label mixtures and store them safely out of reach of children and pets. This approach helps ensure that your clean solutions stay effective over time and reduce the need for more aggressive products.
Safe mixing practices and storage
Always mix cleaners in a well-ventilated area and use dedicated containers. Label each bottle with its contents and date prepared. Do not mix bleach with ammonia, vinegar, or other acids in the same container, and never store mixed cleaners in metal bottles, which can corrode or react. Store away from direct sunlight in a cool, dry place. Keep all recipes simple and test new combinations on a small, inconspicuous patch first to avoid staining or damage. Proper storage extends the life of natural cleaners and minimizes waste, helping you maintain a healthier home. Regularly review what you have and rotate stock to prevent expired ingredients from accumulating.
Room-by-room solutions
Kitchen: a light all-purpose spray using equal parts water and a mild cleaner like a small amount of dish soap, plus a splash of vinegar for mineral deposits. Wipe with a microfiber cloth for streak-free results. Bathroom: a baking soda paste can tackle soap scum on faucets and tiles; rinse thoroughly to avoid grit. For mirror cleaning, use a vinegar-water mix and a separate microfiber cloth. Living areas: use a gentle disinfectant spray sparingly on high-touch surfaces, followed by a clean water rinse on the cloth. Floors can be cleaned with a microfiber mop and a mild solution appropriate for the floor type.
Always test any new solution in a hidden corner of the room first and adjust concentration based on results.
Eco-friendly and budget-friendly choices
DIY clean solutions can reduce cost and plastic waste when you repurpose bottles and rinse thoroughly. Diluting concentrates you already buy helps stretch products further, while choosing biodegradable ingredients reduces environmental impact. When possible, replace single-use wipes with washable microfiber cloths and re-use spray bottles for multiple tasks. This approach aligns with practical Cleaning Tips guidance and supports a sustainable cleaning routine.
Common mistakes and how to fix them
Overly strong mixtures can damage surfaces and leave residues. Underestimating the importance of rinsing can lead to streaks or dull finishes. Always perform a patch test and rinse thoroughly between steps. If a scent or sting appears, dilute the solution or switch to a milder formula. Fine-tuning concentrations and avoiding mixing incompatible ingredients will save time and protect surfaces.
Building a versatile cleaning kit
A compact kit makes it easy to implement clean solutions consistently: measuring cups, spray bottles in two sizes, mixing bowls, safety gloves, microfiber cloths, non-scratch sponges, labels and marker, and a small tray for transporting supplies. Include essential ingredients like white vinegar, baking soda, hydrogen peroxide, lemon juice, and mild dish soap. Keep a small note pad for quick recipes and a checklist to track what you’ve used.
Maintenance and long-term storage of cleaners
Store cleaners in a cool, dark place away from sunlight and heat. Label all containers clearly with contents and date prepared. Dispose of any solutions that change color, develop unusual odors, or separate into layers. Regularly refresh supplies and consider making a fresh batch every few months to maintain effectiveness.
Implementing a routine with clean solutions
Develop a weekly cleaning plan that uses simple, repeatable recipes and routine checks. Start with a primary all-purpose solution for most tasks, then add targeted formulas for problem areas like mineral buildup or soap scum. Build a habit of labeling and rotating stock. Over time, your home will stay cleaner with less effort and fewer harsh chemicals.
Tools & Materials
- Measuring cups(1 cup and 1/4 cup for accuracy)
- Spray bottles(Two 16 oz bottles labeled for different solutions)
- Mixing bowls(Glass or BPA-free)
- Safety gloves(Rubber or nitrile; use when handling acids or concentrated mixtures)
- Microfiber cloths(Lint-free; use for wiping and rinsing)
- Non-scratch sponges(For gentle scouring without scratching surfaces)
- Labels and marker(Waterproof labels help with organization)
- Ventilation (window/fan)(Open a window or use a fan when mixing stronger solutions)
- White vinegar (5%)(All-purpose acidic cleaner for mineral deposits)
- Baking soda(Mild abrasive and deodorizer)
- Hydrogen peroxide (3%)(Disinfectant; don't mix with acids in same container)
- Lemon juice(Mild acidity and fresh scent)
- Mild dish soap(Low-foaming; use sparingly to lower surface tension)
- Grout brush(Optional for tough grout lines)
Steps
Estimated time: 60-120 minutes
- 1
Gather supplies and clear workspace
Set up a dedicated cleaning station with all tools and ingredients within easy reach. Check that spray bottles are labeled and the work area is well-ventilated. This helps prevent cross-contamination and speeds up the process.
Tip: Organize items by task (all-purpose, vinegar-based, paste) to save time. - 2
Read labels and safety data
Read the labels of each product and ingredient to understand any safety warnings or usage limits. Note concentrations and recommended contact times, especially for disinfectants.
Tip: If in doubt, choose milder formulations and test on a small area. - 3
Plan a labeling system
Create a simple labeling system for each bottle (contents and date). This avoids accidental misuse and ensures you rotate stock regularly.
Tip: Label with a date to track freshness and plan fresh batches. - 4
Prepare all-purpose base solution
Mix a versatile base: water with a mild cleaner and a splash of dish soap. This form works for many general cleaning tasks and reduces the need for multiple products.
Tip: Use equal parts water and cleaner in a spray bottle for even coverage. - 5
Create vinegar-based routine solution
Combine water with a small amount of white vinegar for routine cleaning of glass, chrome, and tile surfaces. Rinse surfaces after use to prevent streaks.
Tip: Avoid using vinegar on natural stone or marble unless you’ve tested compatibility. - 6
Make baking soda paste for tough grime
Combine baking soda with a little water to form a paste for scrubbing sinks, tubs, and grout. Allow the paste to sit briefly before scrubbing to improve effectiveness.
Tip: Wear gloves to protect skin and rinse away all residue. - 7
Test on a hidden area
Before tackling visible surfaces, test your chosen solution on an inconspicuous spot to verify it won’t cause damage or discoloration.
Tip: Wait 1–2 minutes and wipe to inspect for color change or surface reaction. - 8
Label, store, and clean up
After use, rinse tools and bottles, dry them, and return them to the station. Ensure caps are secure and bottles are stored away from children and pets.
Tip: Regularly review contents and discard expired items.
Questions & Answers
What counts as a clean solution?
A clean solution is a safe mix of common household ingredients designed to remove dirt, grime, and odors without harsh chemicals. Start with simple formulas and adjust for the task.
A clean solution is a safe blend of everyday ingredients that cleans effectively. Start simple and adjust for the job at hand.
Are DIY clean solutions as effective as store-bought products?
DIY cleaners can be highly effective for many tasks when ratios and ingredients are chosen carefully. For specialized surfaces or stubborn stains, store-bought products may offer stronger or more consistent performance.
DIY cleaners work well for most tasks if you mix them right; for tricky jobs, consider a purpose-made product.
Is it safe to mix essential oils into DIY cleaners?
Some essential oils can irritate skin or trigger allergies. If you use them, dilute properly and avoid applying directly to sensitive skin or near food-contact surfaces.
Essential oils can be nice, but use them sparingly and dilute well to avoid irritation.
How long do homemade cleaners last?
Most homemade cleaners last several weeks if stored properly in labeled containers away from sunlight. Replace mixtures that smell off or show changes in color or texture.
Most homemade cleaners stay good for a few weeks if stored properly; watch for changes and replace when needed.
Can I clean electronics with DIY cleaners?
Yes, but use a dampened cloth rather than spraying liquids directly onto devices. Unplug devices before cleaning and avoid moisture around ports.
Dampen a cloth to wipe electronics, and unplug first. Don’t spray liquids directly on devices.
Watch Video
The Essentials
- Plan with simple ingredients.
- Label and date every bottle.
- Ventilate and rinse after use.
- Test on hidden areas first.
- Store cleaners safely and rotate stock.