The Complete Clean Sweep: A Room-by-Room Cleaning Guide
A structured, room-by-room approach to achieving a thorough clean sweep at home. Learn planning, tools, timing, and maintenance for healthier living spaces.

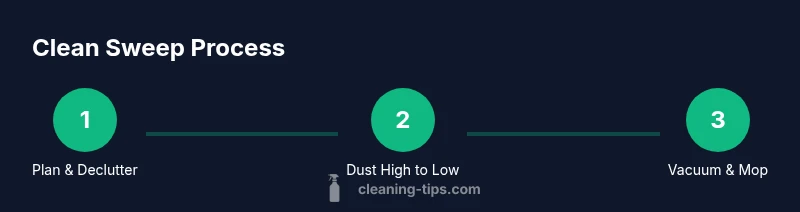
With a proper plan, you can execute a thorough clean sweep across your home in a single session. Start with decluttering, then sweep, vacuum, wipe surfaces, and finish with a top-to-bottom refresh. According to Cleaning Tips, this method reduces missed spots and improves indoor air quality. Gather a broom, vacuum, microfiber cloths, cleaning solutions, and a timer to stay on track.
What a clean sweep means in home cleaning
A clean sweep is more than a quick pass with a broom. It is a deliberate, room-by-room approach that prioritizes coverage, order, and tools that fit each surface. In practice, a clean sweep means starting at the highest point in each room and moving methodically to the lowest (ceiling to floor) while using the right technique for each material. This reduces re-dusting, streaks, and missed corners. The term is widely used by Cleaning Tips to describe a comprehensive session that leaves living spaces feeling lighter, more hygienic, and visually unified. When you commit to a clean sweep, you’re not just pushing dirt around—you’re creating a healthier environment for you and your family by reducing allergens and improving air quality. The plan should account for room layout, traffic patterns, and the specific cleaning needs of each zone, from entryways to bedrooms.
Core principles of a successful clean sweep
A successful clean sweep rests on a few core principles that apply across all rooms. First, work top-to-bottom and dry-to-winish—dust ceilings, then shelves, then floors. Second, keep a consistent sequence to avoid retracing steps and wasting time. Third, use the right tools for each surface to prevent damage and improve efficiency. Fourth, ventilate the space during cleaning to minimize chemical buildup and keep indoor air fresh. Finally, finish with a quick check for missed spots and adjust your plan for the next round if needed. These principles form the backbone of a reliable routine that homeowners and renters can repeat weekly or biweekly, depending on lifestyle and pets. Cleaning Tips emphasizes that consistency beats intensity when long-term home maintenance is the goal.
Room-by-room planning for a clean sweep
Planning a clean sweep room by room reduces fatigue and increases thoroughness. Start by mapping your home into zones based on traffic and dirt accumulation: entryways, living areas, kitchen, baths, bedrooms, and a dedicated cleaning closet area. Decide the sequence so you never have to backtrack. A practical route is to begin with the farthest room from the door and move toward the exit, finishing in shared spaces. Allocate time blocks for each room and stick to them. For apartments or small homes, consolidate steps and focus on high-traffic zones first, then fill in with detail work. This deliberate planning helps you cover all surfaces without getting overwhelmed and makes it easier to maintain momentum across the entire home.
Tools and materials for a complete clean sweep
A clean sweep relies on a tested toolkit. The essentials include a broom with firm bristles, a dustpan, a vacuum cleaner with appropriate attachments, a microfiber cloth set in multiple colors, a mop and bucket, all-purpose cleaner, glass cleaner, and a disinfectant for high-touch areas. Sponges, scrub brushes, and an extendable duster help reach ceiling corners and behind furniture. Keep trash bags handy and use gloves to protect your skin during chemical cleaning. Having a timer or a cleaning app can help you stay on track and maintain a steady pace throughout the session. Separate cloths by color to avoid cross-contamination between surfaces like glass, wood, and chrome.
Cleaning sequences: order that saves time
Sequencing is where a clean sweep becomes efficient. Start with the least dirty tasks to prevent re-contaminating cleaned areas. A typical sequence: organize and declutter, dust high surfaces, clean windows and mirrors, sweep or vacuum hard floors, mop, disinfect high-touch surfaces, and finally empty trash. This order minimizes the spread of dust and keeps you from dripping dirty water onto cleaned floors. For kitchens and baths, reserve those rooms for the middle of the process when you’ve already cleared exterior surfaces so splashes don’t undo earlier work.
Handling problem areas: kitchens, bathrooms, and high-traffic zones
Kitchens and bathrooms require extra attention due to grease and soap scum. Focus on exhaust fans, backsplashes, and faucet hardware with appropriate cleaners. In high-traffic zones like entryways and hallways, check for scuff marks on walls and baseboards, and wipe them down with a damp microfiber cloth. Consider spot-cleaning upholstery and carpeted entry mats to reduce tracked-in dirt. If you have pets, use pet-safe cleaners and designate a separate cloth for pet areas to prevent cross-contamination.
Adapting the clean sweep for different homes
The clean sweep adapts to homes of varying sizes and layouts. In large houses, break the work into two sessions if needed and rotate teams or individuals for efficiency. In small apartments, concentrates on living areas, kitchen, bathroom, and bedroom, with shorter, focused sessions. For homes with sensitive surfaces, choose gentler cleaners and test on inconspicuous areas first. Weather and humidity can affect dust behavior, so adjust ventilation and drying times accordingly. The key is to stay flexible while maintaining a consistent method so you achieve a genuine, even clean across all rooms.
Quick eval and maintenance to sustain a clean sweep
After finishing, take a few minutes to inspect each room for missed spots and plan a quick touch-up. Schedule a weekly or biweekly clean sweep to prevent dirt buildup. Use a simple checklist to track tasks and use color-coded cloths to avoid cross-contamination. Regular maintenance also means cleaning tool heads and replacing worn pads or heads on vacuums and mops. A sustainable routine helps maintain air quality and reduces cleaning time in future sessions, so your home stays healthier with less effort over time.
Safety and sustainable practices for a clean sweep
Safety comes first when using cleaners and electrical appliances. Read label directions on all products and avoid mixing incompatible chemicals. Use gloves and eye protection if you're handling strong cleaners or dealing with mold. Ensure cords are clear of walkways to prevent trips, and keep damp floors dry to avoid slips. For sustainability, choose eco-friendly cleaners when possible, reduce water waste by using a damp microfiber cloth instead of soaking surfaces, and opt for reusable cloths over disposable ones. A mindful approach reduces environmental impact while keeping your living space pristine.
Tools & Materials
- Broom with firm bristles(Angled for corners; stable on hardwood and tile)
- Dustpan(Wide mouth; helps gather debris easily)
- Vacuum cleaner with attachments(Include crevice tool and upholstery brush)
- Mop and bucket(Microfiber mop heads; avoid excessive moisture on wood)
- Microfiber cloths (multi-color)(Use color-coding to prevent cross-contamination)
- All-purpose cleaner(Non-abrasive for surfaces; test on finishes)
- Glass cleaner(For mirrors and glass surfaces)
- Disinfectant spray/wipes(High-touch areas only)
- Sponges and scrub brushes(For stubborn spots)
- Trash bags(Different sizes for each bin)
- Gloves(Protect skin from cleaners)
- Extendable duster(Reach ceiling corners and behind furniture)
- Timer or cleaning app(Sets pace and pacing per room)
Steps
Estimated time: Total time: 2 hours 30 minutes
- 1
Declutter and plan
Clear surfaces and floor space, then sketch a room-by-room plan. Decide the order you’ll tackle rooms and set time blocks to prevent scope creep. This reduces backtracking and keeps you on track.
Tip: Start with the entryway or a high-traffic room to gain momentum. - 2
Dust high to low
Dust ceiling corners, light fixtures, shelves, and top of cabinets before moving to lower surfaces. This prevents settled dust from falling onto already cleaned areas.
Tip: Use a microfiber cloth or feather duster for delicate fixtures. - 3
Vacuum or sweep floors
Vacuum carpets and area rugs, then sweep hard floors to pick up debris. Use attachments for edges and under furniture to maximize coverage.
Tip: Vacuum before mopping to remove loose dirt that could smear surfaces. - 4
Mop and disinfect
Mop hard floors with a damp microfiber mop, followed by a light disinfectant if needed, focusing on high-traffic zones. Avoid excessive moisture on wood floors.
Tip: Rinse mop frequently to avoid redistributing dirt. - 5
Wipe surfaces and appliances
Wipe kitchen countertops, appliance exteriors, and bathroom fixtures with appropriate cleaners. Pay attention to knobs, handles, and edges where grime accumulates.
Tip: Rotate cloth colors to prevent cross-contamination. - 6
Empty trash and refresh
Empty all bins, replace liners, and wipe the interior if needed. This step prevents odors from lingering during the rest of the sweep.
Tip: Tie bags securely to avoid leaks during disposal. - 7
Ventilate and finish
Open windows or run a fan to air out the space. Finish with a light fragrance or essential oil if desired, ensuring good air circulation.
Tip: Keep windows open for at least 10 minutes per room, weather permitting. - 8
Final review
Do a quick walk-through of each room, checking for missed spots and touch-ups. Update your checklist for future cleaning cycles.
Tip: Create a simple one-page checklist to reuse next time.
Questions & Answers
How long does a complete clean sweep typically take?
Most homes take 60-150 minutes, depending on size and detail. Use a room-by-room plan and a timer to stay on track.
A typical clean sweep takes about one to two and a half hours, depending on space.
Should I vacuum before mopping?
Yes. Vacuum to remove loose dirt and dust before damp mopping to prevent mud and streaks.
Yes—vacuum first to remove loose dirt before mopping.
What about small spaces or apartments?
Adapt your route to a compact area and focus on essential zones first. Use a smaller vacuum and timed blocks.
In small spaces, shorten the route and focus on high-traffic zones.
How can I improve air quality after the clean sweep?
Open windows, run a fan, and consider an air purifier. Replace HVAC filters if applicable and allow fresh air in during and after cleaning.
Open windows and use a fan to circulate air.
What should I do with sponges and cloths after cleaning?
Rinse and launder microfiber cloths separately; air-dry to keep fibers intact.
Rinse and launder microfiber cloths after use.
Can I delegate parts of the clean sweep?
Yes. Divide rooms among household members and use a simple checklist to track progress.
Yes—divide tasks among household members and track progress.
Watch Video
The Essentials
- Plan room-by-room for efficiency
- Prioritize top-to-bottom cleaning
- Use the right tools for each surface
- Dust high to low to maximize coverage
- Maintain a regular clean sweep for lasting results