House Clean Job: Your Complete How-To Guide
A practical, step-by-step approach to a thorough house clean job. Plan, gather tools, tackle each room, stay safe, and maintain a healthier home with this classroom-ready guide for homeowners and renters.

This guide walks you through a full house clean job, from planning and decluttering to deep-clean tasks in every room. It provides a room-by-room workflow, a printable tools checklist, and safety reminders to keep everyone healthy. According to Cleaning Tips, a structured cleaning sequence saves time, reduces rework, and improves indoor air quality.
Why a Structured House Cleaning Plan Saves Time and Improves Health
A well-structured house clean job does more than make rooms look tidy. It reduces backtracking, prevents cross-contamination, and helps you monitor progress. Start by identifying the key rooms and surfaces that influence daily life: kitchens and bathrooms first, then living spaces and bedrooms. By planning in blocks of time and tasks, you’ll finish faster and with better results. According to Cleaning Tips, a structured sequence helps homeowners and renters maintain consistent cleanliness without burning out.
Set a realistic target for a single session, and write a simple, flexible checklist. For many households, a focused sweep of the most-used rooms followed by a deeper pass in high-traffic zones works well. The goal is to replace scattered efforts with a deliberate rhythm: high surfaces, then mid-level, then floors. When you plan, you also plan for interruptions, such as cooking or kids’ activities. A clear plan minimizes the chance that you’ll overlook corners or forget to empty the trash.
Define Your Cleaning Scope: Rooms, Priorities, and Time Blocks
The second step is to define scope: list every room and identify priority surfaces. Common priorities include kitchen counters, sink areas, and bathroom fixtures, followed by living room surfaces and dust-prone shelves. Group tasks by room to avoid backtracking. Establish a natural order that mirrors daily flow (front door, kitchen, baths, then living spaces). In a small apartment, you may bundle two rooms into one block; in a larger home, allocate more blocks to reduce fatigue and maintain momentum. This planning phase reduces missed spots and keeps you motivated as the work progresses.
By setting room-specific goals, you also tailor the effort to your home’s layout. For example, kitchens typically require more disinfecting, while bedrooms emphasize dust control and laundry management. If you share space with others, assign zones to reduce overlap and create accountability. A clear plan helps you track progress and stay on schedule, even if life interrupts your rhythm.
Tools, Materials, and Workspace Setup
Before you touch a surface, assemble a focused toolkit and a clean workspace. A dedicated cleaning caddy or cart with color-coded cloths can dramatically reduce switches and back-and-forth. Keep the most-used cleaners accessible in the vicinity of the related rooms. Organize items so you’re not hunting for sponges, rags, or gloves in multiple cupboards. A tidy workspace minimizes delays and discourages re-cleaning due to missed spots. Also, consider eco-friendly options to minimize chemical exposure for kids and pets.
Pro tip: label baskets and cloths by color to prevent cross-contamination between kitchens and bathrooms. Create a small “wipe-down kit” per room with microfiber cloths, a spray bottle, and a disposable glove, then pack it away when you’re done to maintain methodical progress.
Room-by-Room Deep Dive: Kitchen, Bathrooms, Living Areas, and Bedrooms
Tackle kitchens and bathrooms first, since they harbor the most germs and grime. In kitchens, wipe high-contact surfaces, sanitize sinks, and clean appliances, then move to counters and cabinet faces. Bathrooms require attention to toilet rims, faucets, mirrors, and grout lines. Living areas benefit from dusting shelves, vacuuming upholstery, and cleaning electronics with care. Bedrooms should focus on dust removal from surfaces, changing linens as part of a regular schedule, and ensuring under-bed areas stay clear.
Adopt a top-to-bottom approach in each room: start with ceiling fixtures and ledges, then dust horizontal surfaces, and finish with floors. This minimizes recontamination as you work downward. Use appropriate cleaners based on surface type, and avoid abrasive tools on delicate finishes. If you have pets or children, prioritize safety by using child-safe products and keeping cleaners out of reach.
Safety and Eco-Friendly Choices: Ventilation, PPE, and Safe Substitutes
During a house clean job, ventilation is essential to dilute any fumes from cleaners. Open windows or use a small fan to create airflow. Wear gloves and, if needed, a mask when you’re using chemical cleaners or dusty materials. Always read product labels and keep cleaners separate to prevent accidental mixing. For eco-minded households, opt for vinegar-baking-soda combinations for gentle stain removal and aromas, and use microfibre cloths that can be washed and reused. These practices reduce chemical exposure while maintaining cleaning effectiveness.
If you have allergies or sensitivities, test cleaners on a small, inconspicuous area first. Never mix bleach with ammonia or other cleaners, as the resulting fumes can be dangerous. Instead, create mild, surface-safe alternatives that deliver reliable results with lower risk.
Common Mistakes and How to Avoid Them
A frequent mistake is skipping a proper declutter before cleaning, which can lead to wasted time and overlooked messes. Another error is using old rags that shed fibers and re-deposit dirt. To avoid these issues, begin by removing clutter and placing items in designated spots. Use fresh microfiber cloths for each major section, and keep a timer to stay on track. Finally, don’t rush through rooms—brief, repeated passes are more effective than long, exhausting sessions.
Tailoring the Plan: Small Apartments vs Large Homes
Your plan should adapt to your space. In smaller apartments, consolidate tasks by room groupings and use compact storage solutions to minimize motion. Larger homes benefit from longer, focused blocks and a slightly slower pace to maintain consistency. Regardless of size, maintain a simple, repeatable routine so you can sustain cleanliness without overworking yourself. A scalable plan helps you stay on target and adjust for seasonal cleaning demands.
Maintaining Cleanliness Between Deep Clean Sessions: Habits That Stick
Two or three minutes a day can prevent weekend overwhelm. Wipe down high-touch surfaces daily, sweep or vacuum high-traffic areas weekly, and set a rotating mini-clean to handle one room at a time. Build a task calendar so chores become routine rather than an all-day event. The result: a consistently clean home with less effort during major cleaning sessions.
Tools & Materials
- All-purpose cleaner(Choose a plant-based option if possible; avoid mixing with bleach.)
- Disinfectant spray or wipes(Ideal for kitchens and bathrooms; ensure it’s EPA-approved for sanitizing.)
- Microfiber cloths(Use separate colors for kitchen and bathroom surfaces to avoid cross-contamination.)
- Sponges (non-scratch for sensitive surfaces)(Rinse and air-dry between uses; replace when frayed.)
- Scrub brushes(Use a soft brush for delicate finishes; stiff for grout and grime.)
- Vacuum cleaner(HEPA filter recommended for better air quality; empty bag after use.)
- Broom and dustpan(Choose an angled broom for corners and under furniture.)
- Mop and bucket(Use a mop suitable for your floor type; wring out well to avoid wet floors.)
- Glass cleaner(For mirrors and glass surfaces; streak-free formulas preferred.)
- Trash bags(Have sturdy bags in various sizes; replace liners regularly.)
- Rubber gloves(Protect hands from cleaners and dirt; consider disposable gloves for disinfection tasks.)
- Labels and storage bins(Color-coded bins help keep items organized and easy to find.)
Steps
Estimated time: 2 hours 15 minutes
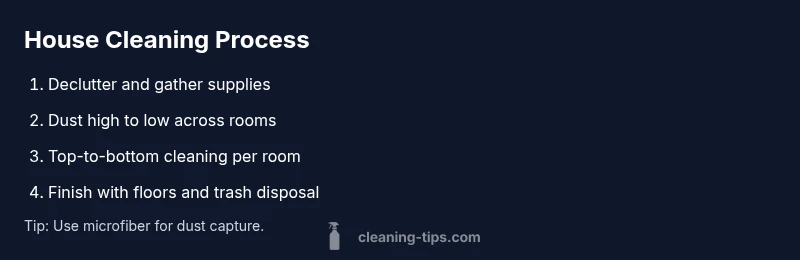
- 1
Declutter and gather supplies
Begin by collecting all cleaning tools and supplies in a central zone. Clear surfaces of clutter to prevent moving objects from getting in the way. This upfront organization reduces backtracking and ensures you have everything needed before you start.
Tip: Use a single cleaning caddy or cart to keep essentials within arm’s reach. - 2
Dust high to low across rooms
But first, remove cobwebs and dust from ceiling corners, light fixtures, and fans. Then wipe shelves, picture frames, and electronics, moving down to tables and chairs. Finish with a quick vacuum or sweep of floors to pick up settled dust.
Tip: Microfiber cloths trap dust better than cotton; use a light, steady motion. - 3
Top-to-bottom cleaning per room
In each room, start with light surfaces and finishes, then clean windows, mirrors, and fixtures. Follow with surfaces that accumulate grime, such as countertops, sinks, and toilets. Finish by cleaning the floors with the appropriate method for the surface.
Tip: Work room-by-room to avoid cross-contamination; keep a dedicated wipe-down kit per room. - 4
Tackle the kitchen and bathrooms last
These rooms demand more attention due to germs and grease. Pay special attention to sinks, faucets, and grout. Sanitize counters and appliance exteriors before moving to the living areas.
Tip: Rinse surfaces after applying cleaner to prevent residue buildup. - 5
Finish with floors and trash disposal
Mop or vacuum floors according to their type. Empty trash bins and replace liners. If you have carpets, spot-clean stains and vacuum thoroughly.
Tip: Let floors dry completely before moving furniture back into place. - 6
Final checks and reorganization
Do a quick walk-through to catch any missed spots. Return items to their spots and wipe any oversights. This ensures a polished, presentable result.
Tip: Keep a small checklist handy for future sessions to maintain consistency.
Questions & Answers
How long does a full house cleaning typically take?
Time varies with home size and the depth of cleaning. A thorough, room-by-room plan can help you estimate effort more accurately, but expect that larger spaces will require more sessions or blocks.
Time varies with home size and how deep you clean each room; using a room-by-room plan helps you estimate the effort needed.
What order should I clean in for maximum efficiency?
Start with rooms that impact daily living most, like the kitchen and bathrooms. Move to living areas and bedrooms, finishing with floors to prevent tracking dirt.
Begin with the kitchen and bathrooms, then the living spaces, and finish with the floors to stop dirt from spreading.
Do I really need to disinfect every surface?
Disinfection is most important on high-touch surfaces (doorknobs, switches, countertops) and in areas used by multiple people. For low-traffic surfaces, a thorough wipe-down is often sufficient.
Focus disinfection on high-touch areas for safety, and clean other surfaces with a good wipe-down when needed.
Can I do a house clean job without professional help?
Absolutely. A well-planned routine with the right tools can deliver excellent results for most homes. For stubborn stains or specialized tasks, consider professional services as a supplement.
Yes, with the right plan and tools you can clean effectively; professional help can tackle tough jobs if needed.
What kitchen cleaners are safe to mix?
Avoid mixing cleaners that release fumes when combined. Use products as directed and, for safety, test on a small area first before broad use.
Don’t mix cleaners; use them as directed and test first to avoid fumes and damage.
Watch Video
The Essentials
- Plan by room to stay organized and efficient
- Use color-coded cloths to prevent cross-contamination
- Tackle high-traffic areas first for quick wins
- Maintain a simple routine to sustain long-term cleanliness