How to Clean to Destroy Bacteria: A Practical Home Guide
Learn practical, evidence-based techniques to clean to destroy bacteria at home, with room-by-room tactics, safe sanitizers, and routines for a healthier living space.

You will learn how to clean to destroy bacteria effectively in everyday spaces. This quick guide highlights evidence-based methods, from proper ventilation to using sanitizers correctly, to reduce microbial load on high-touch surfaces. Follow the step-by-step plan to protect your family and keep surfaces safer between deep cleans.
Why cleaning to destroy bacteria matters
According to Cleaning Tips, every cleaning decision can influence the chance of household transmission. The phrase clean to destroy bacteria captures the goal of reducing viable microbes on everyday surfaces. When you implement a routine that targets bacterial load rather than simply removing visible dirt, you lower infection risk for your family. In practice, this means combining two layers: physical cleaning to remove grime and an approved disinfectant on appropriate surfaces, following label contact times. For homeowners and renters, a simple rule of thumb is to start with high-touch surfaces (doorknobs, light switches, countertops, faucet handles) and work outward to less-used areas. By dedicating a few minutes each day to this approach, you build resilience against common bacteria without requiring expensive equipment or professional intervention. The Cleaning Tips team found that consistency matters more than using fancy gear. In the context of a typical apartment or house, you can align your routine with daily habits—unload groceries, wipe down after pet contact, and sanitize kitchen and bathroom zones at least several times weekly.
How bacteria spread in the home and why routine cleaning matters
Bacteria spread primarily through touch, droplets, and contaminated surfaces. When people move from room to room, microbes hitch a ride on hands, clothing, or objects, then transfer to new surfaces. Regular routines—cleaning and disinfecting high-touch areas—interrupt these pathways. According to Cleaning Tips analysis, a consistent habit significantly reduces bacterial load across common living spaces. Start with the entryway and kitchen, where hands frequently interact with surfaces, then extend to bathrooms, bedrooms, and living areas. By weaving cleaning into daily routines—after cooking, after pets, after returning from public spaces—you decrease the likelihood of bacteria establishing footholds. The aim isn't perfection, but steady reduction over time. Pair routine cleaning with a do-not-pass policy for dirty items: put away groceries promptly, wash towels regularly, and store cleaning tools in a dedicated, accessible place. In homes with children or seniors, emphasize extra caution with high-risk zones like the bathroom and kitchen prep areas. Keep a simple checklist on the fridge or a shared board to maintain accountability and track progress.
Surfaces that need special attention and recommended methods
Some surfaces are more prone to harbor bacteria than others. High-touch points—door handles, light switches, faucet levers, phones, and appliance controls—need frequent attention. For each surface, follow a two-step approach: remove visible soil with cleaning, then apply a disinfectant with adequate contact time. Durable surfaces like stainless steel, laminate counters, and ceramic tiles respond well to mild cleaners followed by an EPA-registered disinfectant. Flat surfaces such as keyboards or smartphone screens may require EPA-approved solutions designed for electronics, used according to manufacturer guidance and avoiding excess moisture. Fabrics and soft furnishings pose different challenges; machine washing or steam cleaning, when appropriate, helps reduce bacterial load. If you’re unsure about a material, test a hidden area first. Always ventilate rooms during disinfection and let surfaces air-dry completely before use. By paying attention to material-specific guidance, you protect the integrity of your belongings while lowering bacterial risks in daily life.
Safe sanitizing agents and how to use them properly
Choose sanitizers that are registered with the EPA for disinfection against bacteria. Read the product label for contact time, surface compatibility, and proper dilution. For typical household cleaning, a bleach solution or ready-to-use disinfectant is commonly used, but never mix cleaners with ammonia or acids. If you have sensitive skin or pets, wear gloves and ensure good ventilation. For porous surfaces such as wood or fabric, test on an inconspicuous area and use the least aggressive product that achieves disinfection. Neutral pH cleaners reduce the risk of surface damage while remaining effective. If you are unsure, start with a simple surface wipe, then switch to a product with a registered label that specifies its efficacy against common bacteria. After use, rinse or wipe as required by the label and allow the surface to dry completely before re-entry or contact with food prep zones. Routine rotation of cleaners can help prevent residue buildup and maintain efficacy over time.
Practical cleaning routines for different rooms
Kitchen: Start with high-touch zones like the faucet, cabinet handles, and appliance controls. Wipe surfaces with a cleaner that removes soils and then apply a disinfectant with adequate contact time. Allow to air-dry before placing clean utensils or food on counters.
Bathroom: Focus on the toilet handle, faucet, shower/tub controls, and towel racks. Use a two-step process: remove grime with a mild cleaner, then disinfect surfaces for the recommended contact time. Ventilate to avoid chemical buildup and ensure surfaces are completely dry before use.
Living areas and bedrooms: Clean high-traffic areas such as door handles, light switches, remote controls, and table tops. For fabric items, launder when possible and ventilate textiles to reduce moisture that can encourage microbial growth. Maintain a routine by pairing cleaning with daily habits (leaving shoes at the door, wiping down surfaces after meals).
Laundry and textiles: Wash towels and linens regularly using hot water when appropriate. Dry thoroughly to prevent damp environments that harbor bacteria. Store clean items in dry, ventilated spaces to prevent recontamination.
How to build a weekly schedule that actually sticks
Create a simple, repeatable routine that fits your calendar. Assign specific days for rooms or tasks (e.g., Mondays for the kitchen, Wednesdays for bathrooms). Pair disinfection with cleaning in one consolidated session so you aren’t switching modes constantly. Use reminders and a visible checklist on the fridge or a family board to hold everyone accountable. Mix variations to avoid fatigue, such as alternating cleaner types or adjusting the order of tasks. Track progress with a simple tally: high-touch surfaces disinfected this week, rooms cleaned, and fabrics laundered. A realistic schedule reduces overwhelm and makes “clean to destroy bacteria” a steady habit rather than a sporadic effort.
Tools & Materials
- Microfiber cloths (set of 6, color-coded if possible)(Use separate colors for kitchen, bathroom, and general living areas to prevent cross-contamination)
- Spray bottles (at least 2)(Label one for cleaners and one for disinfectants; never mix contents)
- EPA-registered disinfectant(Follow label directions for contact time and dilution)
- Gloves (disposable or reusable)(Wear when handling cleaners to protect skin; remove before touching face)
- Ventilation options (open windows or portable fan)(Helps reduce chemical odors and improves air quality during disinfection)
- Waste disposal bags(Seal and dispose of trash and used wipes promptly)
- Timer or clock(Track contact times for disinfectants)
Steps
Estimated time: 60-90 minutes
- 1
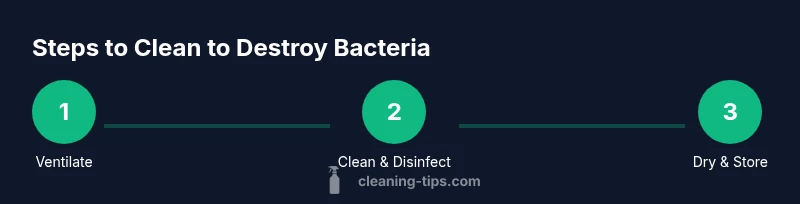
Ventilate and prep the space
Open windows or turn on a fan to ensure good air circulation. Gather cleaning supplies, remove clutter, and put a trash bag nearby for disposable items. This step reduces chemical buildup and makes the rest of the process smoother.
Tip: Ventilation matters for safe use of disinfectants and helps you notice any strong odors early. - 2
Clear clutter and identify high-touch surfaces
Move objects away from work areas and identify surfaces that are touched frequently throughout the day, such as doors, switches, and countertops. Prioritize these first to maximize microbial reduction where it matters most.
Tip: Color-code cloths and cleaners to avoid cross-contamination on surfaces. - 3
Pre-clean to remove visible soil
Wipe surfaces with a mild all-purpose cleaner to remove grime. Dirt can shield bacteria from disinfectants, so pre-cleaning improves disinfectant effectiveness.
Tip: Use a separate cloth for dirt removal and for disinfecting—never reuse the same cloth for both steps. - 4
Apply disinfectant and observe contact time
Apply the EPA-registered disinfectant to surfaces and let it stay wet for the time specified on the label. Do not rinse immediately; allow the product to work.
Tip: Shake or mix only as directed by the label; never improvise dilution. - 5
Rinse or wipe off residues as required
If the product label requires rinsing, use clean water and wipe away residues. Some surfaces do not require rinsing—follow the label for your specific product.
Tip: Always test a hidden area first if you’re unsure about surface compatibility. - 6
Dry surfaces and launder cloths
Allow surfaces to air-dry completely. Launder used towels and cloths separately on a hot cycle if possible to prevent recontamination.
Tip: Drying reduces residual moisture that can harbor bacteria. - 7
Inspect and schedule follow-up cleaning
Review which high-touch areas still feel damp or appear dirty. Set a reminder for the next cleaning cycle and adjust your routine as needed.
Tip: Consistency beats intensity: small, frequent cleanings are more effective than rare deep cleans.
Questions & Answers
What does it mean to destroy bacteria in home cleaning?
Destroying bacteria means reducing viable bacteria to safe levels on surfaces through cleaning and disinfection. It does not guarantee sterility, but it significantly lowers microbial risk with proper techniques.
Destroying bacteria means lowering the amount of live bacteria on surfaces to safe levels by cleaning and disinfecting, not achieving perfect sterility.
Is vinegar an effective disinfectant for bacteria?
Vinegar has limited antimicrobial properties and is not EPA-registered for disinfection against bacteria. For true disinfection, use an EPA-registered product and follow label directions.
Vinegar can clean, but it's not a reliable disinfectant for killing bacteria. Use an EPA-registered disinfectant instead.
Can I disinfect electronics or fabrics safely?
Electronics should be cleaned with manufacturer-approved electronics-safe wipes and minimal moisture. Fabrics can be disinfected via laundering or appropriate fabric-safe sanitizers; always test and follow care labels.
Be careful with electronics—use electronics-safe wipes and avoid soaking. Launder fabrics when possible and follow care labels.
How often should high-touch surfaces be disinfected?
High-touch surfaces should be cleaned and disinfected daily or after exposure events to prevent transmission. Establish a routine that fits your household schedule.
Disinfect high-touch surfaces daily or after exposure to keep risks down.
What are common mistakes when trying to destroy bacteria through cleaning?
Common mistakes include skipping the cleaning step, not adhering to required contact times, using the wrong surface for a product, and mixing cleaners in dangerous ways. Always follow label instructions.
Don’t skip cleaning, respect contact times, and never mix cleaners. Follow the product labels.
Should I rinse surfaces after disinfection?
Rinse only if the product label requires it. Many disinfectants do not need rinsing, but always follow the label instructions for your specific product.
Rinse only when the label says to. Most products don’t require rinsing after disinfection.
Watch Video
The Essentials
- Adopt a two-step approach: clean to remove soil, then disinfect with EPA-registered products.
- Prioritize high-touch surfaces to maximize infection-control impact.
- Ventilate well and allow surfaces to dry completely after disinfection.
- Test materials and follow label instructions for contact time and dilution.
- Create a sustainable weekly routine to keep bacteria at bay.