How to Clean Vinyl Siding with a Pressure Washer
Learn how to safely clean vinyl siding with a pressure washer. This guide covers equipment, detergents, safety, and a proven step-by-step approach for spotless siding without damage.

Using a clean vinyl siding pressure washer is achievable with caution: choose a wide spray nozzle and the lowest effective pressure, hold the wand at a safe distance, and use a mild cleaning solution designed for siding. Start at the bottom, work upward, and avoid seams, outlets, and decorative trim. Rinse thoroughly and dry.
Why clean vinyl siding with a pressure washer matters
A clean exterior not only boosts curb appeal but also protects the structural integrity of your home. Regular cleaning helps remove mildew, algae, dirt, and pollutants that can accelerate wear over time. For homeowners, a clean vinyl surface also reflects sunlight more efficiently, potentially reducing heat buildup near the exterior walls. According to Cleaning Tips, using the right technique with a pressure washer minimizes scrubbing and reduces wear on siding compared to aggressive brushing. A gentle, consistent approach preserves the vinyl’s flexible surface and long-lasting color while delivering noticeable results after a single wash session. When you undertake this project, you’ll also reduce the need for harsher chemical cleaners, which aligns with eco-conscious cleaning habits. With careful preparation and mindful technique, you can achieve professional-looking siding from the comfort of your own yard.
Safety and prep before you start
Before you wash, inspect the siding for loose panels, cracked caulk, or damaged seams. Cut off any exterior power tools or outlets nearby and cover nearby plants to prevent chemical runoff. Wear protective eyewear, gloves, and non-slip footwear. If you have pets or kids, schedule the wash for a calm time of day to minimize distractions. Check the weather forecast; avoid washing in direct sun or on a windy day to prevent streaking and chemical evaporation. A quick test patch on a small, inconspicuous area helps you ensure there’s no discoloration or moisture intrusion. By treating the task with caution, you’re protecting both your home and your family while setting a baseline for consistent results over time.
Choosing the right equipment: washers, nozzles, detergents
Select a pressure washer with adjustable pressure settings and a wide spray nozzle (the fan or 25–40 degree range works well for vinyl). A mild, vinyl-safe cleaner is essential; avoid bleach-heavy formulas or acidic products that can degrade the siding. If you’re unsure, start with a store-bought cleaner designed specifically for vinyl and always follow the manufacturer’s dilution instructions. Keep a basic brush handy for pre-treak or stubborn stains and a hose with a clean water supply to ensure you can rinse thoroughly after cleaning. Use a long wand with a soft, steady sweep to minimize surface agitation and reduce the chance of forcing dirt into seams or gaps. Maintaining the equipment in good condition helps ensure consistent pressure across the surface during the job.
Detergents and cleaners that work on vinyl siding
For vinyl siding, choose cleaners that are non-alkaline, non-etching, and specifically rated for exterior vinyl surfaces. Mild dish soap mixed with water can be effective for light grime, but more stubborn mildew may require a dedicated vinyl siding cleaner. Avoid chlorine bleach or abrasive compounds that can cause streaking or discoloration over time. When using any cleaner, apply from the bottom up to prevent dirt from dripping onto areas you’ve already cleaned. Rinse thoroughly after use to prevent residue that could dull the finish. The Cleaning Tips team emphasizes testing any cleaner on a small area first and never mixing cleaners in the spray bottle, which can create risky chemical reactions.
Step-by-step technique: from bottom to top (no skipping)
Begin at a low-pressure setting and a wide spray, holding the wand at a safe distance. Start at the bottom edge and work upward in vertical strips, keeping the nozzle moving to avoid streaks. Apply cleaner to a manageable section, let it dwell for a short period, then rinse with broad, sweeping motions. For stubborn spots like mildew, pause briefly and gently brush with a soft-bristle brush before rinsing again. Avoid high pressure near seams, window frames, and outlets, as this can force water behind siding panels. If you encounter a stubborn stain, reapply cleaner and rewash the area, ensuring you always rinse toward uncovered areas to prevent moisture accumulation.
Rinsing and drying: the final steps that protect your siding
Rinse from the bottom up to prevent dirty water from running onto areas you’ve already cleaned. Use long, continuous passes to avoid quick, overlapping sprays that can leave streaks. After rinsing, allow the siding to air-dry; you can speed up drying with a clean, dry microfiber or soft cloth if needed. Ensure decorative trim and caulking are dry and intact; moisture behind trims can lead to mildew growth. A final visual inspection should confirm there are no remaining soap lines, streaks, or missed spots. Regular inspection and gentle cleaning help extend the life of vinyl siding and preserve its color and luster.
Avoiding common mistakes that damage siding
Avoid using metal brushes or high-pressure jets that can scratch or gouge vinyl. Do not point the nozzle directly at seams, outlets, or lights; water intrusion can cause electrical hazards or mold. Never clean in freezing temperatures, which can cause expansion and cracking, or during heavy rain, which can stunt the cleaning process. Jumping between low and high pressure mid-clean can shock the siding’s surface; instead, set a comfortable baseline and stick with it. Finally, never mix cleaners in the spray bottle; always apply cleaners in their recommended dilution and rinse thoroughly.
Drying and maintenance after washing
Once you’re done, check the entire surface for missed spots and rinse promptly. Drying the siding helps prevent water spots and streaking, especially in sunny or windy conditions. Re-check caulk lines and seams for looseness or cracking, and re-caulk if necessary to maintain a watertight seal. Consider performing this cleaning task on a yearly basis or as needed when mildew or heavy dirt build-up becomes noticeable. Keeping gutters and downspouts clear helps avoid runoff that could affect the cleaned area. If you plan to repaint or touch up, allow the siding to dry completely before applying any coatings. Regular maintenance reduces long-term repair costs and keeps your home looking its best.
Maintenance plan and schedule for long-term results
Create a simple maintenance calendar that aligns with seasonal weather patterns and environmental conditions in your area. Schedule a light wash at the start of spring to remove pollen and grime and plan a thorough cleaning after autumn leaves have fallen. Regularly inspect the siding for signs of wear and damage, and address issues promptly to prevent moisture intrusion. A consistent routine—paired with the right equipment and cleaning agents—helps maintain curb appeal and structural protection over time. By following a predictable plan, you’ll enjoy easy maintenance and better results with each wash.
Environmental considerations and water runoff management
Be mindful of what you wash off your siding. Use minimal amounts of cleaner and avoid toxic products that could contaminate runoff water. If possible, isolate downspouts during cleaning to control drainage and prevent dirty water from seeping into landscaping or storm drains. Collect rinse water if required by local regulations and dispose of it appropriately. Conserving water is an often overlooked benefit of a well-planned wash: strategic spraying and short dwell times can reduce total water usage while still delivering a clean finish. The goal is to achieve cleanliness without harming the surrounding environment.
Accessories and add-ons that simplify the job
Invest in a soft-bristle brush for stubborn spots, a long-reach extension wand for high or hard-to-reach sections, and an adjustable nozzle jet for versatility. A stabilizing strap or a light ladder stabilization device can improve balance when you’re working on tall siding sections. Consider using a spray nozzle with a reversible tip for quick clearing of heavy grime, and a dedicated vinyl-safe cleaner to avoid dulling the finish. With the right accessories, you can complete the project faster and with fewer passes, which reduces wear on the siding.
Quick test patch and final checks before calling it done
Finish with a final test patch in a discreet area to confirm there’s no discoloration or moisture retained behind the surface. Recheck the entire surface under good lighting to ensure even cleaning and remove any remaining residue. If you see a hazy finish after drying, run a light rinse over the area to remove residues. Finally, re-inspect caulk lines and trim for moisture or damage and plan repairs if needed. A calm, careful approach ensures you’ll have a durable, clean exterior that stands up to weather and time.
Tools & Materials
- Pressure washer with adjustable pressure(Low to moderate pressure settings; use wide spray nozzle)
- Wide spray nozzle (25-40 degrees)(Provides broad coverage with gentle cleaning action)
- Mild vinyl siding cleaner(Non-alkaline, non-acidic, vinyl-safe formula)
- Soft-bristle brush(For spot treatment of stubborn stains)
- Rubber-soled shoes and safety goggles(Protect eyes and footing on damp surfaces)
- Gloves(Water-resistant gloves to protect hands)
- Garden hose with clean water supply(Rinse thoroughly after cleaning)
- Drop cloths or plastic sheeting(Protect plants, outlets, and lamps from spray)
Steps
Estimated time: 60-90 minutes
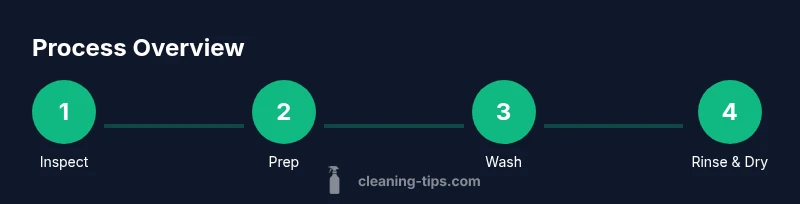
- 1
Inspect siding
Examine panels for cracks, loose caulk, or damaged trim. Note any areas that may require extra care during cleaning. This step prevents surprises once you start spraying.
Tip: Document defects with a photo; address them after washing to avoid water intrusion. - 2
Gather supplies
Assemble the pressure washer, nozzle, cleaners, and safety gear. Having everything within reach minimizes trips and reduces the chance of accidental water exposure to electrical components.
Tip: Lay out tools on a stable surface to keep work area organized. - 3
Protect surroundings
Cover plants, outlets, and decorative fixtures with plastic sheeting. Remove or secure light fixtures and ensure no power cords are in spraying range.
Tip: Work away from windows to prevent water intrusion. - 4
Pre-wet siding
Moisten the siding with a gentle spray before applying cleaner. This helps the cleaner spread evenly and reduces the risk of soap lines.
Tip: Keep wand at a safe distance to avoid forcing water under panels. - 5
Apply cleaner
Spray cleaner in a thin, even layer from bottom to top. Allow it to dwell briefly on mildew or heavy grime, then use a soft brush on stubborn spots.
Tip: Never spray cleaner directly into outlets or vents. - 6
Rinse thoroughly
Rinse in long, overlapping passes from bottom to top to avoid streaks and ensure complete removal of cleaner.
Tip: Keep the nozzle moving to prevent surface damage. - 7
Spot treat if needed
Reapply cleaner to stubborn stains and lightly brush them before a final rinse.
Tip: Do not scrub aggressively; vinyl is resilient but can be scratched. - 8
Dry and inspect
Let siding air-dry and perform a quick final inspection for misses or streaks. Address any areas that remain dirty after initial washing.
Tip: If needed, repeat the rinse on lightly soiled areas. - 9
Maintenance check
Look for damaged caulk and signs of moisture behind panels. Schedule repairs if you notice gaps; otherwise, your siding stays protected for longer.
Tip: Regular maintenance helps prevent costly repairs later.
Questions & Answers
Is it safe to use a pressure washer on vinyl siding?
Yes, it can be safe if you use low pressure, a wide nozzle, and keep the wand at a safe distance from edges, seams, and outlets. Always test on a small area first and avoid forcing water behind panels.
Yes, you can safely use a pressure washer on vinyl siding by using low pressure, a wide nozzle, and careful distance, plus a patch test first.
What nozzle should I use for vinyl siding?
A wide-angle nozzle in the 25–40 degree range provides broad cleaning action without damaging the siding. Move the wand steadily to avoid streaking.
Use a wide-angle nozzle, 25 to 40 degrees, and keep the wand moving for even cleaning.
Can I use bleach or chemical cleaners on vinyl siding with a pressure washer?
Bleach or harsh cleaners can damage vinyl. Opt for vinyl-safe, mild cleaners and follow dilution guidelines. Rinse thoroughly to prevent residue.
Avoid bleach; use vinyl-safe cleaners and rinse well afterward.
How often should I clean vinyl siding?
Clean as needed to remove mildew, dirt, or stains. A light spring clean followed by an annual check helps maintain appearance and siding health.
Clean when you notice dirt or mildew, and do a spring plus yearly check.
What should I do if I have stubborn mold or mildew?
Reapply vinyl-safe cleaner to the affected area and brush gently with a soft-bristle brush. Rinse thoroughly and consider repeating if needed.
Reapply cleaner, brush softly, rinse well, and repeat if necessary.
Watch Video
The Essentials
- Use low to moderate pressure with a wide nozzle.
- Test cleaners on a discreet area first.
- Wash bottom to top to control runoff.
- Inspect seals and caulk after washing.