Best Practices for Cleaning Vinyl Siding Safely in 2026
Learn a proven, safe method to clean vinyl siding without damaging panels, using mild cleaners, gentle scrubbing, and thorough rinsing to restore curb appeal.

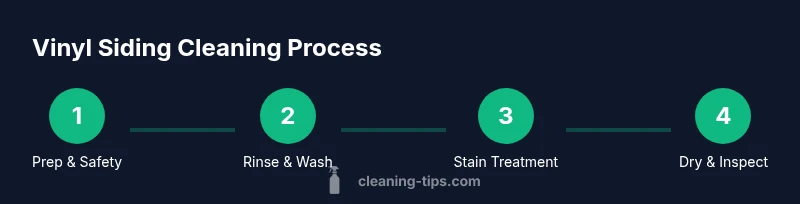
By following this guide, you will learn a safe, step-by-step method to clean vinyl siding without damaging panels or leaving streaks. Gather mild cleaner, a soft brush, a garden hose with spray nozzle, a ladder or pole, and old towels for drying. The aim is thorough rinsing and gentle scrubbing for a bright, lasting finish.
Why clean vinyl siding matters
According to Cleaning Tips, regular exterior cleaning helps preserve the life of vinyl siding and keeps your home’s curb appeal high. Clean siding resists mold, mildew, and staining that can degrade the surface over time. In many climates, soil, pollen, and tree debris accumulate on the façade, creating a home that looks worn even when the interior is well cared for. Cleaning Tips analysis, 2026, shows that most homeowners see the best results when they combine gentle cleaners with a soft brush and patient rinsing, rather than aggressive scrubbing or power washing. The goal is to remove dirt without forcing water behind panels or loosening fasteners. When done correctly, cleaning vinyl siding is safe, quick, and inexpensive, with a noticeable improvement after a single session. In addition to aesthetics, routine cleaning helps identify caulking gaps, cracked panels, or pest entry points early, so you can address issues before they escalate. This article breaks down a practical, step-by-step approach that emphasizes safety, environmental responsibility, and minimal chemical use while still delivering a bright, uniform finish.
Preparing for the job: safety and planning
Before you touch a nozzle, take a moment to prepare. Start by inspecting the siding for loose panels or damaged trim, and note any areas that require special care. Safety comes first: wear gloves, safety glasses, and non-slip footwear; choose a stable ladder or extension pole and have a spotter if you must work above ground level. Clear the area of doors, windows, and plantings, covering sensitive shrubs with drop cloths or plastic sheeting. Gather materials: mild detergent, brush, hose with a spray nozzle, buckets, a towels for drying, and a way to protect nearby landscaping. Plan to wash on a warm, windless day to avoid rapid drying that can leave streaks. If you’re cleaning near electrical outlets or outlets, avoid rinsing directly into electrical components. Finally, test any cleaner on a small, inconspicuous section of siding and wait five to ten minutes to check for color change or shrinking. This quick test helps you choose the safer cleaner and determines dilution ratios.
Cleaning solutions: what works and what to avoid
Mild, all-purpose cleaners work well on vinyl siding. A simple solution of warm water and a few squirts of mild dish soap is a safe starting point for most homes. For mold, mildew, or algae, oxygen bleach is often safer than chlorine bleach because it is less likely to discolor vinyl and is typically gentler on landscaping when used correctly. Avoid ammonia-based cleaners, vinegar in high concentrations, or harsh degreasers that can degrade the vinyl finish over time. Before applying any cleaner, confirm the product is compatible with your siding color and doesn’t void warranties. When mixing cleaners, never combine chlorine bleach with ammonia or vinegar; this can create toxic gases. For stubborn stains, dampen the area with plain water and allow the cleaner to work for a few minutes, then gently scrub with a soft brush. Rinse frequently to prevent the cleaner from drying as you work, which can leave residue. The emphasis is on using the mildest effective cleaner, water-based products, and controlled scrubbing to minimize moisture behind siding.
Techniques for washing vinyl siding
Begin with a thorough rinse from the bottom up or top down? The conventional approach is to start at the top and work downward to prevent dirty rinse water from streaking cleaned areas. Hold the hose at a consistent distance: about 1–2 feet from the surface, using a broad spray to avoid forcing water under seams. Apply cleaner in manageable sections, typically 3–4 panels wide, then scrub in a vertical or circular motion with a soft-bristle brush. Rinse the area immediately after scrubbing to prevent drying marks. Move methodically across the siding, ensuring you cover all surfaces, including corner profiles and channels. If you encounter stubborn, ground-in dirt, re-wet the area and re-clean rather than applying more concentrated cleaner. After this step, inspect for missed spots and repeat as needed. Finally, allow the siding to air-dry completely; avoid forcing dry-out with fans that might pull moisture behind siding if water has penetrated behind flaps.
Handling stubborn stains and mildew
Stains around door frames, near the foundation, or where shade promotes mildew require a targeted approach. Apply a small amount of oxygen bleach solution and let it sit for 5–10 minutes before scrubbing; rinse thoroughly. For mildew on textured panels, a soft brush is usually more effective than a stiff brush, which can mar the surface. If stains persist, consider a second application after the area has dried, always testing a hidden patch first. Avoid scrubbing too aggressively in one spot, which can remove the surface finish or widen caulk gaps. After cleaning, inspect around windows and vents for remaining residue and wipe with a damp cloth if needed. In patios or landscaping near the wall, rinse thoroughly to avoid chemical runoff that could harm plants. Regular maintenance—washing every 1–2 years or when visible dirt accumulates—keeps siding looking new and reduces the likelihood of moisture-related issues. The Cleaning Tips team notes that mild, repeated cleanings are more effective than sporadic, heavy scrubbing.
Maintenance and authority sources
After your siding is clean and dry, perform a quick maintenance check. Seal any cracked caulk, check for loose panels, and trim back trees or shrubs that rub against the siding to reduce future staining. Consider rinsing the outdoor area around the siding periodically and cleaning gutters to prevent water overflow from affecting the siding. For ongoing guidance, rely on reputable sources: Extension services from land-grant universities and federal environmental agencies provide safety tips and best practices. For example, Extension services like Illinois and Minnesota offer home-cleaning guidance, while the EPA provides general safety considerations for outdoor cleaning. These sources help you stay aligned with recommended practices and environmental stewardship. According to Cleaning Tips, a regular, light cleaning cycle is often more effective than infrequent, heavy sessions, and it supports a longer-lasting exterior finish.
Authority sources
- https://extension.illinois.edu/
- https://extension.umn.edu/
- https://www.epa.gov/
Tools & Materials
- Garden hose with spray nozzle(Adjust to a wide spray for rinsing; use a fan spray to avoid splashing behind panels)
- Soft-bristle brush (2–4 inches wide)(Gentle bristles prevent surface damage)
- Buckets(Two buckets: one for cleaner, one for rinse water)
- Mild detergent or soap(pH-neutral preferred; avoid harsh degreasers)
- Oxygen bleach or white vinegar (optional)(Use for mold; test on hidden area first; never mix with ammonia)
- Ladder or extendable pole(Stable setup; consider a safety spotter if working high)
- Safety gloves(Protect hands from cleaners and debris)
- Drop cloths or old towels (optional)(Protect plants and nearby surfaces)
- Soft cloth or microfiber for touch-ups(For final wipe-downs)
Steps
Estimated time: 60-90 minutes
- 1
Prep the area and gather tools
Clear the area, set up a stable ladder or pole, and lay down drop cloths to protect plants. Gather all materials in one place so you won’t need to run back and forth. Do a quick surface check for loose panels or damaged trim before you begin.
Tip: Having a dedicated work zone minimizes distractions and reduces the risk of stepping into wet, muddy areas. - 2
Rinse siding to remove loose dirt
Thoroughly rinse from top to bottom to loosen dust, pollen, and cobwebs. Use a wide spray pattern and keep the nozzle at a safe distance to avoid forcing water behind seams.
Tip: Rinsing first prevents dirt from turning into muddy streaks when you apply cleaner. - 3
Mix and apply cleaning solution
Prepare a mild cleaning solution (warm water + a small amount of dish soap). Apply to siding sections about 3–4 panels wide, keeping a steady pace to avoid oversaturation.
Tip: Test a small area first to ensure color and finish aren’t affected. - 4
Scrub siding in manageable sections
Using a soft-bristle brush, scrub in vertical or circular motions. Work in sections to prevent solution from drying before you rinse.
Tip: Use light pressure; aggressive scrubbing can dull the finish. - 5
Rinse from top to bottom
Rinse each section immediately after scrubbing, moving downward to prevent streaks. Avoid leaving cleaner on the surface for extended periods.
Tip: Rinsing promptly is key to avoiding residue. - 6
Tackle stubborn stains with stain-specific treatment
Apply a small amount of oxygen bleach solution to moldy or stained areas; let sit for 5–10 minutes, then scrub and rinse.
Tip: Never mix cleaners with ammonia or chlorine bleach. - 7
Dry and inspect
Allow siding to air-dry completely. Inspect for missed spots and reseal or touch up as needed.
Tip: A final check helps catch issues like caulk gaps early. - 8
Clean up and store materials
Rinse tools and store them dry, then dispose of any waste according to local guidelines.
Tip: Dry tools to prevent rust and prolong their life.
Questions & Answers
Is pressure washing safe for vinyl siding?
Pressure washing can damage vinyl siding if set too high or held too close. Use a gentle setting and keep the nozzle at a safe distance, or opt for a soft wash method with a brush.
Pressure washing can damage vinyl; use a gentle setting or a soft wash approach instead.
What cleaning solution should I use on vinyl siding?
A mild dish soap solution with warm water works for most surfaces. For mold or mildew, oxygen bleach can be effective when used according to the product label; avoid ammonia or concentrated cleaners.
Use a mild soap solution, and for mold, try oxygen bleach following the label.
Can I use bleach on vinyl siding?
Chlorine bleach can fade colors and damage some vinyl finishes. If used, dilute greatly and test first, then rinse thoroughly. Prefer oxygen bleach for mold concerns.
Bleach can damage vinyl; dilute and test first, or use oxygen bleach for mold.
How often should I clean vinyl siding?
Most homes benefit from cleaning every 1–2 years, or sooner if you notice dirt, mildew, or staining. Regular light cleanings are easier than infrequent, heavy sessions.
Clean every 1–2 years, or when you see dirt or mildew.
Can I clean vinyl siding in winter?
Cleaning in freezing temperatures can cause surfaces to become slick and may trap moisture. Plan for a warm day or postpone until temperatures rise.
Avoid cleaning in freezing weather; wait for warmer days.
Do I need to rinse top-to-bottom every time?
Yes. Rinsing from top to bottom prevents dirty rinse water from streaking cleaned areas and helps ensure an even finish.
Rinse from top to bottom to prevent streaks.
Watch Video
The Essentials
- Use mild cleaners and a soft brush to protect the vinyl finish
- Rinse top-to-bottom and avoid high-pressure washing
- Test cleaners on a small patch before full application
- Let siding dry fully and inspect for needed maintenance later