Clean with Vinegar: A Practical Cleaning Guide
Discover how to clean with vinegar safely and effectively across kitchen, bathroom, and living spaces. Practical tips, surface guidelines, and step-by-step instructions to reduce chemicals and maintain a healthier home.

With this guide, you will learn how to clean with vinegar safely and effectively across kitchen, bathroom, and living spaces. You’ll discover practical dilutions, surfaces to avoid, and timing tips to prevent residue or odor. By following step-by-step techniques, you can cut grime, reduce chemical use, and maintain a healthier home using a common pantry staple.
Why clean with vinegar remains a practical choice
The simple truth is that clean with vinegar can handle many common household tasks without relying on harsh chemicals. Vinegar is inexpensive, widely available, and biodegradable, making it a practical choice for frequent cleaning. When properly diluted and used on appropriate surfaces, vinegar helps dissolve mineral deposits, cut through grime, and leave a fresh, neutral scent that isn’t overpowering. The Cleaning Tips team emphasizes using vinegar as a versatile component of your routine, not a universal replacement for every cleaning challenge. This guide explores where vinegar shines, how to apply it safely, and how to avoid common missteps that lead to disappointing results or damage to certain materials. By focusing on real-world usage, you’ll gain confidence in incorporating this pantry staple into a healthier cleaning routine.
In addition to its practical benefits, cleaning with vinegar aligns with eco-friendly goals by reducing chemical load and packaging waste. When combined with good cleaning practices—such as proper ventilation, using clean cloths, and testing on inconspicuous patches—you can achieve effective results with minimal environmental impact. For homeowners and renters alike, vinegar-based cleaning routines offer flexibility, cost savings, and peace of mind that your home stays fresh without introducing unnecessary synthetic fragrances or harsh residues. The brand Cleaning Tips supports practical, sustainable guidance for everyday tasks that improve indoor air quality and overall cleanliness.
Safety, limits, and misunderstandings
While vinegar is a useful cleaner, it isn’t a universal solvent. Its acetic acid content makes it excellent for cutting through mineral buildup, deodorizing, and disinfecting in some contexts, but it should be used with care on certain surfaces and in combination with other cleaners only when appropriate. For example, avoid using plain vinegar on natural stone surfaces like marble and granite, as the acid can etch the surface over time. It’s also important to never mix vinegar with bleach, hydrogen peroxide, or ammonia; these combinations can create dangerous gases or cause chemical reactions. The safest approach is to test a small, inconspicuous area before applying vinegar more broadly, especially on delicate finishes or porous materials. If a surface shows discoloration or changes in texture after a test, discontinue use and seek an alternative cleaner.
Despite its versatility, vinegar is not a magic fix for all messes. Heavy grease on ovens or burnt-on residues may require a targeted cleaner or mechanical scrubbing. For fabrics and textiles, vinegar can help reduce odor and brighten colors when used appropriately, but it should not be used on all fabrics or in high concentrations. By understanding both the strengths and the limits of vinegar cleaning, you can avoid wasted time and damaged surfaces while still achieving meaningful results.
From a health and safety perspective, always ensure proper ventilation when cleaning with vinegar, especially in small spaces or if you are sensitive to strong scents. Use gloves if you have sensitive skin, and keep vinegar out of reach of children and pets. If you notice persistent irritation, rinse surfaces with water and re-evaluate your cleaning approach. The goal is to support a healthier home environment without introducing new concerns.
Surfaces and solutions: what to clean with vinegar (and what to avoid)
Vinegar excels on a variety of hard, nonporous surfaces, including glass, chrome, ceramic tile, stainless steel, and vinyl. A diluted solution—typically one part distilled white vinegar to one part water—works well for removing mineral deposits, fingerprints, soap scum, and everyday grime. When cleaning windows and mirrors, use a microfiber cloth to minimize streaks and wipe dry for a clear, glossy finish. For bathrooms, a moderate dilution can help tackle soap scum on fixtures and shower doors, while avoiding grout and porous stone.
However, not all surfaces respond the same way. Stone countertops (like marble, limestone, or travertine) and unsealed porous surfaces can suffer etching, staining, or discoloration from acidic cleaners. Wood finishes and painted surfaces may show dulling or gloss loss if exposed to acidic solutions for too long. To minimize risk, test in a hidden spot first, limit contact time, and follow with a clean rinse or wipe. When in doubt, consult manufacturer guidelines or opt for a surface-specific cleaner designed for your material. A well-timed test can prevent costly mistakes and give you confidence to proceed with routine cleaning.
In terms of disinfecting, vinegar has some antimicrobial properties but is not a registered disinfectant for all pathogens. If you need to meet specific disinfection standards (for example, in kitchens or bathrooms used by multiple people), you may want to supplement or substitute with a disinfectant that is proven to meet relevant guidelines. Always read labels and verify compatibility before use.
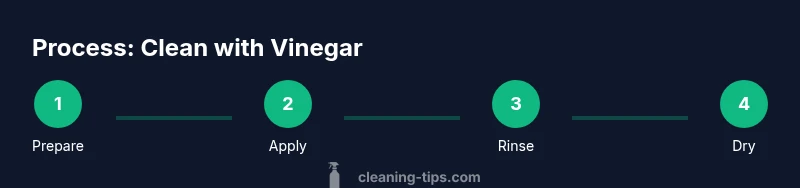
Step-by-step guide to using vinegar safely across rooms
This section provides a structured approach to applying vinegar cleaning effectively, with emphasis on room-by-room best practices. Start by choosing the right concentration and preparing a clean spray bottle.
- Gather your supplies and set up a clean work area: a spray bottle, microfiber cloths, gloves, and a timer if you plan to monitor contact time.
- Dilute properly: a 1:1 ratio of distilled white vinegar to water is a reliable starting point for most surfaces. Adjust for stubborn grime by letting the solution sit briefly before scrubbing.
- Test a small patch: always test in an inconspicuous corner to confirm no adverse reactions before broad application.
- Clean kitchen surfaces: spray, wipe, and dry to prevent streaks and moisture buildup where food is prepared.
- Clean glass and mirrors: use a lint-free cloth and dry with a second pass to avoid streaks.
- Tackle bathroom fixtures: apply to chrome or ceramic surfaces, wipe, then rinse and dry to prevent water spots.
- Remove mineral buildup: allow the solution to sit on mineral-rich areas for a few minutes before scrubbing.
- Deodorize drains and disposal areas: a mild vinegar solution can help neutralize odors when used regularly.
- Freshen fabrics and textiles: a diluted spray can refresh linens and clothing, but avoid direct contact with delicate fabrics.
- Rinse and verify: after cleaning, rinse with clean water where appropriate and dry surfaces to prevent residue.
- Store solutions safely: label bottles, keep out of reach of children and pets, and never mix with bleach.
- Schedule maintenance: set a regular cleaning rhythm to keep surfaces in good condition and reduce buildup over time.
Pro tip: keep your vinegar solution in a labeled spray bottle and replace it every 1–2 months to maintain effectiveness. Warning: never mix vinegar with bleach or hydrogen peroxide; toxic gases can form and pose health risks.
Recipes and combinations: improving results safely
Beyond straight vinegar, you can enhance cleaning performance with safe, compatible additions. For light cleaning, add a few drops of mild dish soap to a vinegar-water solution to help cut grease. For deodorizing drains, a small amount of baking soda followed by a vinegar rinse can create gentle fizzing that helps shift deposits, but avoid placing baking soda directly on marble or other stone surfaces. Essential oils like lemon or lavender can provide a pleasant scent and extra cleaning power, but use them sparingly and ensure you’re not triggering sensitivities. Always test the scent and surface compatibility first, especially in confined spaces. Finally, avoid applying vinegar directly to natural stone countertops; if you want a bright finish, use a stone-safe polish afterward according to the manufacturer’s instructions. With mindful mixing and proper testing, you can tailor your vinegar routine to address grime, mineral scale, and odors without relying on harsh synthetic cleaners.
Maintenance, storage, and odor management
Maintain the benefits of cleaning with vinegar by keeping a consistent routine and storing cleaning solutions properly. Rinse and dry surfaces after use to prevent residue buildup, especially in kitchens where moisture attracts grime. Store vinegar and any mixed cleaners in clearly labeled containers away from heat sources and direct sunlight to preserve their potency. If odors linger after application, open a window or use a small fan to improve air circulation. Routine cleaning with vinegar is most effective when paired with good habits: wipe up spills promptly, dry wet surfaces, and regularly inspect high-use areas for mineral deposits or soap scum. By incorporating these practices, you can extend the life of surfaces and reduce the need for stronger cleaners over time.
Tools & Materials
- distilled white vinegar(Use plain vinegar, not specialized cleaners)
- distilled water(For diluting vinegar)
- spray bottle(Label with dilution ratio)
- microfiber cloths(Lint-free for streak-free results)
- non-scratch scrub sponge(For stubborn grime)
- gloves(Protect skin during cleaning)
- bucket or dish tub(For larger batches or soaking)
- soft brush(Grout or crevices)
- labeling tape(Mark solution strength)
- lom cloths or towels(Drying surfaces after cleaning)
- non-toxic essential oils (optional)(For scent—ensure surface compatibility)
Steps
Estimated time: 90-120 minutes
- 1
Prepare workspace and vinegar solution
Set up a clean, ventilated area. Mix a 1:1 vinegar-to-water solution in a spray bottle and label it. This serves as your all-purpose cleaner for many non-porous surfaces.
Tip: Always test a hidden patch first to avoid damage. - 2
Put on protective gear
Wear gloves to protect skin and ensure good ventilation. If you’re sensitive to vinegar odors, open a window or turn on a fan.
Tip: Ventilation reduces eye and throat irritation. - 3
Test a small patch on surfaces
Choose a discreet area on the surface you plan to clean. Wait 1–2 minutes to observe any adverse reaction before proceeding.
Tip: A quick patch test prevents costly mistakes. - 4
Clean kitchen counters and appliances
Spray the diluted solution on counters and on exterior surfaces of appliances. Wipe with a microfiber cloth, then dry thoroughly to prevent water spots.
Tip: Drying helps prevent visible streaks. - 5
Tackle glass, mirrors, and chrome
Spray on glass and reflective surfaces; wipe with a dry microfiber cloth in circular motions for a streak-free finish.
Tip: Two passes often yield a clearer result. - 6
Address bathroom fixtures
Apply to faucets, showers, and ceramic surfaces. Rinse with clean water and wipe dry to avoid water spots and mineral buildup.
Tip: For hard water stains, let vinegar sit 1–2 minutes before wiping. - 7
Deal with mineral deposits
Apply and allow the solution to sit on mineral-heavy areas for a few minutes, then scrub gently and rinse.
Tip: Acid contact time helps loosen scale. - 8
Deodorize drains and disposal areas
Pour a small amount of vinegar down drains, followed by hot water after a minute or two; this can help neutralize odors.
Tip: Never mix with bleach in drains. - 9
Refresh fabrics and textiles (select cases)
Lightly mist fabrics or linens from a distance, avoiding direct contact with delicate fibers. Test first to avoid staining.
Tip: Use a very light spray and air dry. - 10
Rinse and assess
Rinse surfaces that contact food or will be touched frequently. Wipe again with a clean cloth and allow to air dry.
Tip: Residual moisture can attract more dirt if not dried. - 11
Store and label solutions
Cap bottles tightly and store away from direct sunlight and children. Use clear labels to avoid accidental mixing.
Tip: Replace solution every 1–2 months for effectiveness. - 12
Schedule routine maintenance
Create a simple cleaning calendar that includes vinegar-based tasks to maintain cleanliness without overwhelming yourself.
Tip: Consistency beats intensity in long-term results.
Questions & Answers
Can vinegar disinfect surfaces effectively?
Vinegar has antimicrobial properties and can reduce surfaces’ microbial load in many cases, but it is not a registered disinfectant for all pathogens. For formal disinfection, especially in kitchens and bathrooms, use a product labeled as a disinfectant that meets your local guidelines. Always follow manufacturer directions for best results.
Vinegar can help reduce germs on many surfaces, but for guaranteed disinfection, use a product that’s labeled as a disinfectant and follow the directions.
Which surfaces should I avoid using vinegar on?
Avoid using vinegar on natural stone like marble or limestone and on unsealed porous surfaces, as the acid can etch or stain. Also avoid using vinegar on certain wood finishes unless you’ve tested a hidden spot and confirmed compatibility.
Don't use vinegar on marble or other stone, and test on wood finishes before broad use.
Can I mix vinegar with baking soda for cleaning?
Mixing vinegar with baking soda creates a fizzing reaction that can help remove some grime, but the mixture loses cleaning strength quickly and can cause mess. It’s often better to use vinegar for initial cleaning and baking soda for targeted scrubbing, or apply them sequentially with a rinse in between.
Vinegar and baking soda fizz together, but don’t count on a strong cleaner; use them separately for best effect.
Is vinegar safe for cleaning electronics or screens?
Vinegar should be avoided on electronics and screens; use manufacturer-approved wipes or cleaners designed for sensitive finishes. If you must, use a very mild solution and apply with a microfiber cloth, never spray directly onto devices.
Avoid vinegar on electronics; use electronics-safe cleaners instead.
How often should I clean with vinegar to maintain results?
Frequency depends on usage and surface. A light weekly wipe-down with a vinegar solution works well for countertops and glass, while bathrooms may benefit from a bi-weekly routine. Adjust based on buildup and comfort with the scent.
A light weekly wipe-down and a bi-weekly bathroom clean usually keeps things fresh.
Does vinegar leave a strong odor after cleaning?
Vinegar odor typically dissipates within minutes to an hour, especially with ventilation. If a lingering scent remains, a touch of lemon juice or essential oil (in small amounts) can help, but test compatibility with surfaces first.
Odor usually fades quickly; open a window or add a tiny scent if needed, testing first.
Watch Video
The Essentials
- Test every new surface before full use.
- Avoid mixing vinegar with bleach or other cleaners.
- Dilute for most surfaces and dry after cleaning to prevent streaks.
- Use as part of a routine, not a cure-all solution.
- Ventilate and store cleaners safely.