Closet Clean Out Image: A Practical Decluttering Photo Guide
Learn to plan, shoot, and organize a closet clean out image that clearly shows decluttering progress with practical tips on lighting, gear, and file management.

This guide helps you create a clear closet clean out image by documenting before-and-after shots, sorting items, and photographing the process. You’ll learn a quick, repeatable sequence: plan the shot, stage the space, capture consistent angles, and label images for easy sharing. By the end, you’ll have a compelling visual record of your decluttering success.
Why a Closet Clean Out Image Matters
According to Cleaning Tips, a strong closet clean out image isn't just a pretty photo; it's a practical record of your decluttering progress. The Cleaning Tips team found that before-and-after visuals help you stay motivated, justify donations, and track improvements over time. By documenting your space, you set a clear baseline and a compelling story for yourself and others. A well-executed closet clean out image also supports social sharing, motivation for family members, and can be a reference for future organization projects. When you announce your goals with an actual image, you create accountability that compounds over weeks and months. The image becomes a tangible reminder of the work completed and the progress still ahead, which is why getting the shot right matters more than you might think.
Planning Your Closet Clean Out Photo Session
A successful closet clean out image starts long before the camera clicks. Begin by outlining which zones you want to capture ( shelves, rods, drawers, and floor space). Decide on a consistent sequence for before, during, and after shots, so your gallery reads like a story. Create a checklist of items to photograph in each zone, such as shoes on a rack or clothes on hangers, and decide on a unified color background or wall. Planning also means choosing lighting, camera height, and focal length that will keep angles uniform across all shots. This consistency is essential for a trustworthy closet clean out image and for easy comparisons in your final gallery.
Lighting and Setup for Clear Closet Images
Lighting is the secret sauce for a clean, credible closet clean out image. Use soft, diffused light from multiple angles to eliminate harsh shadows and ensure color accuracy. If you’re indoors, position a neutral light source at roughly 45 degrees to the scene and supplement with a second light on the opposite side. Avoid overhead lights alone, which can cast unflattering shadows. A simple backdrop—like a light gray wall or white sheet—helps the subject pop without competing colors. For consistency, use the same lighting setup for all shots in the sequence, including your before and after photographs.
The Photography Workflow for a Closet Clean Out Image
A repeatable workflow translates to better closet clean out image results and faster sharing. Start by capturing a wide shot of the entire space, followed by close-ups of organized zones. Maintain the same camera height and distance for each shot to enable clean comparisons. When you stage the space, keep the camera level with the closet plane to prevent skewed angles. Take multiple shots from each key angle—two or three per zone—to have options for final selection. Finally, review images on a larger screen to confirm color balance and sharpness before moving on to sorting and labeling.
Organizing Your Photo Gallery: Naming and Tagging
Organized photo libraries save time when you reference or share closet clean out image results. Use a consistent naming convention like area-date-stage (e.g., shelves_0426_before, shelves_0426_after). Create subfolders for Before, During, and After stages, and add metadata or tags that reflect the zone (e.g., shelves, rod space, drawers) and item categories (e.g., clothing, footwear, accessories). Well-labeled files make collaboration easy if you’re sharing results with household members, renters, or a professional organizer. Good naming also helps you locate the exact shot you need when you revisit the project later.
Styling Tips: Making Your Closet Look Spacious
Small changes can dramatically improve how a closet looks in a closet clean out image. Remove clutter from the foreground and straighten items so lines are clean. Use a single, cohesive color palette for hangers, storage bins, and baskets. If your closet has shelves, align bins and boxes to create a calm, organized rhythm. For textiles, fold or hang items neatly and keep similar textures together. A tidy, well-lit scene reads as more spacious and makes the decluttering impact obvious in your closet clean out image.
Common Mistakes and How to Fix Them
Common missteps include inconsistent lighting, changing angles between shots, and capturing only a partial view of the space. To fix these, set a fixed camera height and distance, use a tripod, and photograph every zone in the same orientation. Avoid busy backgrounds or mismatched storage containers that distract from the decluttering story. If you must shoot in mixed lighting (sunlight and artificial light), adjust white balance to keep colors true. Finally, don’t cram too many items into one shot; instead, shoot multiple clean, organized zones to clearly convey progress in your closet clean out image.
Real-World Examples and Case Studies
Real-world examples of closet clean out image projects show how a consistent process yields compelling results. In one case, a family decluttered a large walk-in closet, photographing each zone before and after. By sticking to identical angles, lighting, and file-naming conventions, they produced a cohesive album that was easy to share with friends and a local charity. The after photos highlighted not only the space gained but the emotional payoff of hosting a more functional wardrobe area. These examples illustrate how a well-documented closet clean out image can motivate ongoing organization and inspire others to pursue similar projects.
Authority Sources
For readers seeking depth, consult reputable sources on home organization, safety, and photography basics. These references provide principles you can apply to your closet clean out image workflow:
- https://www.epa.gov/saferchoice
- https://extension.umn.edu/decluttering-and-organizing
- https://www.osha.gov
Tools & Materials
- Camera or smartphone with good resolution(Shoot at 12 MP+ if possible; vertical shots work well for closets)
- Tripod or stable surface(Keeps camera steady for consistent angles)
- Neutral backdrop (white sheet or plain wall)(Balances colors and minimizes distractions)
- Lighting kit or desk lamp(Soft, diffused lighting; avoid harsh shadows)
- Backdrops or simple staging items(Optional for framing and depth)
Steps
Estimated time: 60-90 minutes
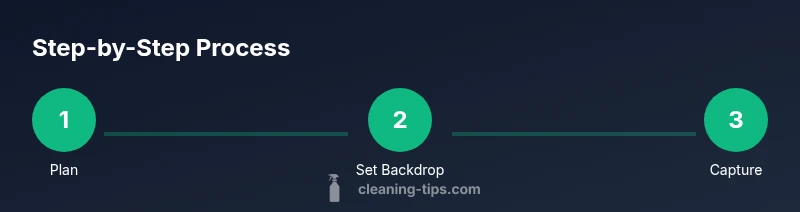
- 1
Plan the shoot
Define which areas to photograph (shelves, rod space, drawers). Set goals for before/after shots and decide on angles that maximize space perception. A clear plan reduces re-shoots and ensures you capture every meaningful change.
Tip: Draft a shot list with zones and angles before you start. - 2
Set up a neutral backdrop
Position a plain backdrop behind the closet area to minimize distractions. A white sheet or light-colored wall helps colors appear true and keeps the focus on the items.
Tip: Ensure the backdrop is secure and wrinkle-free to avoid visual distractions. - 3
Capture the 'before' shot
Take wide-angle photos of each zone before removing items. Use a consistent height and distance for all before shots so comparisons look credible.
Tip: Use the same camera height (roughly chest level) for every before photo. - 4
Declutter in stages
Remove items in logical groups (clothes, shoes, accessories). Photograph each stage to document progress and keep motivation high.
Tip: Keep donation piles organized and clearly separated from keep items. - 5
Capture the 'after' shot
After organizing, photograph the space from the same angles as the before shots. Ensure lighting remains consistent to highlight improvements.
Tip: Use a tripod for precise angle duplication. - 6
Label and file photos
Name files with a simple convention: area-date-stage. Create a folder system (Before/During/After) to simplify sharing.
Tip: Add notes like 'rod space optimized' to quickly recall the change.
Questions & Answers
What equipment do I need to photograph a closet clean out image?
A smartphone or camera with good resolution, a tripod, a neutral backdrop, and consistent lighting. Include a notepad for captions and labeling.
You'll want a camera, a tripod, a neutral backdrop, and stable lighting for clear closet photos.
How should I light the space for before/after photos?
Use soft, even lighting from multiple angles to minimize shadows. Avoid direct harsh light that washes out colors.
Use soft lighting from a few angles to avoid harsh shadows in your closet photos.
What file naming convention should I use?
Adopt a simple scheme like area_date_stage (e.g., shelves_0426_before). This makes sorting and sharing easy.
Name files with area, date, and stage to keep your library organized.
How can I organize my photos after the shoot?
Create folders for Before, During, and After. Use metadata or tags to track location and date.
Group photos in Before, During, and After folders for quick access.
Is there a recommended aspect ratio for closet photos?
A 4:3 or 3:4 ratio generally works well for social sharing and viewing on most devices.
Use 4:3 or 3:4 aspect ratios for closet photos.
Watch Video
The Essentials
- Plan the shot to tell a decluttering story
- Keep lighting consistent for credible before/after comparisons
- Label files clearly to simplify sharing
- Use a neutral backdrop to maximize space perception