How to Clean Cache on PC: A Practical Step-by-Step Guide
Learn practical, safe methods to clean cache on your PC, reduce slowdowns, and improve performance. This Cleaning Tips guide covers browser, system, and app caches with step-by-step instructions.

To speed up a slow PC, this guide explains how to clean cache on your computer, including browser, system, and app caches. It provides safe, step-by-step actions, prerequisites, and cautions to prevent data loss. According to Cleaning Tips, routine cache maintenance can improve startup times and application responsiveness. Prepare a backup and a restart before you begin.
Why Cache Cleaning Improves PC Performance
Cache is a collection of temporary data that helps programs load faster. When you search, browse, or run apps, Windows and browsers store copies of files to speed up subsequent requests. If these caches become too large or corrupted, your system may slow down, start up slowly, or re-download data repeatedly. If you're wondering how to clean cache pc, proper cache hygiene can speed up startups and page loads. According to Cleaning Tips, routine cache maintenance can improve startup times and application responsiveness. In this section, we explain what cache is, why it accumulates, and how cleaning it safely benefits both browsers and the operating system. We’ll cover browser caches, system caches, and app caches, with practical steps you can follow today. We’ll also discuss safe ranges, backups, and restart etiquette to minimize disruption. This isn’t a one-size-fits-all task; you may tailor steps to your browsing habits and software environment. When done correctly, cache cleaning can reclaim disk space and reduce unnecessary network requests, contributing to a noticeably snappier computer experience.
Different Cache Types You Should Know
Understanding cache types helps you target the right cleanup. Browser caches store images, scripts, and pages to speed up reloads. System caches include temporary files that Windows or macOS keep for rapid access, while DNS caches speed up domain name resolutions. App caches vary by software but often live in dedicated folders or the user profile. Regularly clearing the right caches can improve load times and reduce wasted bandwidth. If you’re unsure where a particular cache lives on your PC, start with browser caches and the operating system’s temporary files first, then move to individual apps as needed. Cleaning Tips recommends focusing on caches that most impact your daily routine—e.g., browsers for web work and system caches for overall speed.
Prerequisites Before You Begin
Before you start cleaning caches, prepare by backing up important data and ensuring you have admin rights on the PC. Close nonessential apps to prevent files from being locked during cleanup. Check your browser login states and saved sites; knowing you may need to re-enter passwords after clearing caches helps you plan accordingly. Gather basic tools: a reliable backup method (external drive or cloud), and access to built-in cleanup utilities. Cleaning Tips emphasizes that a quick backup minimizes the risk of losing work or preferences during cache clearance. Finally, set aside a maintenance window so you can restart the computer if needed.
Clear Browser Cache: Chrome, Edge, and Firefox
Browser caches are usually the easiest to clear and often yield immediate improvements in page load times. For Chrome, go to Settings > Privacy and security > Clear browsing data, select Cached images and files, and choose the time range (All time for a full clean). For Edge, Settings > Privacy, search, and services > Clear browsing data similarly clears cached content. Firefox users should open Preferences > Privacy & Security > Cached Web Content and click Clear Now. Reopen each browser and sign back into sites as needed. Regular browser cache maintenance can dramatically speed up web tasks without affecting saved passwords.
Clear System Cache on Windows and macOS
System caches live where the operating system stores temporary data for quick access. On Windows, use Disk Cleanup or Storage Sense (Settings > System > Storage > Free up space now) to remove temporary files and system caches. On macOS, use built-in tools like Manage Storage ( > About This Mac > Storage) to review and remove local snapshots and redundant cache files. Avoid aggressive manual deletions in system folders unless you know exactly what you’re removing. Built-in cleanup options minimize risk while restoring free space and responsiveness.
Clear App Caches and Temporary Files
Many applications maintain their own caches, which can accumulate over time. Check each major app you use (e.g., image editors, office suites, chat apps) for cache or temp-file options in their settings. If an app stores large caches, consider a targeted cleanup rather than a full-system purge. After cleaning, reopen apps to regenerate needed caches with fresh data. This approach helps preserve your important preferences while reducing clutter.
Safe Automation: Built-in Tools vs. Third-Party Cleaners
Automating cache cleanup with built-in OS tools is safer than using third-party cleaners, which may remove more data than intended or misconfigure settings. Rely on official options like Windows Storage Sense, macOS maintenance scripts, or browser-specific cleanups. If you choose third-party tools, research reliability, avoid excessive auto-cleaning, and create a backup first. The Cleaning Tips team recommends sticking to trusted, well-documented utilities and avoiding tools that claim to clean every cache with one click.
Safety and Data Considerations
Cache cleaning is generally safe, but there are caveats. You may lose offline login states, site preferences, or auto-fill data if you clear caches too aggressively. Always back up critical data and be prepared to re-enter credentials after cleanup. Verify that you’re not deleting essential files during temp-file purges, and avoid deleting system folders you don’t recognize. If you encounter problems after cleaning, use System Restore (Windows) or Time Machine (macOS) to revert changes.
Troubleshooting Common Issues After Clearing Cache
If pages load slowly after cleaning caches, some sites may need to fetch fresh content. Sign back into sites where needed and clear only specific caches first to identify the culprit. If a program behaves oddly, it may rebuild caches automatically; restarting the app or the system can resolve inconsistent states. For persistent problems, re-check browser extensions, disable bandwidth-heavy add-ons, and review network settings. Consistent, measured cleanup is usually the best way to avoid new issues.
Maintenance Plan: How Often to Clean Cache PC
Create a simple maintenance cadence that fits your usage. A light, monthly browser cache purge paired with quarterly system cache cleanups works for most users. If you frequently browse media-heavy sites or run many apps, consider more frequent cleanups or a lightweight automation strategy. The key is consistency: establish a routine that minimizes disruption while keeping caches fresh and effective.
Tools & Materials
- External storage backup(Create a backup before cleaning caches)
- Admin access to Windows/macOS(You’ll need admin rights for some steps)
- Disk Cleanup/Storage Sense (Windows) or macOS Disk Utility(Use built-in cleanup utilities to remove temporary files safely)
- Web browser with cache clearing options (Chrome/Edge/Firefox)(Be ready to re-enter passwords after clearing caches)
- Optional: Temporary files cleaner (built-in or trusted tool)(Useful for bulk cleanup but not required)
Steps
Estimated time: 35-60 minutes
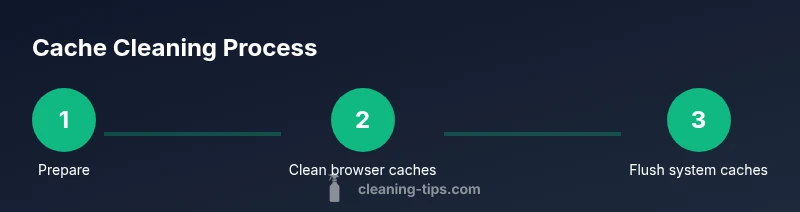
- 1
Prepare your workspace
Set up a clean, comfortable workspace and ensure you have time to complete the entire process. Close nonessential programs to reduce file locks. This helps the cleanup go smoothly and minimizes the chance of accidentally removing needed data during the process.
Tip: Mark your calendar or set a reminder to avoid interruptions. - 2
Back up important data
Create a backup of critical files and settings. A separate drive or cloud backup protects you if you need to revert changes or if a cleanup affects something you didn’t expect.
Tip: Verify the backup completed successfully before proceeding. - 3
Close all running programs
Exit all active applications to prevent caches from being in-use or partially deleted. This reduces the risk of corruption and ensures complete cache clearance.
Tip: Save your work to avoid data loss. - 4
Clear Chrome browser cache
In Chrome: Settings > Privacy and security > Clear browsing data. Choose Cached images and files and set Time range to All time for a full clean.
Tip: Selecting All time ensures a thorough reset of cached assets. - 5
Clear Edge browser cache
In Edge: Settings > Privacy, search, and services > Clear browsing data. Clear cached images and files and choose All time.
Tip: Restart Edge after clearing to confirm changes take effect. - 6
Clear Firefox browser cache
In Firefox: Preferences > Privacy & Security > Cached Web Content > Clear Now. Repeat for any other profiles you use.
Tip: Firefox may prompt to restart for full cache refresh. - 7
Run system cleanup (Windows/macOS)
Use Windows Disk Cleanup or Storage Sense to remove temporary files. On macOS, Manage Storage helps remove caches and old local snapshots.
Tip: Don’t delete critical system files; rely on built‑in cleanup options. - 8
Flush DNS and clear temp files
On Windows, run ipconfig /flushdns to clear DNS cache. Locate and delete temporary files directories as appropriate for your OS.
Tip: Flushing DNS can improve network renewals for some activities. - 9
Clear app caches and re-launch
Check non-browser apps for their cache options and clean where available. Reopen apps to allow fresh caches to build.
Tip: Only clear app caches when you notice app-specific issues. - 10
Restart and verify performance
Restart your PC to apply changes. Monitor startup times and general responsiveness to confirm improvements.
Tip: If performance is unchanged, reassess which caches to target next.
Questions & Answers
Is it safe to clear all caches?
Clearing caches is generally safe, especially with built-in OS and browser tools. It may sign you out of sites and remove saved preferences, but it won’t delete your personal files. Always back up before a full cleanup and proceed in stages if unsure.
Yes, it’s safe to clear caches using built-in tools. You may need to log back into sites afterward.
Will clearing caches delete my passwords or important data?
Clearing browser caches can remove saved site data and login states. Passwords stored in browsers may need re-entry, but saved files, documents, and personal files remain safe. Use selective clearing to minimize disruption.
You might have to log back into sites, but your passwords stored securely in the browser may be affected.
How often should I clear caches?
For most users, clearing browser caches monthly and performing a quarterly system cache cleanup is sufficient. If you notice slowdowns or storage pressure, you can adjust the frequency.
A monthly browser cache cleanup and quarterly system cache check is a good baseline.
Does clearing DNS cache improve gaming or streaming?
Flushing DNS cache can help if you’re seeing domain resolution issues or stale routes. It may modestly improve connectivity in rare cases, but it’s not a universal fix for gaming or streaming performance.
It can help if you’ve had DNS hiccups, but it’s not a guaranteed fix for all connectivity issues.
What should I do if performance doesn’t improve after cleaning cache?
If performance doesn’t improve, investigate other factors like startup programs, disk health, or malware. Reassess which caches you cleared and consider a deeper cleanup or professional help if problems persist.
If you’re still slow, check for other causes like startup programs or malware.
Watch Video
The Essentials
- Back up data before cleaning
- Clear browser caches first for quick wins
- Rely on built-in tools to stay safe
- Establish a maintenance routine for ongoing performance