How to Clean Dry Erase Board: A Practical Guide
Learn proven methods to clean dry erase boards, remove ghosting, and extend surface life with safe cleaners and step-by-step techniques.

This guide teaches you how to clean a dry erase board effectively, remove ghosting, and restore a smooth writing surface. You’ll learn the best cleaners, when to use isopropyl alcohol, and safe techniques for markers, erasers, and boards of different coatings. By following these steps, your whiteboard will erase cleanly and resist staining.
Why clean a dry erase board regularly matters
Regular cleaning maintains a smooth writing surface, prevents ghosting, and extends the board’s life. According to Cleaning Tips, neglect leads to stubborn marks that become harder to erase and can stain substrates over time. In busy environments—classrooms, home offices, and kitchens—a routine cleanup helps keep presentations legible and boards free from odors caused by marker residue. A quick daily wipe with a dry microfiber cloth prevents most ghosting, while deeper cleans should be scheduled monthly or after heavy marker use. Avoid harsh solvents or abrasive pads that can wear down coatings. The following sections explain surface types and cleaning methods so you can tailor a plan for your space, whether you have porcelain, painted steel, or glass whiteboards.
Understanding surface types and how they affect cleaning
Whiteboards come in several coatings, including porcelain enamel, painted steel, and glass. Each surface responds differently to cleaners and friction. Porcelain enamel boards tolerate stronger cleaners but can show ghosting if cleaners are too aggressive; painted surfaces are more sensitive to solvents; glass boards are the most forgiving but can show streaks if not dried properly. In homes and schools, knowing your board type helps you pick a routine that preserves sheen, prevents ghosting, and minimizes wear. When in doubt, start with a mild cleaner and test in a small corner before broad application. This reduces the risk of coating damage while keeping your workspace look pristine.
Cleaning agents: what works and what to avoid
Best results come from mild, non-abrasive cleaners. A mild dish soap solution and water can remove light residue and restore a clean surface. For tougher ghosting, isopropyl alcohol (70%–90%) applied to a microfiber cloth works well on most non-porous coatings. Avoid ammonia-based cleaners on painted boards unless the manufacturer specifies compatibility, and never use abrasive pads or powders that scratch the surface. For persistent marks, alternate between a dedicated whiteboard cleaner and alcohol, testing on a small area first. Always dry the board after cleaning to prevent streaks and moisture damage over time.
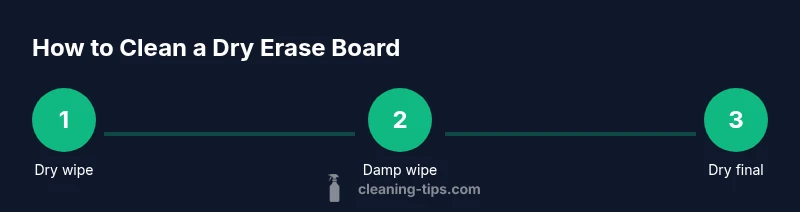
Step-by-step approach to a thorough clean (high-level overview)
A thorough clean typically begins with a dry wipe, followed by a damp wipe with a mild cleaner, then a targeted treatment for stubborn marks, and final drying. Start with a microfiber cloth to remove loose dust, then apply cleaner to the cloth—not the board directly—to avoid oversaturation. Wipe in a consistent direction, rinse with a clean damp cloth if needed, and finish with a dry microfiber to remove moisture. For persistent ghosting, a focused application of isopropyl alcohol on the affected area can help, but test first to ensure compatibility. This approach prevents residue buildup while restoring easy erasability.
Dealing with ghosting and stubborn stains
Ghosting occurs when marker residues remain embedded in the surface coating. To combat this, use a two-step approach: (1) a gentle cleaning to lift surface residues, (2) a targeted treatment for stubborn spots. If ghosting persists, switch cleaners or increase the frequency of maintenance sessions. For permanent markers, apply alcohol on a small area, blot gently, and rinse. If you’re dealing with a porous or coated surface, preserve the integrity by avoiding aggressive solvents and scrubbing. Keeping a weekly routine helps prevent ghosting from forming.
Tools & Materials
- Microfiber cloths or lint-free wipes(Soft, non-abrasive; use separate cloths for dry, damp, and dry stages)
- Isopropyl alcohol (70%–90%)(Use on non-porous surfaces; test first on delicate coatings)
- Mild dish soap(Dilute in water for a gentle cleaning solution)
- Water spray bottle(For damp-wipe steps and rinsing)
- Whiteboard cleaner (optional)(Commercial product designed for whiteboards; follow label)
Steps
Estimated time: Total time: 15-25 minutes
- 1
Prepare your board and workspace
Clear the area around the board and remove loose dust with a dry microfiber cloth. This minimizes smearing during the cleaning process and ensures a clean starting surface.
Tip: Use a clean, unused cloth to avoid transferring oils from hands. - 2
Dry-wipe the surface
Wipe the board in one direction to lift loose marker dust. This prepares the surface for deeper cleaning and reduces the amount of cleaner needed.
Tip: Always start dry to limit smear patterns. - 3
Apply a mild cleaning solution
Dampen a microfiber cloth with a mild soap solution or whiteboard cleaner. Wipe the board evenly, working in sections to avoid re-soiling.
Tip: Never spray liquids directly onto the board. - 4
Tackle stubborn ghosting
For ghosted areas, apply a small amount of isopropyl alcohol on a cloth and gently rub the spot. Do not scrub aggressively, which could damage coatings.
Tip: Test on a corner first to confirm compatibility. - 5
Rinse and dry
Rinse the cloth with clean water and wipe away any soap or cleaner residue. Finish with a dry microfiber to remove moisture and prevent streaks.
Tip: Drying prevents water spots and slows re-soiling. - 6
Inspect and repeat if needed
Check the board under good lighting and repeat steps for areas still showing ghosting. Regular maintenance often reduces repetition.
Tip: Consistency is key for best results.
Questions & Answers
Can I use vinegar to clean a dry erase board?
Yes, a diluted vinegar solution can be mild enough for some surfaces, but test first to ensure it won’t affect coatings. For delicate boards, stick to milder cleaners.
Yes, but test first and consider milder cleaners for delicate boards.
What should I avoid cleaning a dry erase board with?
Avoid abrasive pads, scouring powders, ammonia-based cleaners on painted surfaces, and direct spraying on the surface. These can damage coatings and worsen ghosting.
Avoid abrasives, ammonia cleaners, and spraying liquids directly on the board.
How often should I deep-clean a whiteboard?
In high-use environments, deep-clean once every 1–2 weeks; in lower-use spaces, monthly is often sufficient. Adjust based on ghosting and staining.
Deep-clean every couple of weeks if you use it a lot; otherwise monthly should be fine.
Is 70% isopropyl alcohol safe for all whiteboards?
Most non-porous whiteboards tolerate 70% isopropyl alcohol, but check the manufacturer’s guidance for painted or specialty surfaces.
Usually safe on common boards, but verify with the manufacturer.
Can I clean my glass whiteboard with water only?
Water alone can remove light dust, but for ghosting or marker residue you’ll need a cleaner or alcohol to break down oils.
Water helps a quick wipe, but cleaners work better for stubborn marks.
What about permanent marker stains?
A small amount of isopropyl alcohol or acetone on a cloth can help lift permanent marker on some surfaces; always test first.
Test on a corner before treating the area.
Watch Video
The Essentials
- Clean regularly to prevent ghosting
- Test cleaners on small areas first
- Avoid abrasive tools that scratch coatings
- Dry thoroughly to prevent streaks
- Maintain a consistent cleaning routine