How to Clean and Fix a Flat Off a Rim: A Practical Guide
Learn how to clean and fix a flat off a rim on a bicycle wheel. This comprehensive, safety-first guide covers removing the tire, inspecting the rim, repairing or replacing the inner tube, cleaning bead seating, and reseating the tire with pro tips to prevent future flats.

By the end of this guide you will know how to clean fix a flat off a rim on a bicycle wheel. You’ll learn to safely remove the tire, inspect the rim for damage, repair or replace the tube, clean the rim surface, and reseat the tire with proper bead seating. Gather basic tools and a safe workspace before you begin.
What is a flat off a rim and why it happens
A flat tire that’s described as being off the rim usually means the tube has failed or separated from the bead while a portion of the tire remains seated on the rim. Flats can happen for many reasons, including punctures, pinch flats from over- or under-inflation, or damaged rim beads. Understanding where the failure occurred helps you decide whether to patch, replace, or reseat everything carefully. According to Cleaning Tips, flats are often the result of maintainable issues like improper inflation, worn bead areas, or minor rim burrs that catch the bead during seating. Recognizing these causes empowers you to fix the problem more efficiently and prevent recurrence.
Tools and materials you’ll need
Before you start, assemble a basic toolkit tailored for on-bike tire work. This reduces delays and lowers the risk of damaging the tube or rim during removal. Gather two tire levers, a spare inner tube, a patch kit (if you’re not replacing the tube), rim tape, a pump with a gauge, and clean rags. Optional items include gloves, safety glasses, and a bead seating aid. Keep everything within reach and spend a few minutes clearing space on a sturdy work surface.
Preparing workspace and safety precautions
Set the wheel on a sturdy, flat surface. If you’re working on your bike, stabilize it in a stand or leaning against a wall so it won’t tip. Wear protective gloves to avoid pinching fingers and safety glasses to shield eyes from potential debris. Deflate the tire completely before attempting to remove the bead. Work slowly and deliberately to minimize tube damage and to keep track of small parts like valve cores and wheel nuts.
Removing the tire from the rim safely
Start by loosening the tire bead from the rim with the tire levers. Use one lever to pry the bead over the rim edge, then slide the second lever around to lift the bead completely off one side. Carefully work the lever's tip under the bead to avoid pinching the tube. Once one side is free, you can pull the tire away from the rim and access the inner tube. Take note of any sharp edges, burrs, or spoke holes that could nick the tube later.
Inspecting the rim, tape, and tube for damage
With the tire off, inspect the rim bed for sharp edges, burrs, or protruding spoke ends. Check the rim tape for wear or gaps that could puncture the tube. If you find damage to the rim, address it before reassembly; a bent rim or torn tape can cause recurring flats. If the tube shows a puncture, decide whether a patch or replacement is appropriate based on the patch kit’s condition and the tube’s overall integrity.
Patching or replacing the inner tube
If you’re patching, locate the puncture and apply a patch according to the kit’s instructions. Ensure the patch is pressed firmly and allowed to cure as directed. If you’re replacing the tube, remove the valve core (if present) to deflate fully, then slide the new tube into the tire with even spacing around the rim. Before reinflating, check the tube for wrinkles or twists; a misaligned tube can fail quickly after seating. Remember that some flats are caused by the tire itself, so inspect the tire for embedded objects and replace if necessary.
Cleaning the rim and seating the bead
Wipe the rim thoroughly with a clean cloth to remove dust, grease, or debris that could interfere with bead seating. Inspect the bead wire and tire for deformation. If the bead sits unevenly or catches on the rim, use a little soapy water around the bead to help seating and avoid air gaps. Reinstall the tire, aligning the valve stem with the valve hole and ensuring that the bead sits evenly around the rim. A proper bead seating is essential to prevent air leaks and ensure stable inflation.
Reassembling, inflating, and testing
Reinsert the tube, then mount the tire bead back onto the rim on one side. Inflate gradually in short bursts to avoid sudden bead seating; check for leaks as you go. Once the tire is seated, inflate to the manufacturer’s recommended pressure and spin the wheel to listen for hissing or feel for any bulges. If you detect a leak, re-check the bead and rim tape placement, then reseat and recheck the pressure. Finally, give the wheel a gentle spin to confirm it runs true and doesn’t rub against brakes or frame.
Tools & Materials
- Tire levers(Two levers recommended)
- Spare inner tube(Size matches wheel)
- Tire patch kit(For quick tube repair)
- Rim tape(Check for wear or gaps)
- Floor pump with gauge(Accurate inflation)
- Rags or lint-free cloth(Clean surfaces)
- Gloves(Protection from sharp edges)
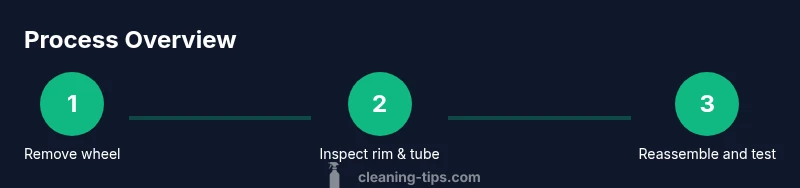
Steps
Estimated time: 45-60 minutes
- 1
Remove the wheel from the bike
Loosen and remove the wheel from the frame or fork. If you’re using a quick-release, open the lever and unthread the axle until the wheel is free. This initial step prevents strain while you work on the tire and rim. Keep track of nuts and spacers to reinstall correctly.
Tip: Label or set aside removed parts so they don’t get mixed up with other parts. - 2
Deflate and remove the tire from the rim
Fully deflate the tire. Use tire levers to pry the bead over the rim edge, then work the bead around the rim until one side is free. Remove the inner tube completely and inspect for punctures or wear. If you can locate the puncture, mark it to orient patches correctly.
Tip: Be gentle with the tube to avoid creating new punctures. - 3
Inspect the tube for damage or punctures
Examine both sides of the tube for small holes, pinches, or areas that look thin. If you find a puncture, decide whether to patch or replace the tube based on patch kit condition and tube integrity. If the tube is old or stretched, replacement is usually safer.
Tip: Only patch clean, dry surfaces; patch failure is common if the patch isn’t properly prepared. - 4
Check rim tape and rim for damage
Inspect the rim tape for wear, tears, or gaps that could expose spoke holes. If the tape is damaged, replace it to prevent future punctures. Look for sharp edges or burrs on the rim that may nick the tube or bead during seating.
Tip: Replace damaged tape even if the patch seems minor. - 5
Patch or replace the inner tube
Apply the patch to the puncture if you’re repairing the tube, ensuring a clean, dry surface. If replacing, inflate the new tube slightly to give it shape before insertion. Check for twists or kinks as you position the tube inside the tire.
Tip: Avoid over-inflating a patch before adhesion sets; follow patch kit instructions for cure time. - 6
Clean the rim and bead seating
Wipe the rim bed and bead area with a clean cloth to remove debris. Check bead seating by gently pulling the tire bead over the rim edge to ensure it seats evenly. If you notice any interference, correct the alignment before continuing.
Tip: A little soapy water around the bead can help beads slide into place without snagging. - 7
Reassemble and test
Insert the tube back into the tire and position the bead onto the rim. Inflate gradually in small increments to seat the bead evenly and check for leaks. Spin the wheel to verify true rotation and listen for air leaks; re-check pressure after a few minutes.
Tip: If you hear hissing, stop and reseat the bead again before finishing inflation.
Questions & Answers
What tools do I need to fix a flat off a rim?
At a minimum, you’ll need tire levers, a spare inner tube, a patch kit, rim tape, a pump, and rags. Depending on your setup, you may also want gloves and a bead seating aid.
You’ll need tire levers, a spare tube, a patch kit, rim tape, a pump, and rags. Gloves and a bead seating aid can help, but aren’t required.
Can I patch a tube without removing it from the rim?
Patching is easiest when the tube is off the rim, but you can patch a small puncture while the tube is still in the tire if you have a flexible patch and can access the area. It’s generally more reliable to remove the tube.
You can patch without removing, but removing makes patching more reliable.
What should I do if the rim is bent after a flat?
If the rim is visibly bent, stop and assess the severity. Minor bending can sometimes be managed with careful bead seating, but significant bends should be addressed by a professional and the wheel should be serviced before riding.
If the rim looks bent, don’t ride it. Have it checked by a pro, as it could fail during use.
Is tubeless setup easier to fix flats on?
Tubeless setups reduce pinch flats and can seal many punctures automatically. However, tubeless systems require proper bead seating and tire sealant; repairs can be more involved if the tire bead or rim tape is damaged.
Tubeless tires can seal many flats, but you still need proper bead seating and intact tape.
How long does this repair typically take?
A straightforward repair on a well-equipped setup usually takes about 45-60 minutes, depending on tube condition and rim accessibility. Rushing can cause mistakes, so take your time to inspect everything carefully.
Most repairs take around 45 to 60 minutes with the right tools.
How can I prevent flats in the future?
Maintain proper tire pressure, inspect tires for wear or embedded objects, replace worn beads, and ensure rim tape is intact. Regular checks reduce the chance of punctures and rim damage.
Keep tires inflated to recommended pressure and inspect for wear regularly to prevent flats.
Watch Video
The Essentials
- Check rim tape before reassembling
- Bead seating is essential to prevent leaks
- Patch or replace the tube based on tube condition
- Inflate gradually and test for leaks