How to Clean Gears: A Practical Step-by-Step Guide
Learn practical, safe methods to clean gears (bike, machine gearboxes, and metal gears) with step-by-step instructions, tools, and maintenance tips. Includes safety notes and pro tips from Cleaning Tips.

This guide teaches you how to clean gears safely and effectively, whether they’re in a bicycle, a gearbox, or another mechanical system. You’ll learn the exact tools you need, how to disassemble when appropriate, the best cleaning methods, and how to re-lubricate and inspect for wear. Cleaning Tips provides practical, step-by-step instructions you can follow today.
Why cleaning gears matters
Gears are precision components that transfer motion and force in bikes, machines, and gearboxes. If dirt, oil, or rust build up, they can slip, wear unevenly, or seize at critical moments. Learning how to clean gears is a practical skill for homeowners and hobbyists, and it can extend the life of expensive parts. This guide explains safe, effective methods to remove grime without damaging delicate tolerances. If you are new to maintenance, start with small, accessible gears such as bicycle derailleur gears or small spur gears in a home workshop. The phrase how to clean gears is more than a cosmetic task; it helps protect alignment, reduce heat buildup, and maintain efficiency. Cleaning Tips, based on Cleaning Tips analysis, emphasizes a methodical approach: inspect, protect components, clean in stages, dry completely, lubricate appropriately, and test. By following these steps, you reduce the risk of contamination entering bearings or clogging lubrication passages. In projects where gears operate under load, cleanliness is directly linked to performance and safety. The goal is consistent, gentle cleaning that preserves metal surfaces and tolerances while removing debris that can cause micro-wear and noise.
Safety and prep
Before you touch gears, set up a clean, well-ventilated workspace. Put a drop cloth down and keep a small tray nearby for loose fasteners. Wear safety gloves and eye protection. Some cleaners can irritate skin or eyes; avoid inhaling fumes by working in a ventilated area. If you are cleaning gears attached to electrical or powered equipment, disconnect power and, if possible, remove the gear assembly from the machine to reduce the risk of accidental activation. Read manufacturer instructions when available, and never mix cleaners. Use mild degreasers rather than solvent-based products that can strip protective finishes or corrode metal. Inspect gear teeth gently for chips or cracks before and after cleaning. Keep a log or label for parts if you disassemble; this helps you avoid misplacing pieces during reassembly. Finally, plan to test the gear in a controlled environment after cleaning to confirm smooth operation. If a part shows significant wear, corrosion, or pitting, pursue replacement rather than reuse. This proactive approach reduces downtime and protects other components in the system.
Gear types and contaminants
Gears come in many forms, from bicycle derailleur gears to small spur gears in hobby machines to large industrial gear trains. Each type presents unique cleaning challenges. Bicycle gears are often coated with grease and road grime; you’ll want to remove this film without flushing away lubrication in the bearings. Industrial gears might accumulate metal shavings, dust, and dried oil that can harden and form crusts. Plastic gears require gentler cleaners to avoid crazing or cracking. Common contaminants include sticky grime, rust, resin, and old lubricant that has dried into a film. A careful inspection can reveal pitting or wear that requires attention beyond cleaning. If rust is present, you’ll need to address it with a rust-inhibiting approach that does not damage the base metal. The key is to choose a cleaning method that lifts grime while preserving tolerances and protecting bearing surfaces. Always keep moving parts dry when not lubricated, and avoid soaking sealed bearings unless you have a replacement plan. The goal is to reintroduce clean, evenly distributed lubrication without introducing new contaminants.
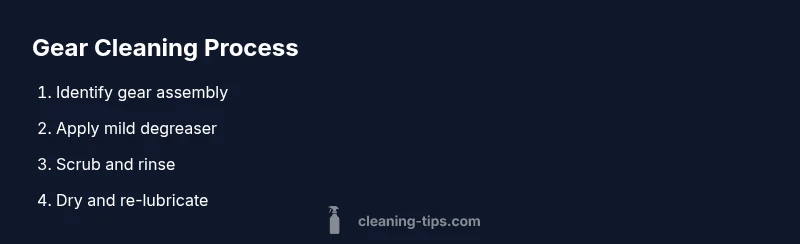
Step-by-step: general workflow
When learning how to clean gears, follow a consistent workflow to minimize risk and maximize results. Start by identifying the gear assembly and checking if disassembly is required for access. If you are cleaning a sealed system, you may only need to wipe external surfaces; otherwise disassemble with care and label parts. Next, apply a mild degreaser to loosen grime, letting it dwell briefly while you inspect gear teeth for damage. Use a soft brush to scrub between teeth, cogs, and fillets, avoiding aggressive scrubbing that could remove coatings or expose bare metal. Rinse with clean water or a damp cloth, then thoroughly dry all parts with lint-free towels. Pay attention to crevices and oil passages; use a toothpick or small brush to clear debris. Once dry, re-check for signs of wear or rust that cleaning cannot fix. Finally, apply the recommended lubricant in the correct amount, reinstall the gear assembly, and run a gentle test under no-load conditions before returning the machine to service. Document any anomalies and adjust maintenance intervals accordingly. This routine helps you maintain peak performance while extending the life of gears and the devices they drive.
Cleaning methods for different environments
Different environments demand different cleaning approaches. In a bike workshop, you may prefer a grease-cutting degreaser followed by a light rinse and air-dry. In a metalworking or small machine shop, you might encounter stubborn carbon deposits; in that case, a slightly stronger cleaner with longer dwell time may be required, but you should avoid harsh acids that attack metal. Plastic gears require gentler handling and extra care to avoid damage from solvents. For rust-prone gears, you may need a rust-removing step after cleaning; this should be followed by thorough rinsing and drying. Drying is critical; moisture left in crevices can accelerate corrosion. After cleaning, always reapply a fresh lubricant. If contamination includes coolant or cutting fluids, you should flush with water first, then wipe dry. Finally, reassemble with care, ensuring seals and bearings are properly aligned. This tailored approach helps ensure that different gear sets regain their designed fit and function while minimizing unexpected downtime.
Post-clean maintenance and testing
After cleaning, inspect gear teeth for wear, burrs, and pitting; any damage should be addressed before reassembly. Cleanliness alone cannot restore a worn part, but it can reveal issues you didn’t see before. Dry all parts thoroughly and re-lubricate according to manufacturer recommendations or best-practice guidelines. Use the recommended lubricant and apply a consistent film across teeth, avoiding pooling in crevices. Reinstall the assembly carefully and check for proper meshing alignment and smooth rotation. Run a brief, unloaded test to listen for abnormal noises, binding, or vibration. If you notice any issues, stop and re-check your work. Document the maintenance event, including what cleaners you used and how long parts were dwell-cleaned. Regular maintenance intervals help prevent buildup and extend gear life. Finally, store spare parts in a dry place away from moisture, dust, and exposure to solvents that could degrade seals. With proper maintenance, gears stay quiet, efficient, and longer-lasting.
Authority sources and best practices
To support safe and effective gear cleaning, refer to recognized safety and materials guidelines. OSHA guidelines emphasize protecting workers during cleaning of machinery and avoiding exposure to dangerous solvents when possible. NIST provides general best practices for maintaining metal components and lubrication paths that can help you plan a safer process. EPA resources remind users to dispose of chemical residues responsibly and keep habitats free from hazardous cleaners. For gear-specific maintenance, always consult manufacturer instructions and use mild, non-caustic cleaners when possible. By combining these authoritative sources with careful technique, you ensure both safety and performance while avoiding common mistakes like over-wetting or corroding contacts. Cleaning Tips encourages you to document procedures, monitor results, and adjust your approach as equipment evolves.
Tools & Materials
- Mild degreaser suitable for metal gears(Choose a milder formula that won’t corrode metal surfaces.)
- Soft-bristled nylon brush(Use gentle strokes to avoid scratching gear teeth.)
- Microfiber cloths or lint-free rags(For wiping, drying, and removing residue without leaving fibers.)
- Warm water (bowl or bucket)(Used for rinsing and dilution of cleaners.)
- Toothpicks or small brushes(Gently clear debris from crevices and oil passages.)
- Isopropyl alcohol (70%) or dedicated gear cleaner(For disinfecting and residue removal if needed.)
- Safety gloves(Protect hands from chemicals and sharp edges.)
- Safety goggles(Eye protection against splashes.)
- Light machine oil or grease(Re-lubricate after cleaning to prevent wear.)
- Rust remover (if rust is present)(Only use if rust is detected; follow product instructions.)
Steps
Estimated time: 60-90 minutes
- 1
Prepare the workspace
Clear the area, lay down a protective mat, and gather all tools. Double-check that power to any powered gear is off and locked out if applicable. This reduces the risk of accidental movement during cleaning.
Tip: Label any small parts as you remove them to simplify reassembly. - 2
Identify disassembly needs
Assess whether the gear can be cleaned externally or if full disassembly is required for access. Avoid forcing parts apart; consult manuals or photos you took during disassembly to preserve orientation.
Tip: Photograph each step before removing fasteners to speed reassembly. - 3
Apply mild degreaser
Apply degreaser to key areas where grime accumulates. Let it dwell briefly to loosen grease, then use a soft brush to dislodge grime without harming surfaces.
Tip: Avoid soaking sealed bearings unless you have a replacement, to prevent damage. - 4
Scrub and agitate
Gently scrub between teeth, fillets, and grooves with a nylon brush. Pay attention to crevices where debris hides; avoid harsh scraping that could remove protective coatings.
Tip: Use a toothpick for stubborn particles in tight corners. - 5
Rinse and dry
Rinse with clean water or wipe with a damp cloth, then dry all parts thoroughly with lint-free towels. Moisture left in bearings accelerates corrosion.
Tip: Use compressed air with care only if you know parts won’t be forced apart or damaged. - 6
Inspect for wear
Check for nicks, pitting, cracks, or rust that cleaning cannot fix. If wear is present, replace affected gears rather than reusing compromised parts.
Tip: Keep a magnet handy to collect ferrous debris during disassembly and cleaning. - 7
Lubricate and reassemble
Apply a light, even film of lubricant to gear teeth. Reassemble with correct orientation and seating, ensuring bearings and seals sit correctly.
Tip: Wipe excess lubricant to prevent attracting dust. - 8
Test run
Perform a gentle test under no-load conditions to verify smooth meshing and absence of noise. If anything feels off, stop and reassess alignment before loading.
Tip: Document results and adjust maintenance intervals accordingly.
Questions & Answers
How often should gears be cleaned?
Frequency depends on usage and environment. In dusty or high-debris settings, clean quarterly or after heavy grime exposure. In cleaner environments, biannual checks may suffice. Always inspect for buildup that could affect gear engagement.
Frequency depends on use and environment; clean when you notice grime buildup or noise.
Can I use household cleaners on gears?
Mild degreasers are usually safe; avoid strong solvents that can degrade metal or seals. For sensitive gears, use products labeled for mechanical parts and follow manufacturer recommendations.
Usually a mild degreaser works, but avoid harsh solvents on sensitive gears.
What signs indicate a gear needs replacement after cleaning?
Visible wear such as pitting, chipped teeth, or persistent misalignment after cleaning signals replacement is needed. If cleaning reveals loosened spokes or cracked hubs, replace the assembly.
Look for wear, cracks, or persistent misalignment even after cleaning.
Is it safe to clean gears while they’re still installed?
Cleaning installed gears is possible for external surfaces, but only if removal isn’t necessary for access. Disconnect power and ensure the system can’t move during cleaning.
It can be done, but ensure safety and access considerations first.
Do I need to disassemble every gear to clean it?
Not always. Clean exterior surfaces first, then disassemble only as needed to access clogged areas or to inspect wear. Label parts to simplify reassembly.
Disassemble only when needed to access grime and inspect wear.
What frequency of maintenance is recommended for gear trains?
Establish a routine based on usage. More frequent cleaning for high-load or contaminated environments helps prevent unexpected downtime and maintains gear efficiency.
Set a routine based on how hard the gears work and how dirty they get.
Watch Video
The Essentials
- Start with a clean, safe workspace.
- Use mild cleaners and avoid soaking bearings.
- Dry thoroughly before lubrication.
- Inspect for wear and replace damaged parts.
- Document and maintain a regular schedule.