How to Clean Oil Spots on Driveway: A Step-By-Step Guide
Learn a proven, eco-friendly method to remove oil spots from driveways. This step-by-step guide covers prep, absorbents, cleaners, scrubbing, and prevention for concrete and asphalt.

By the end of this guide you will remove oil spots from a driveway and restore curb appeal. You’ll learn a proven, step-by-step method that works on concrete and asphalt, plus tips for prevention and safer cleaners. The approach emphasizes absorbent applications, degreasers, scrubbing, and thorough rinsing to prevent re-staining. No heavy equipment required—just common household supplies and patience.
Why oil stains happen on driveways and why cleaning matters
Oil stains on driveways come from vehicles and can worsen over time as oil seeps into concrete or asphalt. According to Cleaning Tips, not addressing these spots allows staining to penetrate the surface, making removal harder and diminishing curb appeal. The Cleaning Tips team found that addressing fresh drips promptly and using a simple, repeatable method yields the best long-term results. This section explains how stains form, why a clean driveway matters for safety and aesthetics, and how different surface materials respond to cleaners. You’ll also learn how small improvements—like keeping a kit nearby—prevent larger problems later. By understanding how contamination interacts with surface porosity, you’ll choose cleaners and techniques that minimize surface damage while maximizing stain removal.
Surface types and choosing the right cleaner
Driveway surfaces vary, typically being concrete or asphalt. Concrete is porous and benefits from alkaline cleaners or degreasers that lift oil without etching the surface. Asphalt, while more forgiving, can still stain deeply if left untreated. For light stains, a mild detergent or dish soap with hot water may work; for heavier spots, a dedicated degreaser or solvent-based cleaner is more effective. Always test cleaners on a small, inconspicuous patch first to avoid color changes or slick spots. If you prefer eco-friendly options, look for products labeled biodegradable and low-toxicity, and avoid mixing acidic cleaners with bleach. The goal is to break the oil’s grip without harming plants or concrete integrity. In all cases, consider sealing after cleaning to slow future staining and make maintenance easier, especially on bare concrete surfaces.
Absorbents and initial prep
Absorbing as much oil as possible before washing is crucial. Use an absorbent material such as cat litter or baking soda to cover the stain fully and let it sit for 15–30 minutes on fresh drips. This step reduces the amount of oil that soaks deeper into the surface and makes subsequent cleaning more effective. Sweep up the used absorbent material and dispose of it according to local guidelines. Before you apply cleaners, remove loose debris with a broom and inspect for any cracks or loose sections that might need sealing later. Protect nearby plants and grass by laying down a plastic sheet or cardboard barrier to prevent chemical runoff. This preparation streamlines the cleaning process and minimizes the chance of spreading the stain.
Deep-clean methods for concrete and asphalt
For concrete stains, apply a degreaser or heavy-duty dish soap directly to the stain and let it sit for 5–10 minutes to loosen trapped oil. Scrub with a stiff-bristle brush using circular motions, then rinse thoroughly with a garden hose or pressure washer set to a gentle jet. For asphalt, you may need a slightly milder cleaner to prevent surface damage; repeat the degreasing and scrubbing as needed. In both cases, work from the outside edges of the stain toward the center to prevent spreading. If the stain persists, apply a poultice made from baking soda and water to draw the oil out of the surface and cover with plastic wrap for 24 hours before rinsing.
DIY green cleaners you can trust
If you prefer eco-friendly options, a baking soda poultice combined with water can help lift remaining oil from the surface. A simple mixture of baking soda and water creates a paste that pulls oil out of porous materials when left to dry. White vinegar can be used in small amounts on some stains, but avoid mixing vinegar with chlorine bleach or ammonia. Always wear gloves and eye protection when handling cleaners, and ventilate the area well. After cleaning, rinse the area thoroughly to remove cleaner residues and prevent slick conditions. These methods balance effectiveness with environmental responsibility.
Preventing future stains and maintenance tips
Prevention is easier than remediation. Regularly inspect your driveway for drips and place a removable oil-absorbent material under the vehicle when parked for extended periods. Address small drips immediately—blot and apply a quick degreaser to avoid stamped-in stains. Consider applying a concrete sealer after the area is completely dry to slow future absorption and make routine cleaning easier. Create a seasonal cleaning routine that includes sweeping, rinsing, and spot-treating any new stains before they set. By combining prompt action with a simple cleaning protocol, you’ll keep your driveway looking clean longer.
Common mistakes to avoid and safety tips
Avoid mixing cleaners (especially ammonia with chlorine bleach) as this can release dangerous gases. Do not use highly abrasive tools on concrete or asphalt, which can dull the surface or create micro-cracks that harbor oil. Never allow cleaners to sit on plants or grass for extended periods. Wear protective gloves and eye protection, and keep pets and children away from treated areas until the surface is dry. If you are unsure about a cleaner’s compatibility with your driveway material, test in a small area first and consult product instructions. Proper ventilation and disposal of used absorbents are essential for safe, responsible cleaning.
When to call in pros and sealing options
If stains are deeply ingrained or cover a large area, a professional cleaner may be warranted. Professionals can assess whether the underlying surface has structural damage or cracks that require sealing or patching. Sealing concrete after a successful cleaning helps create a barrier that resists future oil absorption and simplifies maintenance. For asphalt, resealing can renew the surface’s appearance and extend its life. Always ensure the surface is completely dry before sealing and follow the manufacturer’s guidelines for curing time. Regular, light maintenance combined with periodic resealing often yields the best long-term results.
Tools & Materials
- Stiff-bristle scrub brush(8-12 inch handle; use on concrete or asphalt)
- Plastic putty knife(Lift hardened residues without scratching)
- Absorbent material (cat litter or baking soda)(Cover stain fully; 15-30 minutes minimum)
- Degreasing detergent or commercial degreaser(Biodegradable if possible)
- Dish soap (for light stains)(Good backup for mild spots)
- Plastic bucket(For mixing cleaners if needed)
- Garden hose with spray nozzle(Rinse area thoroughly)
- Rubber gloves(Protect skin from cleaners)
- Safety glasses(Eye protection during scrubbing)
- Plastic sheeting or cardboard barrier(Protect nearby plants from runoff)
Steps
Estimated time: 60-90 minutes
- 1
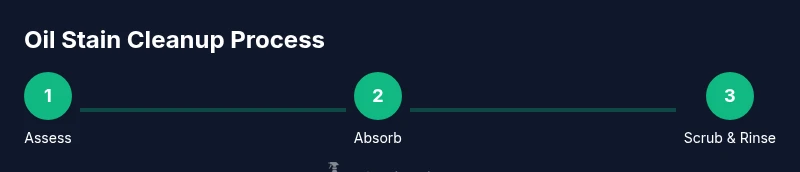
Assess area and prep
Survey the stain size and surface type (concrete or asphalt). Clear vehicles and obstacles, and protect nearby plants with barriers. Gather all tools and ready absorbents before starting to minimize interruptions.
Tip: Protect surrounding greenery; set up a plastic barrier to catch runoff. - 2
Absorb fresh spills
Cover the stain with cat litter or baking soda and press gently to absorb surface oil. Leave for 15-30 minutes, then sweep or vacuum up the material. This step reduces the amount of oil that seeps deeper into the surface.
Tip: Use a fine-grit broom to sweep absorbent without spreading oil. - 3
Apply cleaner and wait
Apply a suitable degreaser directly to the stain and let it dwell for 5-10 minutes. Do not let cleaners dry on the surface, or you may reduce effectiveness. For very large stains, dilute cleaner as directed to cover a larger area.
Tip: Test cleaner spot first to avoid discoloration. - 4
Scrub thoroughly
Scrub in circular motions, moving from the outside edges toward the center. Use a stiff-bristle brush to break oil bonds with the surface. Rinse briefly as you work to monitor progress.
Tip: Keep the area wet enough to avoid creating powdery residue that can re-stain. - 5
Rinse and re-treat if needed
Rinse with a garden hose or low-pressure washer. If the stain persists, reapply cleaner and repeat steps 3-4 until you see a noticeable lightening. For stubborn spots, apply a baking soda poultice and cover with plastic for 24 hours before final rinse.
Tip: Patience pays off; stubborn stains may require multiple passes. - 6
Dry and inspect
Allow the area to dry completely before evaluating color restoration. If any residual staining remains, consider professional cleaning or potent sealers for ongoing protection. Ensure there is no standing water that could affect curing if you plan to seal later.
Tip: Drying time varies with weather; plan for a half-day minimum in mild conditions. - 7
Seal and maintain
Once dry, consider applying a concrete sealer to deter future oil absorption and simplify maintenance. Follow product directions for application and curing time. Maintain the surface with regular cleaning and prompt spill response to keep it looking like new.
Tip: Seal only after full surface dryness and correct weather conditions.
Questions & Answers
What oils can be removed from concrete driveway?
Most common spills are motor oils and transmission fluids; lighter oils remove more easily with detergent, while heavier oils may require a stronger degreaser and multiple passes.
Most common driveway oils come from motor oil and transmission fluid. Lighter oils come off easier with detergent, while heavier oils may need stronger cleaners and a couple of passes.
Can I use bleach or strong chemicals on the driveway?
Avoid mixing cleaners with bleach and avoid harsh chlorine cleaners on many driveway surfaces. Use a degreaser or mild dish soap instead, and always test first on a small patch.
Bleach and strong chemicals can damage driveway surfaces. Use a degreaser or mild soap and test first on a small patch.
Is baking soda or vinegar safe for concrete?
Baking soda is generally safe for mild stains and can help draw out oil when used as a poultice. Vinegar should be used sparingly and never mixed with bleach; always test first.
Baking soda is safe for mild stains and can help as a poultice. Vinegar is okay in small amounts but don't mix with bleach.
How long does it take for stains to disappear?
Times vary with stain size, surface porosity, and weather. Smaller stains may clear after a single clean, while deep stains may need repeated treatments and drying periods.
It varies, but expect some stains to require more than one treatment and drying time depending on surface and weather.
Should I seal my driveway after cleaning?
Sealing helps resist future oil absorption and simplifies maintenance. Wait for complete drying, then follow the sealer’s instructions for application and curing.
Sealing helps prevent future stains and makes cleaning easier—apply after the surface is fully dry.
Watch Video
The Essentials
- Start with absorbents to limit oil spread
- Choose the right cleaner for concrete vs asphalt
- Scrub from outside in and rinse thoroughly
- For stubborn stains, repeat steps or use a poultice
- Seal after drying to prevent future stains