Master Clean: Practical Step-by-Step Home Guide Essentials
Learn a practical, eco-friendly master clean method with a clear, step-by-step plan to keep your home spotless. Includes core tools, routines, safety tips, and a flexible schedule for homeowners and renters.

Master clean means building a practical, repeatable cleaning system that covers every room with efficient steps, eco-friendly products, and simple maintenance checks. In this guide you’ll learn a proven workflow, from setup to daily routines, plus safety tips and tool lists. By following the steps, you’ll reduce grime buildup, save time, and keep your home healthier for family and pets. Ready to start?
Why Master Clean Pays Off
According to Cleaning Tips, establishing a consistent, systematized approach to cleaning reduces recurring grime, saves time, and creates a healthier living environment. A master clean isn't about one-off scrubbing; it's a repeatable method that keeps dirt from building up in the first place. By front-loading effort—decluttering surfaces, organizing tools, and setting up dedicated cleaning zones—you gain momentum that makes daily tasks faster and less stressful. When you adopt a single framework that you customize to your space, you avoid decision fatigue and forgotten tasks, which often lead to backsliding. In practice, master clean translates to a weekly rhythm: quick daily pickups, a focused 20- to 30-minute surface wipe, and a longer deeper clean every weekend or midweek. The payoff isn't just a sparkling home; it's a measurable improvement in air quality and energy savings as you replace harsh chemicals with safer, eco-friendly products. The approach works for renters and homeowners alike, and it's scalable from a studio apartment to a multi-room house.
Core Principles of Master Clean
- Consistency beats occasional deep cleaning. A steady rhythm prevents grime from taking hold.
- Clean top to bottom, left to right. Start high, finish low, and tackle rooms one at a time to avoid re-contamination.
- Use eco-friendly products and safe methods. Safer ingredients protect health and the environment.
- Organize tools and supplies. A dedicated kit saves time and reduces the chance of cross-contamination.
- Document your routine and adjust. Small tweaks improve efficiency over time.
Implementation matters: assign specific days for focused tasks (e.g., bathroom Mondays, kitchen Fridays) and keep a visible schedule so every household member participates.
Tools & Materials You Need
To implement master clean, assemble a compact, repeatable kit. Essential items include two cleaning stations (one for damp tasks, one for dry tasks), microfiber cloths, sprayers, gloves, and safe cleaners. Optional items that boost speed include squeegees, grout brushes, and a small vacuum for quick pickups. Use eco-friendly cleaners or simple mixtures like diluted vinegar for glass and mild grime. Label each bottle and store supplies in clearly marked bins to reduce search time during cleaning. The goal is to have every item within arm’s reach before you start so you can move quickly through each zone without backtracking.
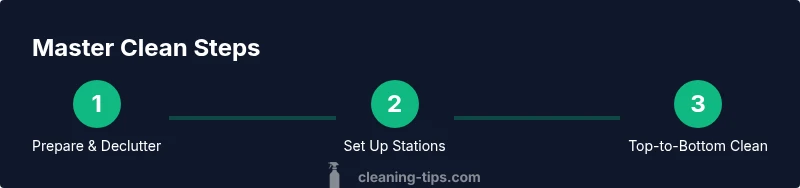
Step-by-Step Framework Overview
The master clean framework is a repeatable cycle you run in every space. It begins with setting up zones, then moving through a top-to-bottom sequence, and ends with a quick check and plan for next time. Each cycle should be fast enough to complete in a single session or split into two shorter sessions if needed. The steps below form a generalized template you can adapt to your home’s size and layout. By following these steps in order, you minimize wasted motion and maximize results, creating a reliable foundation for ongoing cleanliness.
The Two-Bucket Method and Eco-Friendly Staples
A two-bucket approach separates rinse and waste, cutting cross-contamination and enabling efficient multitasking. Use one bucket with clean water or a gentle cleaner, the other for grimier rinsing. Pair this with microfiber cloths, a mild eco-friendly cleaner, baking soda, and white vinegar for tough grime. Avoid mixing cleaners; read product labels and use water-based solutions for most surfaces. This method helps you maintain a consistent clean across kitchens, baths, and living areas while limiting chemical exposure for people and pets.
Daily, Weekly, and Monthly Routines
- Daily (5–10 minutes): quick wipe of high-traffic surfaces, straighten clutter, empty trash.
- Weekly (60–90 minutes): deeper wipe-downs, bathroom refreshes, kitchen counters, floors.
- Monthly (2–4 hours): behind appliances, grout lines, air vents, and windows; rotate tasks across rooms.
Adapter tip: keep a small checklist in a central spot so every household member can participate and you can track progress over time.
Safety, Warnings, and Common Mistakes
- Do not mix ammonia and chlorine bleach; it creates hazardous fumes.
- Test cleaners on inconspicuous areas first to avoid damage.
- Avoid over-wetting surfaces; damp cleaning is safer and faster for most materials.
- Wear gloves and proper ventilation when using cleaners near kids or pets.
- Keep labeling consistent to prevent using the wrong product.
Common mistakes: skipping decluttering, ignoring high-to-low order, overusing harsh chemicals, and failing to maintain tools and storage.
Authority Sources
These sources provide guidance on indoor environmental quality and cleaning safety:
- https://www.epa.gov/iaq/molds
- https://www.cdc.gov/healthyhomes/
- https://www.who.int
Tools & Materials
- Buckets (2, 5-gallon or 2 x 4-gallon)(One for clean solution, one for rinse/damp tasks)
- Microfiber cloths (6–12)(Lint-free, washable)
- Spray bottles (2, 16 oz)(Label with cleaner type)
- Eco-friendly all-purpose cleaner(Prefer non-toxic)
- White vinegar(Food-grade; for glass and surfaces)
- Baking soda(For deodorizing and grime)
- Gloves (rubber or nitrile)(Protect hands)
- Grout brush(Optional for bathroom/grout)
Steps
Estimated time: 2-3 hours
- 1
Prepare your space and gather supplies
Clear the area and collect all cleaning tools and solutions before you start. This minimizes interruptions and keeps momentum high. Quick decluttering in each zone reduces the amount of grime you must remove later.
Tip: Lay out all items in labeled zones to avoid searching mid-task. - 2
Set up two cleaning stations
Place one bucket with cleaning solution and a second bucket for rinsing. Position cloths, brushes, and spray bottles within arm’s reach to prevent backtracking.
Tip: Label stations clearly and keep water temperature consistent for efficiency. - 3
Tidy surfaces and declutter high-traffic zones
Remove objects from counters, tabletops, and shelves. Store items elsewhere and wipe surfaces to remove dust and residue before deeper cleaning.
Tip: Start with the area that gets the most use to maximize perceived cleanliness quickly. - 4
Dust from top to bottom
Dust ceilings, light fixtures, and shelves first. Finish with baseboards and floors. Use a microfiber cloth to trap dust rather than push it around.
Tip: Work in a single pass per area to prevent repeated dusting. - 5
Wipe down surfaces with eco-friendly cleaner
Spray cleaner on surfaces and wipe with a fresh microfiber cloth using circular motions. For glass and mirrors, wipe with a lint-free clean cloth for a streak-free finish.
Tip: Let stubborn spots sit for 15–30 seconds before scrubbing. - 6
Tackle tough spots and grime
Apply baking soda paste to tough stains and grout; scrub gently with a grout brush or old toothbrush. Rinse thoroughly after scrubbing to avoid residue.
Tip: Use a dedicated brush for grout to avoid cross-contaminating other surfaces. - 7
Rinse, dry, and reassemble
Rinse surfaces with clean water, dry with a microfiber cloth, and return items to their place. Ensure no moisture remains to prevent mold growth.
Tip: Finish with a final quick wipe of edges and corners where moisture hides. - 8
Plan the next session
Set a date or frequency for the next master clean and assign tasks if you have helpers. A visible plan keeps everyone engaged and accountable.
Tip: Add tasks to a shared calendar or wall chart for ongoing momentum.
Questions & Answers
What does 'master clean' mean?
Master clean refers to a repeatable, efficient cleaning system that covers every room with a consistent top-to-bottom workflow, using safe products and organized tools to prevent grime buildup.
Master clean is a repeatable, efficient cleaning system for every room using a top-to-bottom approach.
What tools are essential for master clean?
Essential tools include two cleaning stations, microfiber cloths, spray bottles, gloves, and eco-friendly cleaners. Having these on hand saves time and supports a steady routine.
The essential tools are two cleaning stations, microfiber cloths, spray bottles, gloves, and eco-friendly cleaners.
How long does a full master clean take?
A thorough session typically takes 2–3 hours, depending on space size. You can split into two 60–90 minute blocks if needed.
Most people complete a full master clean in 2 to 3 hours, or two shorter sessions.
Can I adapt the plan for a small apartment?
Yes. Scale tasks by zone and adjust frequency to fit a smaller footprint. Focus on high-traffic areas and essential maintenance.
Absolutely—adjust zones and frequency to fit a small apartment.
Are eco-friendly products effective for tough grime?
Eco-friendly cleaners can handle everyday grime when used correctly, especially with proper dwell times and brushing. For stubborn grime, consider milder, safer options.
Eco-friendly products work well for everyday grime when used properly.
Watch Video
The Essentials
- Establish a repeatable routine for every space.
- Use eco-friendly products to protect health and the environment.
- Organize tools to reduce search time and backtracking.
- Schedule daily, weekly, and monthly tasks for consistency.