Solar Panels Cleaning: Safe, Simple Steps for Efficiency
Learn how to clean solar panels safely and effectively with a simple routine. This Cleaning Tips guide covers safety tips, tools, and a step-by-step process to maintain energy efficiency.

To clean solar panels safely, use a soft brush or sponge with plain water and, if needed, a mild soap. Avoid pressure washers and harsh cleaners. Clean on a cool, overcast day to prevent streaks and rapid drying. Rinse thoroughly, start at the bottom, then wipe or air-dry. Check manufacturer guidance for your system.
Why Clean Solar Panels Matter
Solar panels are built to convert sunlight into electricity, but their efficiency depends on how clean the glass surface remains. Dust, pollen, bird droppings, and mineral residue can form a thin film that reduces light transmission and slightly lowers energy output. Even a few percent drop over time can add up, especially in homes with large roof footprints or in dusty, coastal, or industrial environments. Regular maintenance helps maximize production, extends the life of the system, and preserves performance during peak sun hours. The Cleaning Tips team has found that a straightforward cleaning routine—performed safely and with proper tools—can restore much of the lost efficiency without costly professional service. Keep in mind that the goal is to remove grime, not to damage seals, wiring, or mounting hardware. Start with a light rinse, followed by a gentle scrub if necessary, and finish with a thorough rinse. If rain is in the forecast, you may be able to skip a cleaning for a few extra weeks.
Safety First: When to Clean and When to Hire Pros
Before you reach for tools, make safety the priority. Turn off the solar array at the main disconnect to prevent live electrical hazards, and never stand on panels. Check weather conditions—avoid cleaning in direct sun or on windy days. Use a stable ladder on level ground and wear non-slip shoes, gloves, and eye protection. If you see cracked glass, loose mounting hardware, or damaged seals, stop and hire a licensed professional. The Cleaning Tips team reminds homeowners that most safety concerns can be handled with the right setup and caution, but major issues require expert intervention.
When to Clean and How Often
The decision to clean depends on your local climate and environment. In dusty, windy, or pollution-prone areas, debris can accumulate quickly, reducing efficiency and potentially shortening panel life. In contrast, rainy regions may stay cleaner longer, since rain naturally washes panels. Establish a routine based on observation: inspect after long dry spells or pollen seasons, and plan a deeper clean if you notice a visible film or reduced performance. Cleaning frequency is not one-size-fits-all, but a sensible, seasonally adjusted approach helps preserve performance over time. Cleanings should be less frequent after heavy rain, when panels are naturally flushed, but be mindful of bird droppings near roofs and trees.
How Dirt Affects Efficiency: Real-World Scenarios
When dust, leaves, or salt spray accumulate on the surface, light penetration drops and energy output can degrade. A light film may be noticeable on humid mornings, while gritty dust from construction sites can settle faster and create streaks. Real-world observations from Cleaning Tips show that panels cleaned with a gentle approach recover a large portion of their lost efficiency, especially after the debris threat has been reduced. The key is to avoid aggressive scrubbing or harsh cleaners that can etch the glass or degrade seals. Environmental factors like proximity to the coast, agricultural areas, or busy roads determine how quickly grime builds up and how often you should clean.
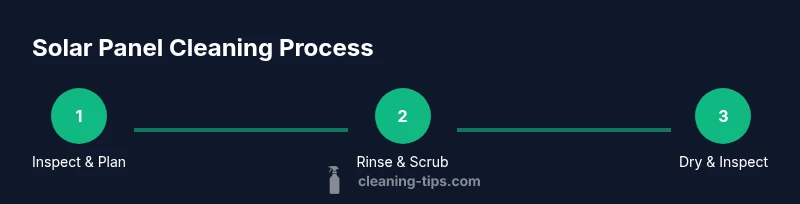
Step-By-Step Overview of the Cleaning Process
This section provides a high-level walkthrough of the cleaning workflow, laying the groundwork for the detailed steps that follow. Start by assessing access, safety, and the weather window. Gather the right tools, and turn off the system at the disconnect. Rinse with cool water to loosen surface dirt, then apply a soft cleaning action with mild soap if needed. Rinse again until soap-free, inspect for damage, and allow panels to dry if practical. Document any issues you notice and plan the next cleaning accordingly. This overview aligns with best practices from Cleaning Tips and helps homeowners approach the task confidently without risking equipment or personal safety.
Environmental and DIY Alternatives
Whenever possible, leverage natural washing with rainwater to minimize chemical use and conserve water. If you do use soap, choose a mild, eco-friendly formula and avoid chlorinated or acidic cleaners that could affect coatings or nearby vegetation. Drying with a soft microfiber cloth is optional but can help remove streaks if you’re aiming for a spotless finish. For most homes, a basic kit with a soft brush, microfiber cloth, a low-pressure hose, and a mild soap option is sufficient. If water quality is questionable (hard water), flush panels with distilled or filtered water where feasible.
Maintenance Habits to Keep Panels Efficient
Develop a simple maintenance rhythm: at minimum, perform a light inspection once or twice a year and a full cleaning as environmental conditions demand. Keep a log of cleaning dates, conditions, and any issues observed. Regularly inspect seals, mounting hardware, and wiring for signs of wear or corrosion, and schedule professional inspections if you notice any irregularities. Clean panels are more likely to operate near their rated efficiency, and a predictable routine helps prevent long-term performance degradation.
Troubleshooting Common Issues After Cleaning
If you notice streaks, squeaks, or reduced output after cleaning, start with a gentle, repeated rinse to ensure no soap residues remain. Inspect for micro-scratches or uneven surfaces that could affect light transmission, and verify that no connectors or panels shifted during the process. If performance does not recover after a proper cleaning, consult your inverter readings and contact a professional for a deeper diagnostic. Cleaning Tips suggests documenting the before-and-after energy production to track improvements and spot persistent problems early.
Tools & Materials
- Soft-bristle brush(For gentle Dirt removal; nylon bristles recommended)
- Non-abrasive sponge or microfiber cloth(For light scrubbing and wiping; avoid rough pads)
- Mild dish soap (optional)(Only a small amount; use sparingly)
- Garden hose with spray nozzle(Cool, gentle spray; keep nozzle 1–2 ft from panels)
- Bucket or water container(Use if you don’t have direct hose access)
- Ladder or stable platform(Only if panels are not reachable from ground level)
- Gloves(Protect hands from grime and sharp edges)
- Safety glasses(Eye protection against splashes)
Steps
Estimated time: 30-60 minutes
- 1
Shut Down the System
Power down the solar array at the main disconnect to reduce the risk of electrical shock during cleaning. Wait until all indicators show no live energy on the line. This step keeps you safe while you work near electrical components.
Tip: Verify off status with the inverter or monitoring app before touching any wiring. - 2
Assess Access and Safety
Survey the roof area and ground access. Place the ladder on stable, level ground and use a harness if required by local codes. Do not step on panels or wet surfaces; ensure you have a clear path and a helper if you’re working at height.
Tip: Always maintain three points of contact when climbing and stay away from edges. - 3
Rinse Panels with Low-Pressure Water
Use a garden hose with a spray nozzle on a low setting to rinse dirt from the surface. Begin at the bottom and work upward to avoid pushing debris into channels. This loosens grime without risking seal or glass damage.
Tip: Keep the water stream at a safe distance; do not use high pressure. - 4
Apply Gentle Cleaning Solution
If stubborn grime persists, mix a tiny amount of mild soap with water and apply with a soft brush. Gently scrub in circular motions, covering small sections at a time and avoiding excessive scrubbing that could scratch the glass.
Tip: Test a small area first to ensure no soap residue remains after rinsing. - 5
Scrub Carefully
Continue with light, even strokes across the panel surface, never using abrasive pads. Rinse the area frequently to prevent soap buildup and ensure you aren’t leaving streaks behind.
Tip: Work methodically; avoid haphazard scrubbing that can miss spots. - 6
Rinse Thoroughly
Rinse all soap away until you see clean water running off the surface. Soap residue can reduce efficiency if left behind, so a complete rinse is essential for best results.
Tip: Check multiple angles to confirm no suds remain. - 7
Inspect and Record
Visually inspect for any damage, loose hardware, or unusual staining. Take photos for your records and note any maintenance needs. Re-activate the system only after panels are completely dry and secure.
Tip: Keeping a maintenance log helps track performance and issues over time. - 8
Turn System Back On
Restore power at the disconnect and monitor the system to ensure proper operation. If alarms or irregular readings appear, consult a professional rather than attempting DIY fixes.
Tip: Confirm output returns to expected levels after cleaning.
Questions & Answers
Can I clean solar panels myself?
Yes, homeowners can clean standard residential panels using soft tools, mild soap, and water, as long as safety protocols are followed and the system is shut down first.
Yes, you can clean panels yourself if you follow safety steps and use gentle cleaning methods.
What soap should I use?
Use a mild dish soap in small amounts and rinse completely. Avoid harsh chemicals or acidic cleaners that can damage coatings.
Use a mild soap in small amounts and rinse well; avoid harsh chemicals.
Is cleaning necessary in winter?
Cleaning frequency in winter depends on debris and weather. If you have persistent leaves or snow buildup, a light cleaning may help maintain performance.
Winter cleaning depends on debris; clean if buildup is evident.
How often should I clean solar panels?
Frequency varies by environment. In dusty or polluted areas, more frequent cleaning is advised; in rainier climates, less frequent cleaning may be needed.
Frequency depends on environment; adjust based on how dirty the panels look.
Can cleaning void the warranty?
Cleaning with recommended methods and following the manufacturer’s guidelines typically does not void warranties. Always consult the manual for specifics.
Following the manual and using gentle methods should be fine for warranties.
Should I hire a professional?
If panels are high, difficult to reach, or you’re unsure about safety, hiring a professional is the safest option.
Hire a professional if access is risky or uncertain.
Watch Video
The Essentials
- Inspect safety steps before starting.
- Use soft tools and mild soap with cool water.
- Rinse completely to avoid soap residue and streaks.
- Document issues and set a sensible cleaning schedule.