The Ultimate Cleanse: Deep Cleaning Your Home
Master the ultimate cleanse with a structured, safe approach to deep cleaning your home, plus maintenance tips for a healthier living environment.

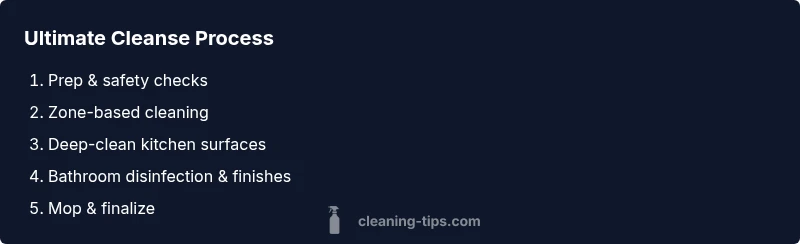
With the ultimate cleanse, you’ll complete a thorough, safety-focused deep-clean that refreshes every room. This guide provides a step-by-step protocol, equipment lists, and time estimates so you can plan a single, powerful cleaning session or a series of focused bursts. Expect to prep, deep-clean key surfaces, disinfect wisely, and adopt maintenance habits that keep grime from returning. According to Cleaning Tips, a methodical plan reduces overwhelm and yields better, safer results.
What is the Ultimate Cleanse?
The ultimate cleanse is a comprehensive, room-to-room cleaning system that combines prep, deep cleaning, disinfection, and maintenance. It emphasizes safety, efficiency, and consistency. According to Cleaning Tips, a methodical plan reduces overwhelm and yields better, safer results. This approach works well whether you’re tidying a single room or refreshing an entire home, and it scales to apartments, houses, or rentals. The goal is not just to remove visible dirt but to minimize future buildup by choosing appropriate cleaners and applying them correctly across surfaces. By following the framework below, you’ll gain confidence and tangible improvement in air quality, surface cleanliness, and overall comfort in your living space.
Prepping for the Ultimate Cleanse
Before you start, create a safe cleaning environment. Open windows or turn on ventilation, wear gloves, and keep pets and kids out of the work area. Gather your supplies and review the cleaners you’ll use to avoid mixing incompatible chemicals. Set a realistic goal for the session—whether you’re doing a 90-minute blitz or a two-day sequence—and stage products in zones to minimize back-and-forth. This preparation reduces repeated passes and protects delicate finishes while saving time over the long run.
Deep-Clean Strategy for Surfaces
The core of the ultimate cleanse is a surface-by-surface approach. Start with high, less-contaminated areas and move downward to prevent re-soiling. Use warm water and a microfiber cloth for most surfaces; reserve abrasive pads for only tough grime on non-scratch-safe materials. For kitchens, focus on countertops, appliances, and sink areas, using a mild degreaser for grease and a disinfectant where appropriate. In bathrooms, target sinks, faucets, shower doors, and toilets with non-abrasive cleaners. Always test a hidden spot first to confirm finish compatibility. This section offers practical, surface-specific steps to ensure you don’t miss critical areas.
Maintenance and Safe Habits
The final phase of the ultimate cleanse is maintenance. Create a quick daily wipe routine to prevent buildup, and schedule a deeper monthly or quarterly refresh to keep spaces looking like new. Track your progress with a simple checklist so you can spot recurring problem areas and adjust your products or methods accordingly. Keeping air circulating, wiping from top to bottom, and using microfiber reduces waste and improves results over time. By making cleaning a habit, you sustain a healthier, more comfortable home.
Tools & Materials
- All-purpose cleaner(Choose a non-toxic option if possible)
- Microfiber cloths(Set of 6–12; lint-free for best results)
- Spray bottles(Label to separate cleaners)
- Non-scratch sponges(Separate for kitchen and bathroom surfaces)
- Buckets (2)(One for solution, one for rinsing)
- Protective gloves(Nitrile or rubber; ensure proper size)
- Goggles or eye protection(Optional but recommended for splashes)
- Baking soda(Deodorizing and gentle scrubbing)
- White vinegar(For deodorizing and cutting grease (dilute))
Steps
Estimated time: 90 minutes
- 1
Prepare space and safety
Clear the area, ventilate the space, and assemble your cleaning kit. Put pets and children away from the work zone. Inspect surfaces for potential hazards and wear gloves to protect hands from cleaners. Check labels to avoid mixing incompatible chemicals. This initial setup saves time and prevents accidents.
Tip: Ventilate well before applying cleaners to minimize fumes. - 2
Declutter and protect surfaces
Move lightweight objects away from work zones and wipe down high-traffic areas to reduce dirt transfer. Cover electronics if needed and place towels beneath items to catch drips. This reduces rework and keeps grime from spreading.
Tip: Use a tray or tray-like container for easy transport of items you relocate. - 3
Set up cleaning zones
Divide the home into zones (kitchen, bathroom, living spaces) and assign a sequence. Start with the area that collects the most grime and work methodically through each zone. Label zones if multiple cleaners are used to avoid cross-contamination.
Tip: Group tasks by surface type to minimize tool changes. - 4
Dust and wipe high surfaces
Dust ceiling corners, light fixtures, and upper shelves first. Use microfiber cloths and a gentle cleaner on smooth surfaces. Move downward to prevent re-dirtying lower areas.
Tip: Dusting top-to-bottom prevents re-settling of particles. - 5
Deep-clean kitchen surfaces
Wipe countertops with a mild cleaner, then treat grease with a degreaser or vinegar solution. Clean appliance exteriors and the sink, paying attention to chrome and stainless finishes. Rinse and wipe dry to prevent water spots.
Tip: Always test cleaners on a hidden area of the finish first. - 6
Deep-clean bathroom surfaces
Scrub sinks, faucets, shower doors, and toilets with non-abrasive cleaners. Rinse thoroughly and dry to prevent water stains. Remove soap scum with a recommended cleaner and treat grout lines if present.
Tip: Avoid abrasive pads on delicate tiles or lacquered surfaces. - 7
Mop floors and finalize
Mop from the farthest corner toward the door, using a clean bucket and fresh solution. Allow floors to air-dry or dry with a clean microfiber mop. Do a final wipe-down of high-touch areas and recheck for missed spots.
Tip: Let cleaning solution dwell briefly on tough stains before scrubbing.
Questions & Answers
What supplies do I need for the ultimate cleanse?
A basic kit includes a cleaner, microfiber cloths, sponges, a mop, a bucket, gloves, and optional pH-neutral products for delicate surfaces. Having labeled bottles helps prevent mixing cleaners and saves time during the session.
You’ll want a basic kit: cleaners, microfiber cloths, sponges, a mop, and gloves. Label your bottles to stay organized.
Can I use DIY cleaners for all surfaces?
Many surfaces respond well to mild, homemade mixtures, but avoid strong concentrates or acidic cleaners on delicate finishes. Always test first and use dedicated cleaners for specialty surfaces like natural stone or wood.
Mild DIY cleaners work for many surfaces, but test first and avoid harsh acids on delicate finishes.
How long does an ultimate cleanse take?
The duration depends on space size and scope. A focused blitz can take about 60-90 minutes, while a full-home cleanse may extend to a few hours in stages.
Most blitz cleans take an hour to a couple of hours; larger homes may take longer.
Is it safe for kids and pets?
Yes, if you choose non-toxic cleaners, follow label directions, and ventilate well. Keep products out of reach when not in use and rinse surfaces that contact skin or food.
Yes, with non-toxic cleaners and good ventilation, plus supervision for kids and pets.
How do I remove tough stains during the cleanse?
Pre-treat with a baking soda paste or appropriate stain remover, then scrub with a non-scratch sponge. For stubborn grease, let the cleaner sit for a few minutes before wiping.
Pre-treat stains, then scrub with a non-scratch sponge and let the cleaner work briefly.
How often should I perform an ultimate cleanse?
Aim for a deep cleanse monthly, with a lighter weekly maintenance. Adjust frequency based on traffic, pets, and household activities.
Most people do a deep clean monthly and a lighter weekly touch-up.
Watch Video
The Essentials
- Plan your cleanse before you start.
- Work top-to-bottom to prevent re-soiling.
- Ventilate and protect with PPE during cleaning.
- Maintain a simple routine to sustain results.