What Clean Gas Off Concrete: A Practical DIY Guide
Learn how to safely remove gasoline stains from concrete with absorbents, degreasers, and poultices. This Cleaning Tips guide covers supplies, step-by-step methods, safety tips, and sealing strategies for durable, stain-free concrete surfaces.

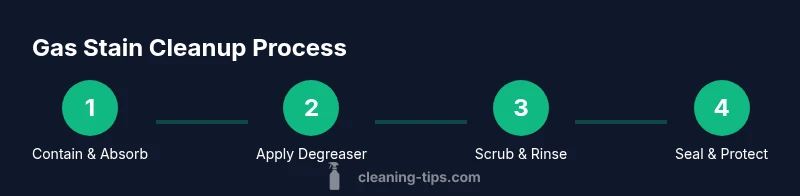
Gas stains on concrete can be cleaned with a fast absorb-and-clean method. Absorb the spill, apply a degreaser, scrub with a stiff brush, and rinse thoroughly. For detailed steps, safety notes, and troubleshooting, see the full guide.
Why Gas Stains Demand Prompt Action
Gasoline is a stubborn contaminant on concrete, especially in driveways and garages where spills are common. It soaks into porous surfaces, leaving dark, oily patches and a lingering odor. Acting quickly minimizes penetration and makes cleanup more straightforward. According to Cleaning Tips, the keys to success are fast containment, using the right absorbents, and choosing an effective cleaner paired with proper scrubbing. If you delay, hydrocarbons can migrate into tiny pores, complicating extraction and potentially affecting nearby soils and sealers. This section explains why porosity matters, and how to tailor your approach to fresh versus set-in stains. You’ll learn when to use simple detergents, stronger degreasers, or professional help, and how to prioritize safety in a workspace that may contain fumes. The Cleaning Tips team emphasizes safety: ventilate, avoid open flames, and wear protective gear while you work.
How Concrete Porosity Affects Cleaning Results
Concrete is inherently porous, and the degree of porosity affects how deeply an oil-based stain penetrates. Fresh spills tend to sit on the surface, while older stains can wick into microscopic capillaries, making removal more challenging. Based on Cleaning Tips analysis, the sooner you begin, the more you’ll lift from the surface. Porous slabs (common in many garages and driveways) require a two-pronged approach: a strong degreaser to break down hydrocarbons, followed by thorough rinsing and, if needed, a poultice for stubborn spots. In contrast, sealed or polished concrete offers a moisture barrier that can slow penetration but may require different cleaners to avoid dulling the finish. Understanding your surface type helps prevent unnecessary scrubbing or over-wetting, which can push stains deeper or spread them.
Tools and Safety You’ll Need
Preparing the right tools and PPE sets the tone for a safe, effective cleanup. Gather absorbents (cat litter, baking soda, sawdust, or a commercial spill powder), a stiff-bristled brush, a garden hose or low-pressure nozzle, and a degreasing cleaner designed for hydrocarbons. Personal protective equipment is essential: nitrile gloves, splash goggles, and a respirator or mask if fumes are strong. Keep a barrier or plastic sheeting handy to contain the spill and protect nearby plants or surfaces. If you’re cleaning a large area, a push broom and a bucket for dilutions help maintain a steady workflow. Surface tests in a small, inconspicuous spot are advisable to ensure the cleaner won’t discolor or abrade the concrete. This section also covers ventilation tips to minimize exposure to fumes while you work.
Step 1: Contain and Absorb the Spill
Start by closing off the area to prevent spreading. Use a barrier or plastic sheeting if you’re working near grass, gravel, or other surfaces. Generously spread absorbent material over the stain to cover all edges. Let it sit for 15–30 minutes so the hydrocarbon can wick into the material. Do not rub or scrub at this stage; the goal is to lift, not smear. After absorption, sweep up the used absorbent and deposit it in a sealed bag for disposal according to local regulations. If you’re dealing with a larger spill, you may need more than one layer of absorbent and repeated applications. The faster you act, the less residue remains, and the easier the next steps will be.
Step 2: Pre-Treat with Absorbent or Degreaser
With the area dry, apply a degreaser or biodegradable detergent specifically formulated for hydrocarbon residues. Apply according to label directions, ensuring the product wets the stain completely. Allow a dwell time of 5–10 minutes so the cleaner can emulsify the oil. For eco-friendly cleanup, citrus-based degreasers offer good performance with less harsh chemistry, but always test on a small patch first. If odor is a concern, you can add a mild odor-neutralizing product after cleaning. Do not cover the surface with a hot water spray during dwell time, as heat can spread fumes and push stains deeper.
Step 3: Scrub Thoroughly
Using a stiff-bristled brush, scrub the stained area with firm, even pressure in a circular or back-and-forth motion. Focus on the stain’s edges where it may be creeping outward. Scrubbing helps break the bond between hydrocarbon molecules and the concrete’s porous surface. Maintain a consistent wetting of the area by adding more cleaner as needed. For larger patches, a push broom can improve coverage and speed. If the stain is particularly stubborn, alternate between scrubbing and applying a fresh layer of cleaner to keep the surface reactive. This step benefits from a methodical, patient approach rather than fast, shallow scrubbing.
Step 4: Rinse and Inspect
Rinse the treated area with a garden hose on a moderate setting or a low-pressure nozzle of a pressure washer. The aim is to flush away the loosened residue without forcing it into joints or cracks. After rinsing, inspect the surface closely in good lighting. If a faint stain remains, repeat Steps 2–4 or move to a poultice treatment for deeper or older stains. A clean rinse before reapplying cleaner reduces the chance of dirtying the soap film and helps you judge whether you’ve achieved satisfactory results. If odors persist, repeat the rinse and consider using a surface-safe odor eliminator.
Step 5: Tackle Stubborn Stains with a Poultice
For set-in stains, a poultice can pull hydrocarbon residues from the concrete. Mix baking soda with water to form a thick paste, or use a commercially available poultice product. Apply a generous layer over the stain and cover with plastic wrap to slow evaporation. Leave the poultice in place for 6–24 hours, checking periodically. Remove and clean the area thoroughly, repeating if necessary. Poultice methods are typically most effective on small to medium stains and work best after the surface has cooled completely. Always test a patch before full application to avoid discoloration.
Step 6: Final Rinse and Drying
After the poultice treatment, perform a final rinse to remove any residue from both poultice and cleaners. Use a clean water rinse to ensure no films are left that could attract dirt. Allow the concrete to air dry completely; if you’re near rain or humidity, you may speed drying with a floor fan or dehumidifier. The surface should feel dry to the touch and emit no strong gasoline odor before sealing. If you notice persistent staining after drying, you may need a professional evaluation for deeper remediation. Drying time depends on weather; plan accordingly.
Step 7: Seal the Concrete to Prevent Future Stains
Once the surface is fully dry, consider applying a suitable concrete sealer to resist future spills. A penetrating or film-forming sealer can create a barrier that reduces absorption. Follow the manufacturer’s instructions for preparation, application temperature, and curing time. Sealing is especially beneficial for high-traffic areas, outdoor driveways, and garages where spills are common. Re-sealing intervals vary by product and use; many sealers require reapplication every 1–3 years. The right sealer can simplify future cleanups and preserve the concrete’s appearance.
Aftercare: Sealing and Long-Term Maintenance
Beyond sealing, basic maintenance helps keep concrete clean and attractive. Regular sweeping removes dust and grit that can embed into stains. For routine cleaning, use a non-alkaline cleaner and a soft brush to avoid dulling the surface. If spills occur, address them promptly to minimize penetration. Keep a supply of absorbent material on hand for quick response. Periodically inspect the surface for cracks or joints where liquids may infiltrate; repair these promptly to maintain the integrity of your cleaning efforts. This long-term approach also contributes to safer, healthier indoor air quality and a more attractive exterior.
Common Mistakes to Avoid
Common mistakes include scrubbing too aggressively with abrasive pads, which can scratch concrete or push stains deeper. Using high-pressure water can force hydrocarbons into cracks and pores. Skipping a test patch before applying cleaners risks discoloration. Finally, forgetting to ventilate can lead to uncomfortable fumes and reduced effectiveness of cleaners. By avoiding these missteps and following a measured plan, you’ll achieve better results with fewer hassles.
Tools & Materials
- Heavy-duty degreaser (hydrocarbon cleaner)(Choose a product labeled for oil and gasoline stains; follow label directions.)
- Absorbent materials (cat litter, baking soda, sawdust, or commercial spill powder)(Use generously and replace as it becomes saturated.)
- Stiff-bristled brush(Nylon or stiff natural fiber; avoid metal that could scratch the concrete.)
- Garden hose or low-pressure spray nozzle(High pressure can push stain into joints; test first.)
- Personal protective equipment (gloves, safety goggles, mask)(Nitrile gloves, splash protection, and respirator if fumes are strong.)
- Bucket, spray bottle, and measuring cup(For mixing cleaners and applying evenly.)
- Poultice material (baking soda paste or commercial poultice)(Optional for stubborn stains; has proven effectiveness for deep-set residues.)
- Plastic sheeting or barrier tape(Useful to protect surrounding surfaces when using strong degreasers.)
- Sealer (penetrating or film-forming)(Apply after the area is completely dry to prevent future staining.)
Steps
Estimated time: 1-2 hours active, plus up to 24 hours drying if poultice is used
- 1
Contain and Absorb the Spill
Block the area to prevent spreading. Spread absorbent material over the stain until fully covered. Let sit 15–30 minutes to allow absorption, then sweep up and dispose of used material.
Tip: Avoid rubbing; absorption is key to trapping contaminants early. - 2
Pre-Treat with Degreaser
Apply a degreaser or detergent to the stain, ensuring full coverage. Allow it to dwell for 5–10 minutes to emulsify hydrocarbons before scrubbing.
Tip: Eco-friendly cleaners are effective but test a patch first. - 3
Scrub Thoroughly
Scrub with a stiff brush using firm pressure, focusing on edges and any seepage paths. Re-wet as needed to keep the surface reactive.
Tip: Move from the stain outward to prevent spreading. - 4
Rinse and Inspect
Rinse with a garden hose on moderate pressure and inspect for residual stain. Repeat degreasing and scrubbing if necessary.
Tip: Low pressure is safer for joints; avoid forcing liquid into cracks. - 5
Poultice for Stubborn Stains
If needed, apply a poultice and cover with plastic. Leave 6–24 hours, then remove and rinse. Repeat as necessary.
Tip: Always test poultice on a small area first. - 6
Final Rinse and Drying
Do a final rinse to remove residues and allow the surface to dry completely before sealing.
Tip: Ventilation speeds drying and reduces lingering odors. - 7
Seal the Concrete
Apply a suitable sealer after full dry-out to minimize future staining. Follow product directions for curing times.
Tip: Sealing is a long-term investment for easier maintenance.
Questions & Answers
What is the best method to clean gasoline off concrete?
Contain and absorb the spill, apply a degreaser, scrub with a stiff brush, and rinse. Repeat as needed and consider a poultice for stubborn stains. Seal the concrete once it’s completely dry.
Contain and absorb, then degrease, scrub, rinse, and seal once dry.
Can I use vinegar on gasoline stains?
Vinegar is not ideal for hydrocarbon stains like gasoline. It may help mask odor but is unlikely to fully remove the stain; use a purpose-made degreaser and poultice if needed.
Vinegar isn't the best choice for gasoline stains; use a degreaser instead.
Should I seal the concrete after cleaning?
Sealing helps protect against future spills and makes cleaning easier. Wait until the surface is completely dry, then apply the sealer following the product directions.
Yes, sealing after it’s dry helps with future cleanups.
What safety precautions are essential?
Wear protective gloves and goggles, ensure good ventilation, and keep flames away from the area. Read all product labels before use.
Wear protection, ventilate, and avoid flames.
Can I use a pressure washer to rinse the area?
A light to moderate pressure is fine. High pressure can push stain deeper into joints or crack surfaces, so start low and test.
Use gentle pressure; high force can spread the stain.
Watch Video
The Essentials
- Act quickly to minimize stain penetration
- Use absorbent material and a degreaser for effective cleanup
- Rinse thoroughly and inspect before sealing
- Poultice can help with stubborn stains, then seal for protection