Oil Spill Cleanup: A Practical Step-by-Step Guide for Safe Home Cleaning
Learn how to respond to oil spills safely at home or in a workshop. This Cleaning Tips guide covers containment, absorbents, cleanup steps, disposal, and prevention to protect surfaces, pets, and the environment.

You will learn to contain, absorb, and clean up oil spills safely with practical steps and required safety gear. This guide covers immediate actions, materials, disposal, and prevention tips for homes and workshops. By the end, you'll be able to handle minor spills confidently. We’ll emphasize ecological considerations, when to call a professional, and how to minimize future risks.
Why Cleanup Oil Spills Matter
According to Cleaning Tips, rapid containment is key to minimizing environmental impact and indoor contamination. The Cleaning Tips team emphasizes that swift, deliberate action reduces spread and simplifies cleanup. Oil spills can leave oily residues that attract dirt and may damage flooring, basements, or drainage systems if left unaddressed. This section explains why addressing spills promptly matters for health, safety, and the environment, and why a calm, methodical approach yields better results than panic cleanup. We focus on practical principles that apply to most household spills, from kitchen grease to car engine drips, so you can act confidently. By treating every spill as a contained event, you minimize future cleaning requirements and protect family members and pets from slippery hazards. The guidance here also sets you up to document what happened for prevention and, when needed, to seek professional advice without delay.
What Qualifies as an Oil Spill in a Home Setting
An oil spill refers to any release of petroleum-based liquids that occur outside of a controlled lubrication context. In a home setting this includes cooking oil, motor oil from vehicles, shop lubricants, and solvents with mineral oil bases. Even small amounts can slick a surface and become a slip hazard or a stain if absorbed into porous materials. This section helps you distinguish between a spill that requires immediate containment and a routine oil-soaked drips that can be cleaned with standard cleaners. It also covers the typical surfaces affected, including concrete, tile, wood finishes, carpets, and fabric, and what makes each surface respond differently to cleanup.
Safety First: PPE, Hazards, and Ventilation
Safety is the foundation of any spill cleanup. Wear appropriate PPE before approaching the spill: nitrile gloves, closed-toe shoes, eye protection, and a simple respirator if fumes are noticeable. Ensure the area is well ventilated, especially in enclosed spaces or where volatile solvents are involved. Do not mix cleaners with unknown substances, and keep children and pets away from the area during cleanup. This section provides a quick PPE checklist, explains why ventilation matters for air quality, and suggests simple, low-cost solutions that improve safety without slowing you down.
Immediate Containment: Stopping the Spread
Containment buys you time to clean without spreading the oil to other surfaces. Create a perimeter using absorbent pads or plastic sheeting to prevent the spill from reaching drains, waterways, or carpet edges. If the spill is on a hard surface, place a damp towel or a disposable mat around the edges to control airflow. For carpeted areas, do not scrub aggressively; instead, focus on blotting and absorbing from the outer rim toward the center. This approach minimizes staining and reduces the amount of contaminated material you must dispose of.
Absorbents and Containment Tools: Choose the Right One
Select absorbents designed for oil spills, such as universal oil absorbent pads, granules, or sorbent booms for larger spills. The key is to choose an absorbent that soaks up oil but resists absorbing water, which can complicate disposal. Keep a small supply of disposable gloves, plastic bags, and a stiff brush handy. For delicate surfaces like wood, use a substrate that will not scratch while you blot. This section helps you compare product types and decide what to keep on hand for common household spills.
Step-By-Step Cleanup Process: Spill Response
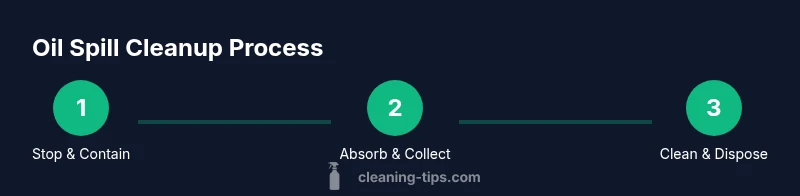
Follow a clear sequence to maximize safety and effectiveness. 1) Stop the flow and assess the area. 2) Wear PPE and secure the space. 3) Contain the spill and prevent spread. 4) Apply absorbent, press gently to soak up the liquid, and wait 5–10 minutes for absorption. 5) Gather used material into a leak-proof bag. 6) Clean the area with an appropriate cleaner suited to the surface, then rinse if needed. 7) Dry the surface completely and inspect for remaining residue. 8) Document the incident for future prevention. The step count should be adjusted for the spill size.
Cleaning and Decontamination: Surfaces and Tools
After the bulk cleanup, you must thoroughly clean the surface and any tools used. For hard floors, mop with a degreasing cleaner and rinse; for wood, wipe with a dry cloth and apply a suitable finish if required. For fabrics, launder according to care labels when possible, or consider professional cleaning for persistent stains. Sanitize tools and dispose of cleaning materials properly. This section describes surface-specific approaches and the considerations for reapplication, odor control, and returning to normal use.
Disposal and Waste Handling: Safe, Legal Disposal
Oil-contaminated absorbents and disposable PPE must be sealed in a plastic bag and placed in a designated trash container, not the drain or compost. Check local regulations for hazardous waste disposal—some regions require special handling for used sorbents. Do not reuse materials that are saturated with oil, and keep them away from children and pets. This section provides general guidelines and emphasizes the importance of proper labeling and storage until disposal.
Environmental Considerations and Prevention
Oil spills can threaten soil quality and groundwater if not contained. The best prevention is rapid response and secondary containment measures to stop the spread before it reaches soil or drains. Installing spill mats near high-risk areas, maintaining a clean workspace, and having a ready-to-use spill kit are practical steps. Cleaning Tips suggests a routine check for leaks or drips and developing a quick reaction plan for family members, including what to do in a vehicle or garage scenario.
Quick Recovery: Aftercare and Documentation
Once the area is clean and dry, perform a final inspection to ensure no oily residue remains. Dry the space thoroughly, check for lingering odors, and ventilate further if needed. If staining persists, consult stain removal guides for the specific surface. Keep a brief incident log detailing what happened, the steps you took, the materials used, and the disposal method. This log helps with future prevention and may be useful for landlord or insurance questions. The Cleaning Tips analysis reinforces that documenting responses improves readiness for future spills and supports safer environments for everyone in the home.
Common Mistakes and Troubleshooting
Avoid common errors that can worsen a spill cleanup. Do not use bleach on organic stains or when it could react with other cleaners. Do not push oil deeper into porous surfaces; blot or absorb instead. Do not flush oily residues down the drain unless your local rules permit it. If you encounter persistent staining or odors, reassess the area and consider professional cleaning for stubborn spills. This section highlights pitfalls to avoid and practical workarounds. The Cleaning Tips team notes that staying calm and following a planned approach prevents costly fixes later and helps maintain a healthier home environment.
Tools & Materials
- Oil absorbent pads or granules(Choose universal or oil-specific absorbers; have enough to cover the spill area)
- Nitrile gloves(Non-porous, chemical-resistant; wear during all handling steps)
- Safety goggles(Protect eyes from splashes and fumes)
- Disposable bags or a sealable trash bag(For containing used absorbents and PPE)
- Broom, dustpan, and stiff brush(Use on hard surfaces to gather solids)
- Degreasing cleaner or mild detergent(Surface-appropriate cleaner; avoid harsh solvents on certain finishes)
- Mop or absorbent mop(Assists with final cleaning on hard floors)
- Water supply or running water access(Needed for rinsing on washable surfaces where allowed)
Steps
Estimated time: 1 hour to 1 hour 30 minutes depending on spill size and surface
- 1
Stop the spill and assess
Identify the spilled liquid and the affected area. Prioritize safety and determine if immediate containment is feasible without creating new hazards.
Tip: If the spill involves unknown liquids, treat it as hazardous and evacuate the area until you know more. - 2
Put on PPE and secure the space
Don nitrile gloves, eye protection, and a mask if fumes are present. Keep children and pets away to prevent exposure.
Tip: Choose snug-fitting gloves to avoid tearing during blotting and cleaning motions. - 3
Contain the spill
Create a boundary using absorbent material or plastic sheeting to prevent the liquid from reaching drains or porous materials.
Tip: Work from the outside edge toward the center to minimize spreading. - 4
Absorb the liquid
Spread absorbent material over the slick area and press gently to enhance absorption; wait 5–10 minutes before removal.
Tip: Do not rub; blotting reduces spreading and surface damage. - 5
Collect and seal contaminated materials
Carefully gather used absorbents, gloves, and wipes into a leak-proof bag for disposal.
Tip: Seal the bag before moving it to the trash to avoid leaks. - 6
Clean the surface
Apply a surface-appropriate cleaner, agitate lightly if needed, and rinse away residues according to the surface type.
Tip: Test cleaners on a hidden area first to avoid damage. - 7
Dry and inspect
Completely dry the area and inspect for any remaining sheen or stain. Repeat cleaning if necessary.
Tip: Use a white cloth to detect hidden oil; if it darkens, more cleaning is needed. - 8
Dispose and document
Dispose of waste per local guidelines and note the spill details for prevention.
Tip: Record spill size, surface, cleaners used, and disposal method for future reference.
Questions & Answers
Can I use household cleaners on oil spills?
Yes for many surfaces, but avoid mixing cleaners and choose degreasers appropriate for the material. On porous surfaces, blot first and test cleaners in an inconspicuous area.
You can use common degreasers on many surfaces, but test first and avoid mixing chemicals.
Is it safe to clean oil spills on carpet?
Yes, but blot rather than scrub to prevent embedding oil deeper. Use a carpet-safe degreaser and consider professional cleaning for stubborn stains.
Blot the spill on carpet and use a carpet-safe cleaner; call a pro if it won’t come out.
What should I do with contaminated absorbents?
Seal contaminated absorbents in a sturdy plastic bag and dispose of them according to local regulations. Do not reuse, and store safely until disposal.
Seal the used absorbents in a bag and dispose of them per local rules.
Can I flush oil-contaminated materials down the drain?
Generally no. Do not flush oily residues unless your local guidelines explicitly permit it, as oils can damage plumbing and waterways.
Avoid flushing oil; follow your local disposal rules.
How long does cleanup typically take?
For small household spills, expect 30–60 minutes. Larger spills or delicate surfaces may take longer and could require professional help.
Most small spills take about an hour or less; larger spills take longer.
When should I call a professional?
If the spill covers a large area, involves unknown substances, or occurs on porous or delicate surfaces, seek professional cleaning or hazardous waste guidance.
Call a pro if in doubt or if the spill is large or unusual.
Watch Video
The Essentials
- Contain the spill quickly to minimize spread.
- Use oil-safe absorbents and PPE to stay safe.
- Dispose of waste properly and document the incident.